


Share your craft projects
Make new craft buddies
Ask craft questions
Blog your craft journey
17 Comments

This is a great “little Shaker”.
The top is striking. The dovetails are the kind I dream about. They look handmade. Are they?
What’s the white square on right top side of the drawer?
Very well done!
Abbas, Castro Valley, CA

lovely .. and those delicate legs … nice!
Toxins Out, Nature In - body/mind/spirit

Thanks MsDebbieP. Lanwater, the dovetails are handmade. The balance in proportion is harder for me than the construction of them. I am an artsy kind of guy so e.g. the tails are 3/4 in the drawer leaving 1/4 proportion of the cherry showing. I got a little thinner on the pins this time but … I couldn’t go to nothing like I’ve seen some do (fear). The white square is a reflection. The secondary wood is sassafras and I’m on the fence about the health issues around it. I am making a toolbox now with it and I’ll post pics when I’m a little further.
David L. Whitehurst
MsDebbieP, I think taper all around the leg looks much better. I see folks like to just taper on the inside edges where visible. It’s a personal preference but I still like mine better. :-)
David L. Whitehurst

Please , fill in the details of construction of this piece. I love Shaker, but I hate one liner explanations. If I could be kinder with my request, I would.
HorizontalMike
What’s the spacing around the drawer and what guide system did you use? I’m starting something similar.
Where are the band-aids?---Pro Libertate!
Monty, I used 4 pieces of 3/4×1 stock to make 4 runners for the drawer. Because the aprons are thinner (3/4 approx) than the legs (1-1/8×1-1/8) that gives a 3/16" approx. need for a little strip that sits on the bottom drawer runners and glues to the apron, making a straight shot from the leg to the back leg. This holds the bottom side of the drawer (reduces lateral movement). The reveal or the space around the front drawer piece (cherry) is between 1/32 and 1/16. This is really up to you. The runners are all glued. The front rails are joined to the legs. The top rail is dovetailed. The bottom rail is a 3/8 × 3/4 tenon. The drawer runners are just glued. E.g the drawer is made separate from the table and with every build I’ve had to “fit” the drawer. I’ve learned a lot from this little table. I can send you the PDF I’ve used with the drawing and piece dimensions. Let me know.
David L. Whitehurst
I’ve built this table from a PDF from a woodworking magazine. I’ve done my own take on the top. And, I’ve tapered all 4 sides of the legs. First I make the legs. They are 1-1/8 × 1-1/8". I’ll mortise everything before I taper. The table has 3 aprons of equal size. Each apron has 3/8″ × 3/8" tenons the full height of the apron. The legs get mortised for the aprons. The back legs get two mortises for the back and side aprons. The front legs get mortised for the side aprons only. The front bottom rail requires a 3/8″ × 3/4" mortise in the front legs also. The top rail is dovetailed. That’s done after the legs and side aprons are assembled and glued.
The tapered starting at 6" from the top to 5/8″ × 5/8" I have a jig that I use now to make the legs. 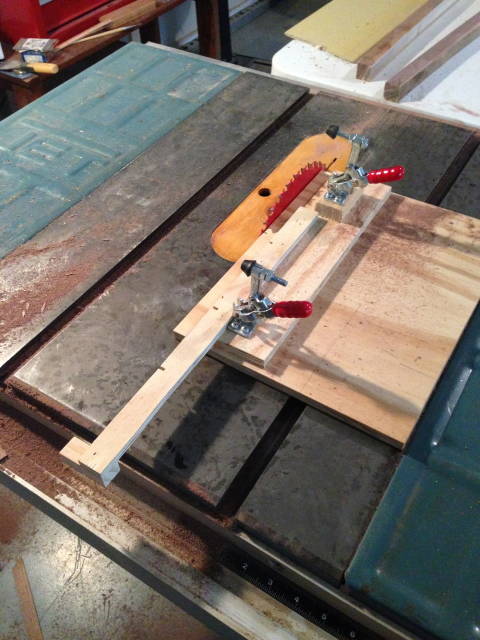 After the legs are tapered now the front and back legs can be glued to the side aprons. I used a #80 scraper plane and card scraper to finish everything prior to any glue-ups. Here is one of the leg-apron assemblies.
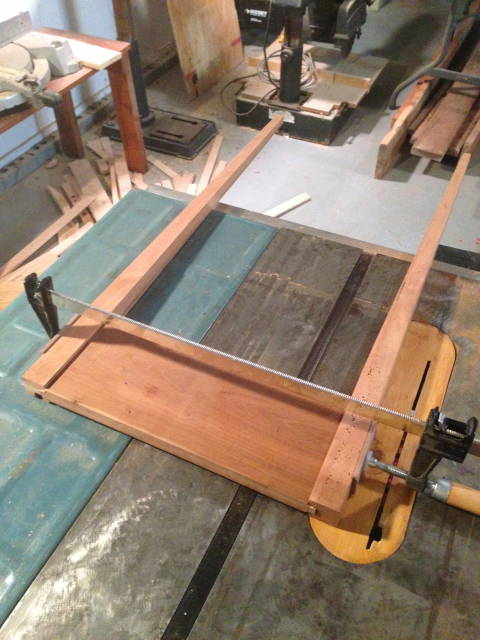
After the leg assemblies are dry, you’ll want to cut your dovetails for the top rail. 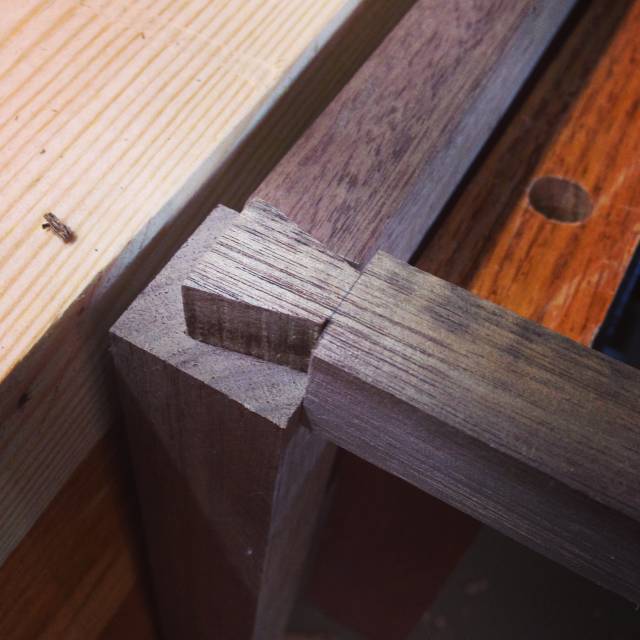
Since your mortises for the bottom rail are already cut, now you can glue up, 1) the top rail, 2) the bottom rail, and 3) the back apron. This will sturdy the table now. Please be sure to check everything for squareness. This is tricky here and so important. I have done 3 of these tables and I have a commission for one more in walnut. Every table has come out square. 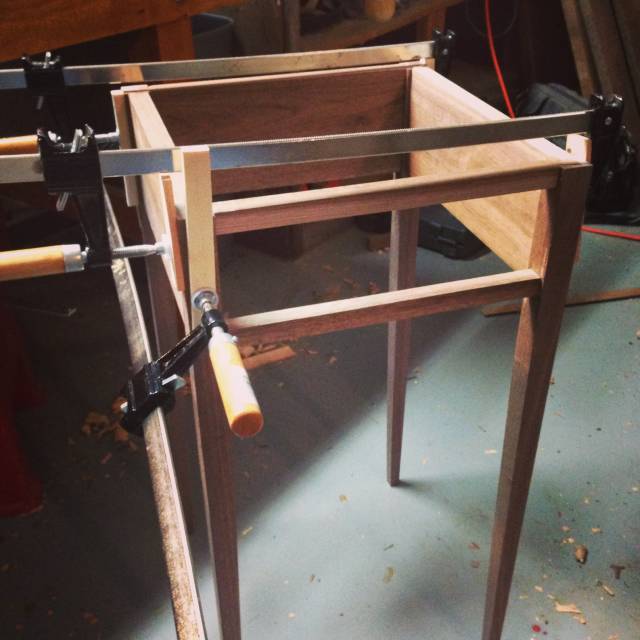
Once the table is dry, I’ve used a little block plane to clean up where the top will sit. I’ve also planed again after the drawer runners are glued in. Here’s a shot with the runners. 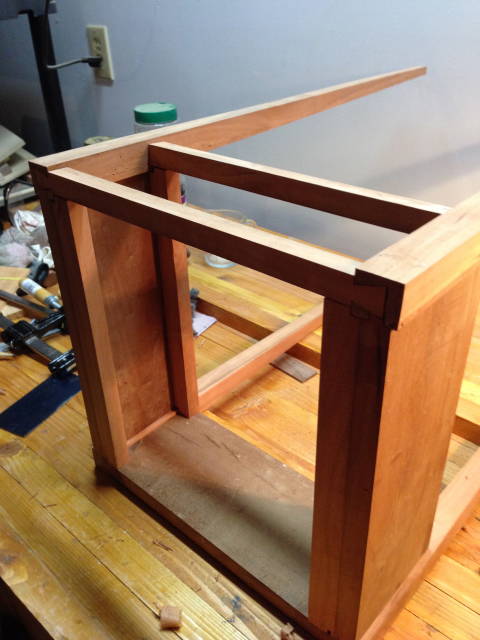 The drawer will fit between the front legs so you can see there’s the need for shims on the bottom runners and aprons to provide the same width between the front legs all the way through to the back of the table.
The top (18″ × 18″) can be made anyway you like. I’ve done a walnut table that’s solid with no breadboard ends. And, I’ve done a pine and a cherry top with breadboard ends. All tops get a little bevel in at 2" on the underside. This is tricky to do on the tablesaw and on this most recent cherry table I left the tool marks and saw chatter. It kind of added to the table. The cherry also had worm holes in it because it was from a tree that was on family property since the late 1600s. 
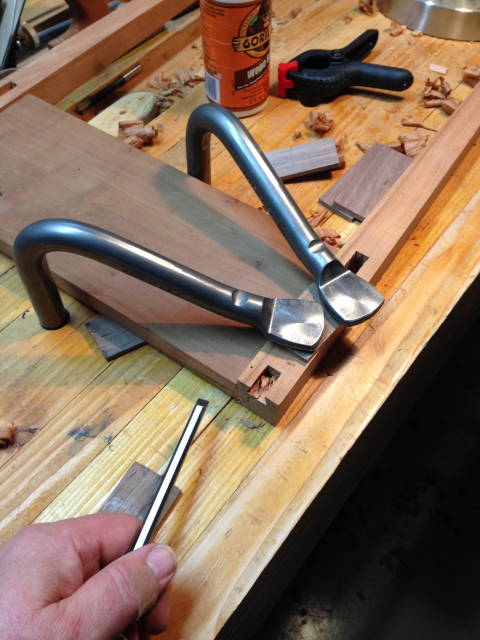
The drawers are fun. They have a half-blind dovetail on the front piece. The backs are just rabbet joints. The bottom of the drawer floats in a groove in the drawer front, sides, and back. The drawer material is sassafras. I got this beautiful material for $2.50 a board foot.
David L. Whitehurst
Here’s the drawer pic. The last post stopped allowing photos. Probably for size.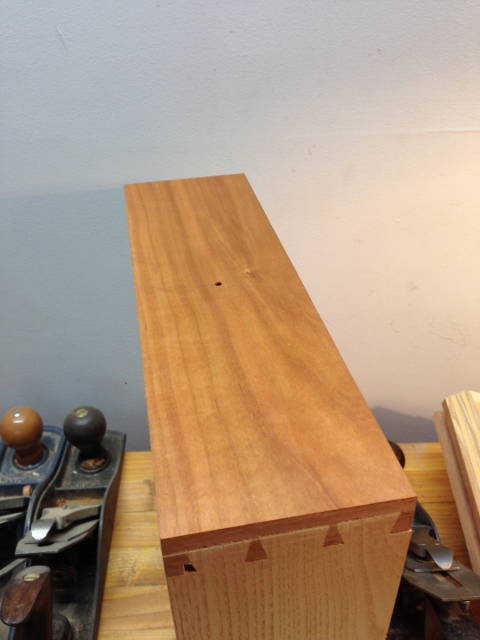
David L. Whitehurst

Really nice descriptive post, thanks. Great techniques and explained clearly and the table looks great, too! Thanks for taking the time. Noobs like me need all the help we can get.
-- Alec (Friends call me Wolf, no idea why)
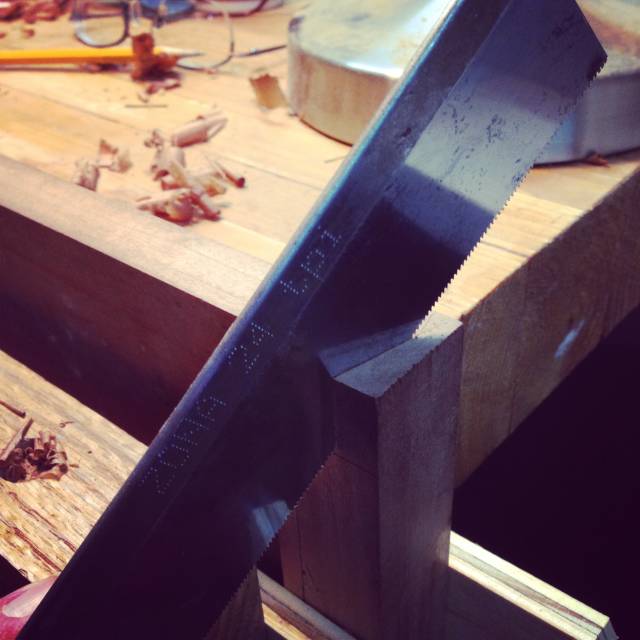
Very Nice David, thanks for progress pics too. How do you like the Zona saw? I picked up a thin fine tooth saw but have not used it on a project yet.
Tim:
As for the saw:
1. I love the very thin and accurate cut.
2. I do not love that the blade bends sometimes in a way that the wood just wants it to go.
I’m on the fence about the saw. I have a larger dovetail back saw that I got from a cabinetmaker friend that refurbishes old tools. It’s very sharp and its blade is much firmer. But, I don’t have a groove or mojo yet when cutting aside pencil, now marking knife marks. Basically, I haven’t settled on “my” dovetail process. I’ve done several play joints and three table drawers. I just haven’t found that spot yet. The Zona saw does the job with accuracy.
David L. Whitehurst
A beautiful table. I like that the breadboard ends are front and rear rather than on each side. Does the top attachment allow for wood movement?
Might As Well Dance : http://barbsid.blogspot.com/
The top drawer rails have oblong holes for movement in the top.
David L. Whitehurst
It’s great to see the added details David.
I feel it’s coming alive before my eyes.
You are very talented.
Abbas, Castro Valley, CA

Very clean build and wonderful results.
woodworking classes, custom furniture maker
Good clean build and wonderful results.
woodworking classes, custom furniture maker