


Share your craft projects
Make new craft buddies
Ask craft questions
Blog your craft journey
10 Replies
I guess I’m a butcher compared to your method, which is probably more proper.
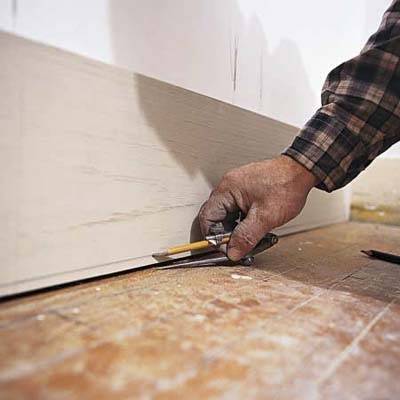
I usually rabbit the back of my scribe pc so that I’m cutting 1/4 thick. I tape up the face of my pc, draw the scribe line and follow it with my jigsaw. This works for me because the 1/4" is easy to cut through, I always start with a fresh blade and I’m pretty good at following a line. A quick swipe with a sanding block and presto. I just have to clean my mess when I’m done. At times I have used my belt sander to sneak up to the line when there isn’t enough meat to hold the jigsaw. I have to do this outside though, don’t own a festool. I do have a small hand plane to take it to the line but don’t find myself using it that often.
Here’s what I use for a scribe pencil, it doesn’t mark the walls.
Figuring out how to do something you have never done is what makes a good challenge.

I pretty much do the same thing Bentlyj does but I just use a normal compass.
woodworking classes, custom furniture maker

I keep a couple of hand planes in my tool box that I use for scribe work. I find them much easier to control than a power planer, although I do use one from time to time. I also use a belt sander for thicker materials (ie tops and heavy mouldings).
I use a simple compass for the scribe line.
Artisan Woodworks of Texas- www.awwtx.com

I’m a member of American Woodworker online and receive emails periodically. Today I received this and remembered reading the topic you brought up here…so I pasted a link below…I found it informative and might be a helpful tip for you and others…
Measure "at least" twice and cut once

My answer will be a mix of photos I just scalped from the internets as my tools are at work, and I’m parked on my couch.
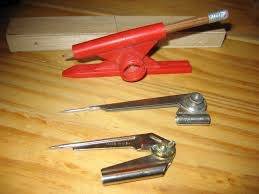
Scribes
The two main tools I use to scribe are a General brand compass. We’ve always called it a “Nickel Scribe”. The other is a Hafele brand, plastic wall scribe. I’ve been looking online and I can’t find them for sale any where.
Material Removal
That usually depends on the material. Over the years I’ve been exposed to many things to scribe. From logs to trim to furniture grade cabinets. It’s pretty much as you’ve all described. (Pun not intended) Start aggressive and get more detailed as you go.
By aggressive I mean skill saw, jig saw, coping saw, power plane, table saw…etc
Detailed is where it gets fun. Most of the time after it’s close to the scribe line we use a disc sander. Like this Makita
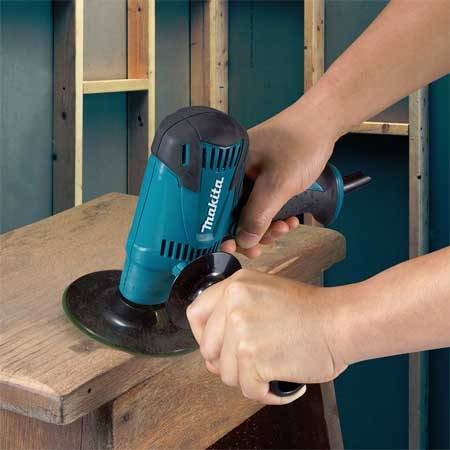
(Usually if dust is an issue we will just take it outside)
Or we use hand planes to get it close and anything from sandpaper to files to fine tune. If it’s a very detailed scribe, like around rocks or bricks, we use a variety of rasps and special shaped mini files.
You’ve already had great input on the subject, just throwing in what I know.
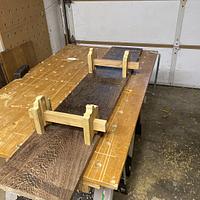
Does anybody have any pictures of scribes that they have done? Not sure if I have any around or not. Would be nice to add to the topic.
Happy Scribing

I bought a scribing tool from Trend some years ago and have yet to use it. You can find it on the net. The Norwegian houses are build pretty straight and flat.
Mike, an American living in Norway
Lucky you Mike. Around here, between the concrete guys and the framers NOTHING is flat or straight! It’s not unusual at all to see a wall 1/4" out of plumb.
Artisan Woodworks of Texas- www.awwtx.com
No doubt Bill,
The framers say don’t worry the sheetrockers will fix it,
The sheetrockers say don’t worry the tapers will fix it.
The tapers say don’t worry the painters will fix it.
When it’s all said and done, we end up have to scribe waves in the backs of our cabinets just to get them to sit flat against the wall. The concrete goes down hill. I started making cabinets with a 1/4" taper just so the front of the cabinet will touch the ground so that I don’t have to scribe each one in the field.
It’s rare that I can install something without having to scribe.
Another thing, studs 16" apart….LOL not hardly.
Figuring out how to do something you have never done is what makes a good challenge.
Cost effective and easy to use. The lack of moving parts makes
for a more productive day.
I know the parts from my Accuscribe are somewhere in my truck.
LOL
Obviously, there are many choices, when marking your scribe lines. For example:
1) If the gap is minimal, you can just drag your pencil along the cabinet.
2) You can use a flat washer of the size best suited for the situation, to mark the line.
Once I have my line, I love using my Porter Cable 371K (2-1/2"X14") belt sander, with a fine grit belt, to bring even 3/4" stock to the line. It provides more control than I get using a saw or plane, but still gets the job done quickly.
The last job I used it on was a molded counter top. It made scribing to the wall a breeze.