I’m new to making dovetails. I’m actually new to most woodworking techniques 😊, and I’m sure my first attempt at making them by hand will result in them having gaps in them.
Im doing research on line on how to make them, and repair them, and learned that there’s a book by Tage Frid that has a section on how to fix the gaps in them.
Does anyone know which book of his has this technique in it?
Or can you share your own technique on fixing gaps in dovetails?
Thanks for the help.
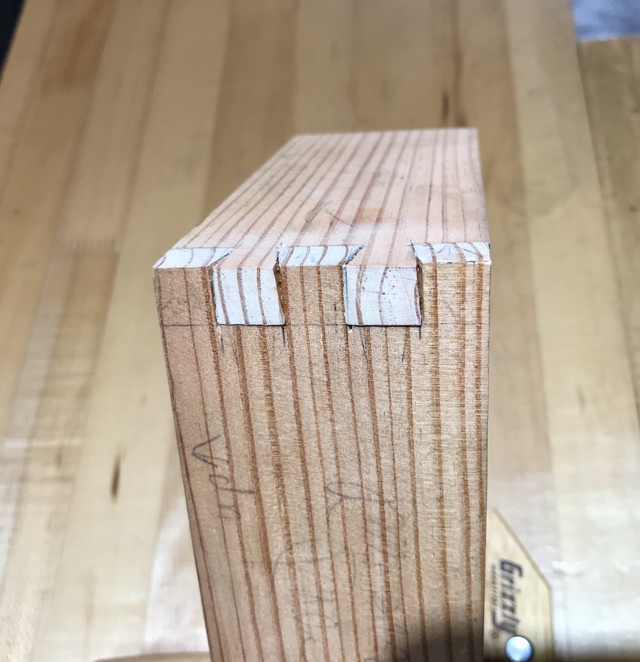
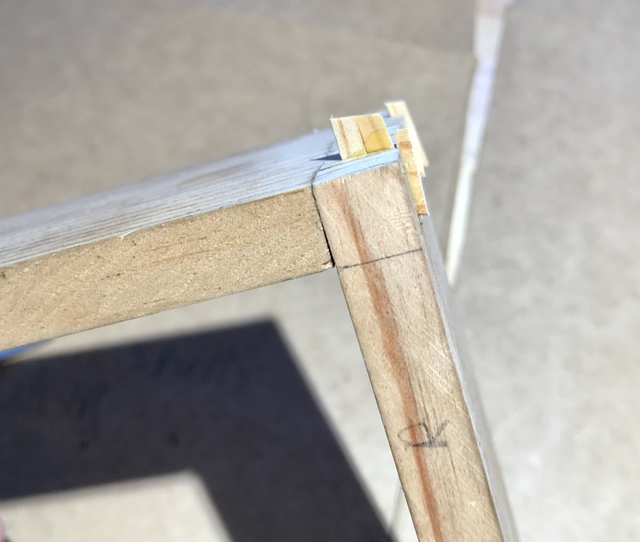
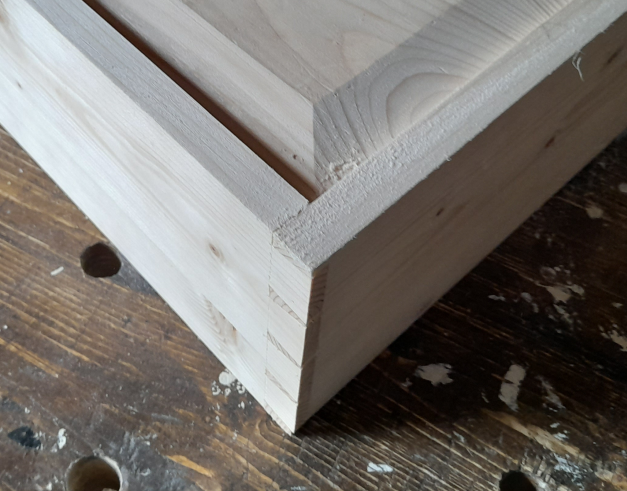
Well here’s my first attempt on 7/26/2023 I played Paul Sellers video while I was cutting these dovetails.
There are some small gaps but for my first attempt I’m happy with it. Now I’ll plane or sand them down and try to fill in the gaps.
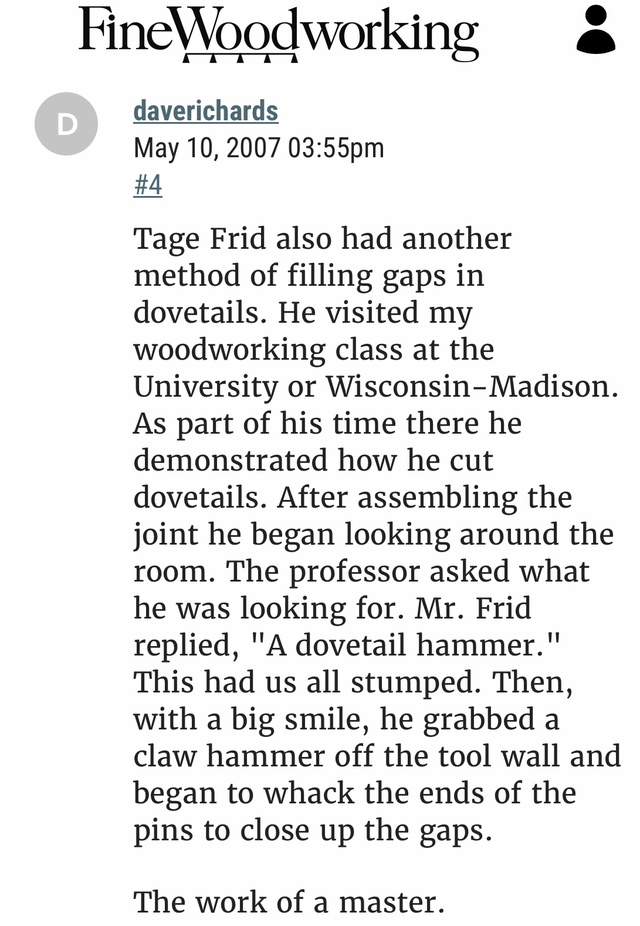
I found this question and answer forum in Fine Woodworking Magazine. I’m going to try it. I do have a dovetail hammer. The Tage Frid wack the pins with a hammer didn’t work. I think I was supposed to wack before I glued.
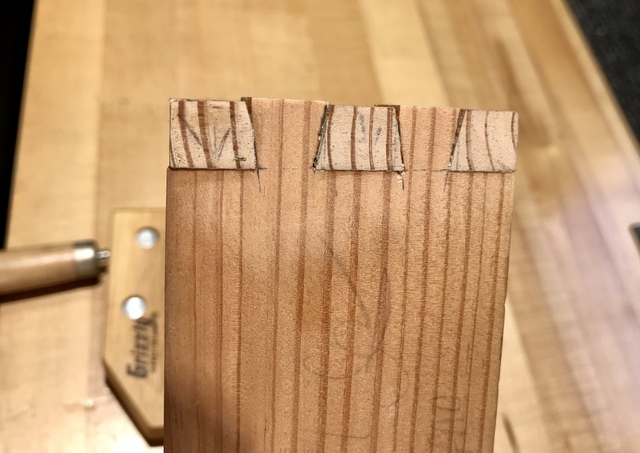
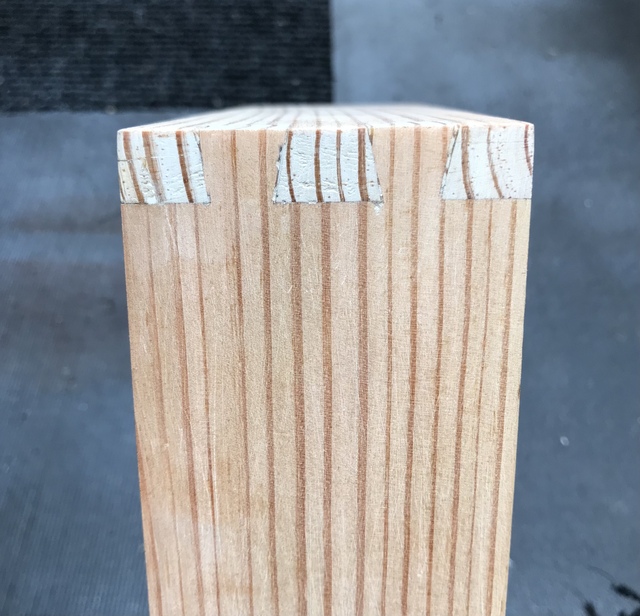
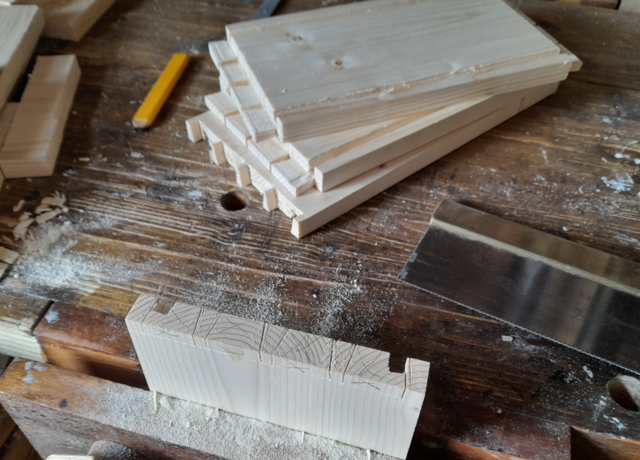
Now I’m trying the glue the wedges in the gaps technique. I’ll sand them tomorrow. Here’s the tails with the wedges sanded down.
I am guessing you desire to walk down the hand made path... or saw and chisel to be correct.
If you plan to make squillions of joins, it's hard to bypass a jig. I use the Leigh D4R jig... not cheap but nearly as versatile (in layout) as a hand job... and their instruction manuals are reputed to be one of the best... many alternatives out there (for volume builds).
If your first cut is too short... Take the second cut from the longer end... LBD
You have to remember that LBD is in Australia so he always cuts his dovetails upside down. He's also still a little perturbed that his effort to change the name from dovetails to ducktails never got any traction.
In all seriousness, yes, you will have gaps on your first several attempts. My preferred method of fixing gaps is super glue and saw dust. Pack the saw dust into the gap and wick a little super glue into it. Let it dry and sand it flush.
Two things that really helped me in my early efforts to master dovetails with hand tools:
Use painters tape a'la Mike Pekovich instead of relying on my less-than-perfect eyes to be able to saw on the edge of a knifed line.
Practice makes perfect. I did "30 days of dovetails" (well I called it 30... it was more like 10/30 if I'm honest) where I took a scrap 3/4" board about 4" wide and cut it into a bunch of pieces about 12" long. Every evening I would take two boards and layout and cut mating dovetails. Then I'd cut an inch or two off that end of the boards and label them "Day 1." Then the next day I'd use the rest of the boards and do it again. Rinse and repeat. There's no better teacher than experience. It only takes about 20 minutes a day once you learn to lay them out efficiently and if you can take that 20 minutes for 30 consecutive days, you'll be pounding out pro-level dovetails with your eyes closed!
HokieKen ...... In all seriousness, yes, you will have gaps on your first several attempts. My preferred method of fixing gaps is super glue and saw dust. Pack the saw dust into the gap and wick a little super glue into it. Let it dry and sand it flush.
Can't change tails but can spruik my hints tales...
Harvest sawdust... Superglue (or as we call it in Aussieland... CA), you'll have to buy.
If your first cut is too short... Take the second cut from the longer end... LBD
Gaps are DT growing pains. My suggestion is before spoiling a lot of good wood, to get some el cheapo used wood, pine, or whatever you can get for free, or really low cost.
Once you have a cheap wood supply, spend some time doing prep work so ALL of the stock is same size, true and flat. I believe more than half the problems with joinery are people trying to join wood that doesn't want to go together.
After your prep journey is over start cutting one corner a day. I still have my very first corner as a reminder of how bad I was starting out, and I affectionately call it Punkin Teeth, cause it is one gappy SOB. Most people after a week, 2 at the most are cutting pretty fair DT's and corners are starting to look decent. To do a corner I would grab 2 pieces of stock at least 3" wide, and only about 5 or 6" long. Then you literally just make a corner. I'd also suggest starting with through DT's and do your 1/2 blinds later, once you had throughs down pat.
Don't be in a rush, and enjoy the journey. Return with questions as you have them, take pics as you go so you have a record to look back at. If you stick with them, they will provide a smile some time in the future.
Good lighting, and having something like a Moxon vise to hold the work really do help. Other stuff, sharp saw that you enjoy holding. A good layout gauge. and really sharp, and easily held chisels for chopping, and paring your waste.
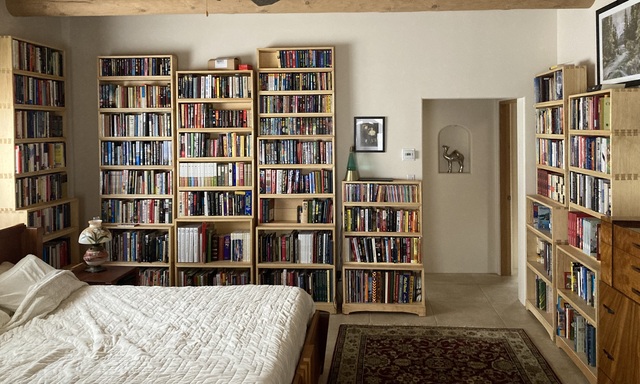
I cut a few dovetails making my bookcases. 70 boxes over the course of a year and change. Practice helps, but as Chris Schwarz has said, everyone has a certain number of crappy dovetails in them, and the only way through is to cut them and get them out of your system. Eventually, they’ll show up less often.
Most of these cases, I didn’t bother to fill any gaps, as they’re close enough to each other that people won’t see the gaps without a dentists mirror to look between the cases, and I set the best ones on the ends where they’re visible.
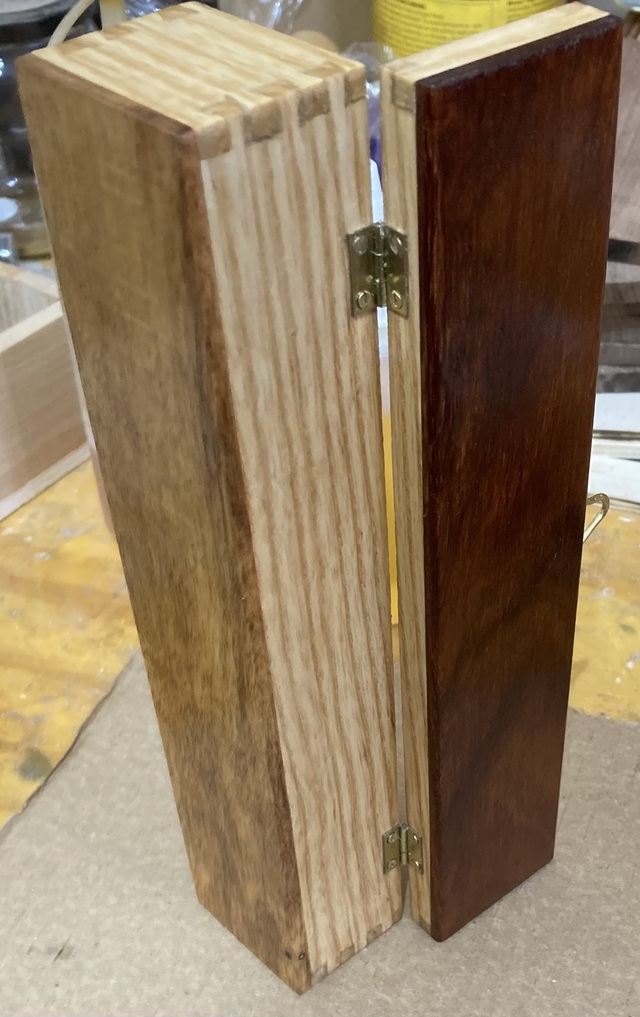
But if I have to fill gaps, I typically collect the sawdust from cutting the tails (so it matches) and jam that into the gaps and then add CA glue to bond it. Maybe a shot of accelerator if I’m in a hurry. Works pretty well, even when working small. This is ash with dovetails that were pretty gappy. Just the width of the kerf looked like a huge gap when I cut the wrong side of the line on one of them. That hinge is a 12mmx6mm (½ x ¼ inch) hinge, so the tails were close enough together that a ¼ inch chisel was too big to clean them up. The stock was roughly 3/16” thickness, so I was cutting dovetails with a 24 tpi gent saw. I used a 2mm diamond file to clean things up, then filled the gaps with sawdust and CA. The recipient was thrilled.
Note that I always cut out the waste with a coping saw, rather than paring with a chisel, clean up with a rasp or file, then glue them together with everything proud on the corners. Pins and tails are sticking out all over. Then I take the box to the belt sander and “trim” the protruding pins and tails with that (there’s usually a belt of 60 grit on there, though if it’s an old one, it behaves more like 200 grit). Plenty of fine dust available for filling.
You are doing well for the first attempt of hand cut tails. As other have said use dust and glue to fill. I have also taken little shavings cut with a knife to fill trying to match the grain pattern.
I also use the sawdust and CA method, and with practice you’ll need it less and less. There are craftsman who make dovetails effortlessly…but they’ve also been doing it longer and more often than you’ve probably been driving a car. That ain’t me! A couple things I think were important for me to learn when I was first learning dovetails:
1) Dimension all your woods carefully. In reality this doesn’t matter, but when you’re learning you want as few variables as possible, and trying to make up angles due to uneven woods is trouble you don’t need.
2) The blue tape method was a game changer for me. The idea of cutting to the line but not over is much easier with a tape edge than with a line…for me.
3) Steady saw movement. Changing anything about how the saw is laying or moving through the wood will create gaps in the finished product. You need perfectly flat walls on all cuts to have perfectly gap-less dovetails.
4) I use a coping saw to remove waste first. Hacking it out with a chisel makes it harder to control the edges for me.
5) Chisel sparingly, and only with a razor sharp chisel. Take only the thinnest shavings a test fit regularly. You can’t put wood back on the tails. Hone your chisel often!
6) Soft woods and hard woods act differently. I think too much practice in soft pine has its disadvantages. I like poplar because it’s easy for me to get and it’s a good middle of the road density.
Practice practice practice!
Ryan/// ~sigh~ I blew up another bowl. Moke told me "I made the inside bigger than the outside".
I’m like Ryan in clearing my waste with a coping saw then chiseling to the line. And I wholeheartedly agree that hard and softwoods are very different. In fact, I think softwoods are much more difficult to get tight joints in. I would actually recommend practicing in hardwoods.
Dave thanks. That’s a massive amount of dovetails. Nice work too. I’ll bet you can make them in your 😴
Thanks Eric will try the saw dust technique.
Thanks Ryan. A lot a good advice there. I used CA glue and saw dust to experiment on filling wood a little while ago. Does it cause the wood to darken?
Ken. My next try will be in hardwood. And I do have a fret saw. Thanks I’ll give it a try.
I used CA glue and saw dust to experiment on filling wood a little while ago. Does it cause the wood to darken?
In my experience it does change the color a bit, but since it should mostly be only in the gap, it’s not terribly noticeable, especially with original sawdust to match.
Ryan/// ~sigh~ I blew up another bowl. Moke told me "I made the inside bigger than the outside".
Sawdust and CA is darker than the original wood in just about everything. But it won’t darken more than the surface of areas you aren’t filling. That’s part of why I fill first, then sand everything flush afterwards. That plus it lets me overfill things a little and then sand back, which also gets me less darkening.
WG for your first ever id say you killed it man ! your only gonna get better with each one. hell i use a jig like LBD mentioned. mine is the porter cable jig. my shop time is limited and i just dont have time to hand cut em at this point. maybe when i retire ? nice work man.
working with my hands is a joy,it gives me a sense of fulfillment,somthing so many seek and so few find.-SAM MALOOF.
The trick is just to cut them perfectly every time. 😉 Yours look pretty good, so bit of practice and you won't need to worry about anything other than minor gaps soon (And the occasional large scale mess up).
For small gaps I add a bit of glue first, then lightly sand to fill with sawdust instead of adding sawdust then glue. It seems to hide it slightly better than adding sawdust first then glue, well, that and the sawdust always comes from the wood you are matching, so colour variations are less.
No jigs, but I always mark the waste, I've cut away the wrong bit too many times.