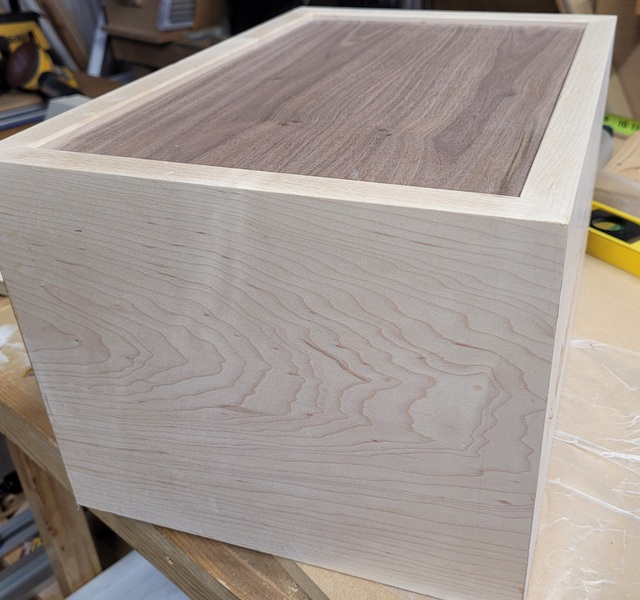
I glued up the wedding card box yesterday. Was a challenge but corners are ok. I designed it so I'll cut the top off.
I'm planning to cut the splines BEFORE I do the cuts for the top. Any reason I would cut the top off and then make the spline cuts? I plan to have one level of splines for the top/lid and then two (or three?) on the box portion.
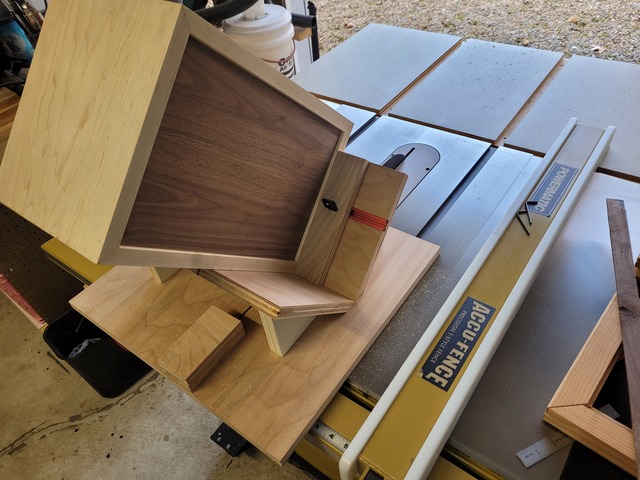
My method for getting the top off involves setting the TS blade height to just slightly below the side thickness. Use the box next to the blade to get the height about 1/32" below thickness.
I then run all four sides.
Next I'll bump up the blade for a through cut and run the long sides through. This leaves the lid still firmly attached on the ends so no surprises while cutting.
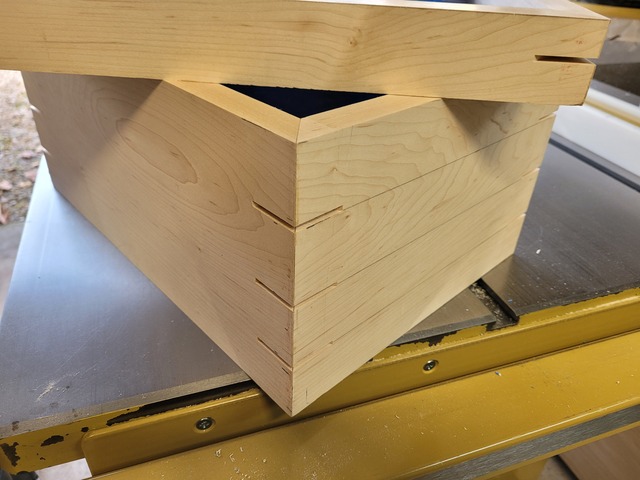
For the lid removal, I then use a box cutter. The blade is inserted into the kerf and worked to sever the last little thinness of wood. Keep the blade angled so each cut is pulling from the inside of the box out. This will prevent chipping out on the box inside.
Once the lid is free, I'll use a scraper at the same angle to remove the little lip (work from the inside out). Then I'll go to a sheet of sand paper on a flat plate and go at it. This gets me a perfect flush fit along the perimeter.
There are a lot of other techniques for cutting, one being to placing shims into the saw kerfs as you cut the last two sides. This keeps the lid/box in position and if done right, will avoid any saw blade "kisses" on the edges.
The only issue is aesthetic spacing with your splines. Since you’ll lose kerf height overall, if you’re trying to make things symmetrical, you need to account for that.
Ryan/// ~sigh~ I blew up another bowl. Moke told me "I made the inside bigger than the outside".
To reduce some planning perils, maybe draw out your spline locations on one corner of the box, and include a real life kerf thickness where you intend to part it off. That way you can stand back and visualize it.
Ryan/// ~sigh~ I blew up another bowl. Moke told me "I made the inside bigger than the outside".
RyanGi - that is exactly what I did this afternoon (glad to be on the right track!). Ran out of time, and didn't want to rush, so hope to get to cutting the splines, etc tomorrow.
The 90 degree stop hinges posted earlier by Birdseye and used on his recipe box are easy enough to find if you want that style. Nice thing is they don't require any morticing 😃
I ordered some of those hinges this morning. 😀 I also have some other hinges so will see which works best. I'll always have a future use for the extras. And to get free shipping I bought some clamps that were on sale. Who doesn't need more clamps!?!?😊
I put the splines in before I cut off the top. I do take time with one of the centering rulers to put the spline in the middle of the top (counting for the kerf cutting off the top.
I tried splints method; it did not work for well me. I put self-adhesive sandpaper on the TS and just run the box and lid over that sandpaper to remove any imperfections from the cut.
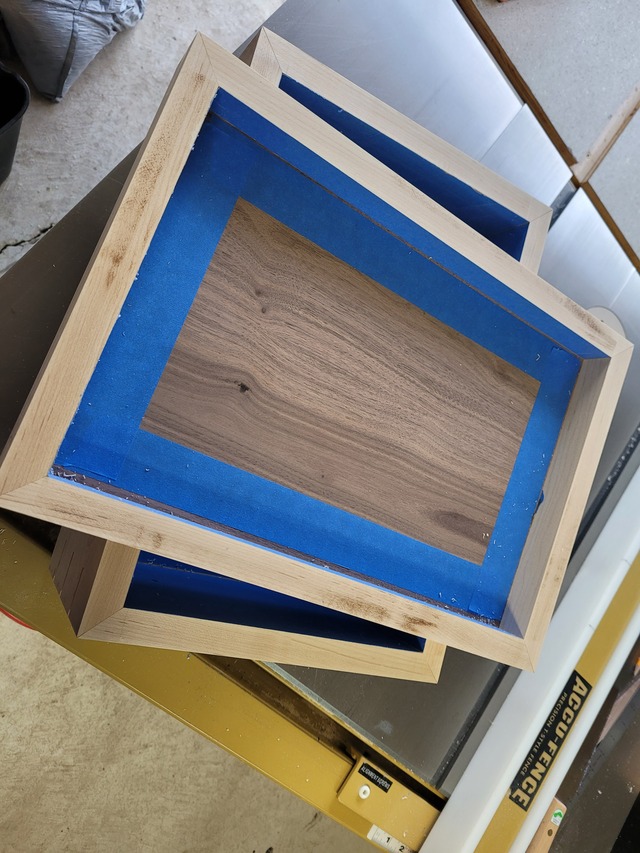
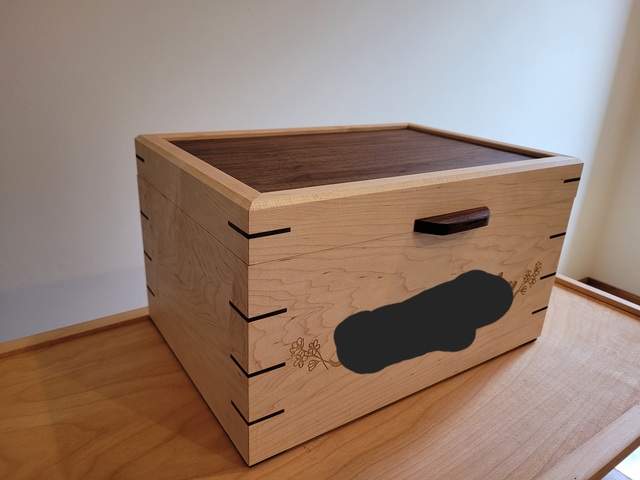
And top safely removed (even after I dropped a metal ruler inside when checking if I cut thru on the first side 🤦♀️). Ended up pretty clean cut. Did multiple passes and then left a bit on the short sides which I cut free by hand. This is before any sanding (hard maple burned a bit). Happy with this afternoon's progress. On to getting the splines glued in.
Few "issues" along the way (aka mistakes): * two of the corners shifted a bit so I had to use the screw driver trick to close the edges (thankfully the top looks ok) * a few of my walnut splines weren't sanded down enough so I couldn't get them fully in the slots AND then they wedged so I couldn't remove BUT my husband was nearby so he was able to remove the half-seated splines so I could find ones that fit - that happened three times 🙄
So, there have been some situations but handled and moving forward. I doubt I'll ever have a "perfect" project, but always try my best!
Nice work BB. Dang, if I had glued up that box with mitered corners, there'd be lots of daylight showing thru the corners. Those corners look nice. Did good on cutting the splines as well.
Drop out of warp and prepare to be boarded. Mike southwest CO
I was surprised you cut the lid off before splining. I'm always afraid of the miter joints failing while I try to cut if the splines are not already installed. Largish picture frames are the worst, almost tempted to cut a single spline slot, then install before moving on to the other corners.
I have finally learned to make sure all the splines slide in before gluing. Nothing like the panic of a half-seated spline with setting glue while trying to find a clamp or hammer to force it home.
Splintergroup- in hindsight, my order of operations may not have been ideal. Thankful it worked out. I think I was just so anxious to see how the inside looked!
And yes, I should have tested all the splines first!! Lesson learned and thankful my husband is strong 💪 as I was panicked when it was stuck midway.