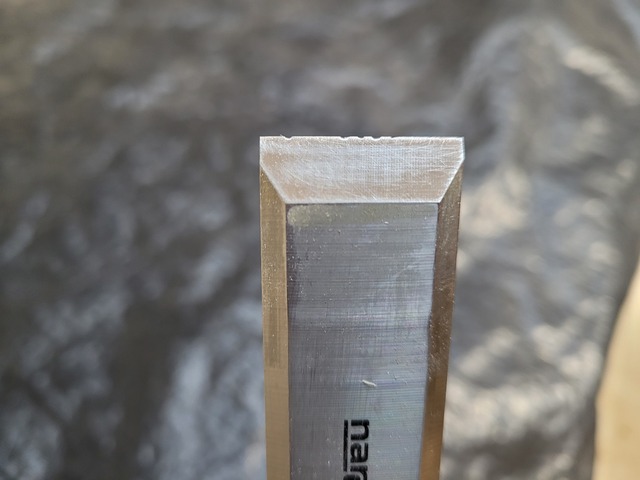
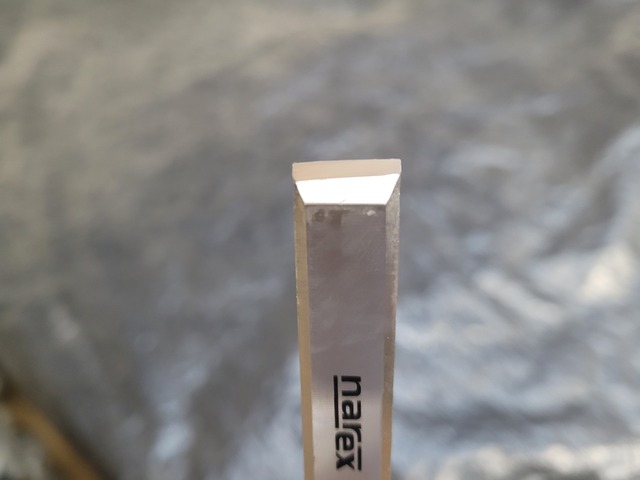
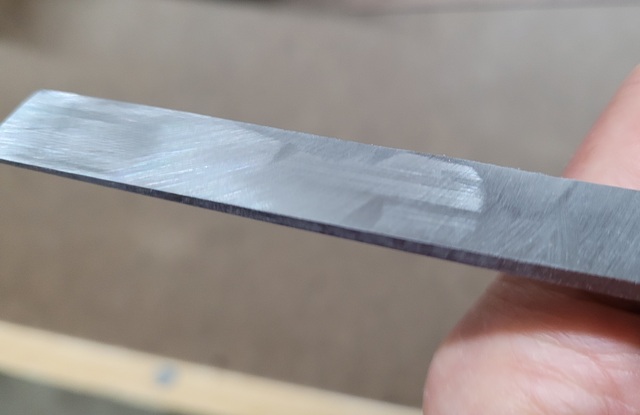
I got my Work Sharp 3000 in action. Followed the instructions on getting the abrasives on the glass plates. Got out my damaged chisel (no idea how it got this bad 😕). Anyway, it seems like when I use that lower guide, that I'm not achieving a straight sharpened edge. Also worked on trying to get the blade from my grandpa's plane fixed up (the edge was not 90 degrees from the side). After a lot of time, I finally got to this point. Still not fully at 90 from the side.
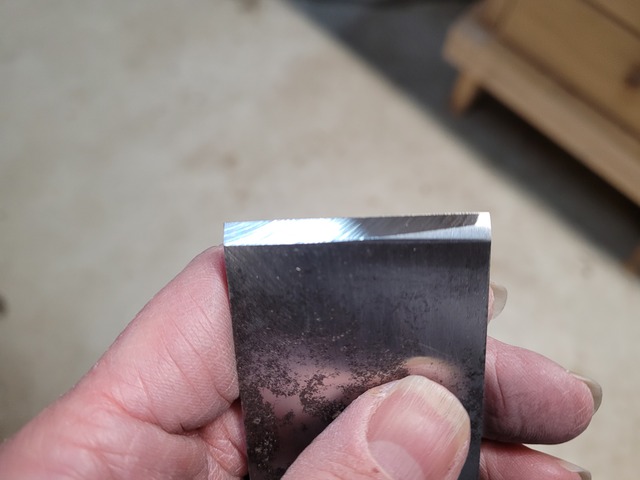
I also tried a smaller chisel and totally messed up trying to flatten the back (I know, I should have gotten cheap chisels to practice 😟).
Any hints appreciated. I don't have a stand built (yet) so when trying to flatten the back I trying rolling it into the surface (that didn't work for me!).
As an aside- the tool rest arrived from WS (it was missing in the box I recieved). Very good customer service.
Not so nice really- that small chisel is a mess. I didn't get the back flat (more of a wave 🤦♀️), and then the front edge isn't straight. Really trying to focus on keeping the edge on the guide.
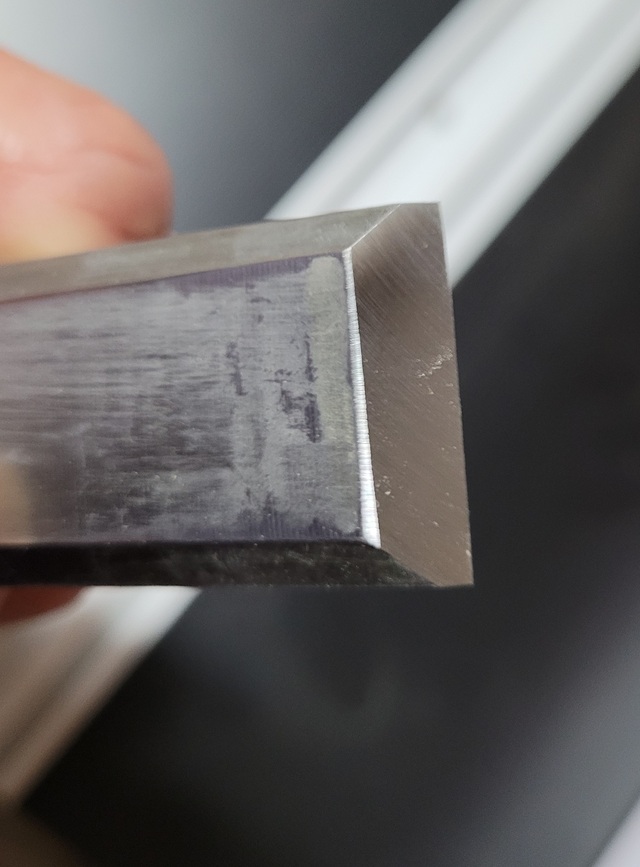
For the others, is it typically to have the scratch pattern not be equal. Maybe I didn't continue long enough?
Yes, support is your friend. It's hard to watch the chisel, and also keep it flat and level. The plate is flat, or very very close to it, so to have waves like that it's you moving. doing backs, allowing the chisel/blade to just lay flat will get you there.
On anything that will fit into it, trust the chute for your bevels. It will keep you at your selected angle, and is also as true as you could ever hold it simply by allowing the chisel/blade to rest. Moving forward slowly will engage you into the disc.
Always think Baby steps, trying to go to quickly will usually end in rough results.
Basic video to hopefully make you more comfortable with it. Plus if you have a beater chisel it can allow you to relax a bit and get it done, not thinking about good chislels.
That unevenness you’re seeing is one of a couple things:
1) The bevel on the chisel wasn’t square to begin with and now you’re making it square.
2) Uneven pressure applied across the face while being ground. I find this happens of you’re not using a good guide and/or are rushing. Let the grit cut at its own rate, don’t apply much pressure at all. If you’re holding the chisel pointed at the center of the disc, then the disc is cutting cross the face of the bevel, and you tend to get more pressure applied to the left side than the right in an attempt to keep it secure against the disc. If you’re holding the chisel so that the disc is cutting along the long axis of the chisel (the chisel is pointing at an area to one side of the disc center) then the cutting speed on the left and right of the bevel are different which can lead to uneven cutting or drift. Maintaining even pressure side to side is very important!
3) you’re presenting the bevel to the disc at some weird angle, which causes uneven pressure (see #2).
If you’re not using a guide like the MkII, I find you need to hold really light pressure and be very consistent with placement. I started this way and burned up the paper really fast because I was holding the iron in one spot to keep things consistent and that wore down the paper in that spot. Once I started using a guide and the homemade table, I could use the whole width of the disc and got better longevity from it. The MkII also had an automatic micro-bevel setting which is really nice to.
Once the Primary grind is cut in, you should only ever sharpen or hone the micro bevel, and that micro bevel only needs to be like 1/32” wide. It’ll get wider over time as you sharpen, but there’s no sense sharpening the Primary bevel every time… You’re just spending extra time and putting extra wear on the paper. The issue with a micro bevel is that it’s so small that it can be hard to hold the chisel manually at that angle since you can’t feel it resting on the micro bevel face like you can on the Primary bevel…which is why I use a guide!
Whatever you do, be consistent. Other wise you’re always trying to make a correction for the previous grinding.
Keep on it, you’ll get out!
Ryan/// ~sigh~ I blew up another bowl. Moke told me "I made the inside bigger than the outside".
Ryan - missed your question. For the back, I was trying to roll it onto the top to flatten (like in that video GeorgeWest posted). They make it look easy...haha...I struggled a bit. Probably should have worked on my stand first, but was wanting to try it out.
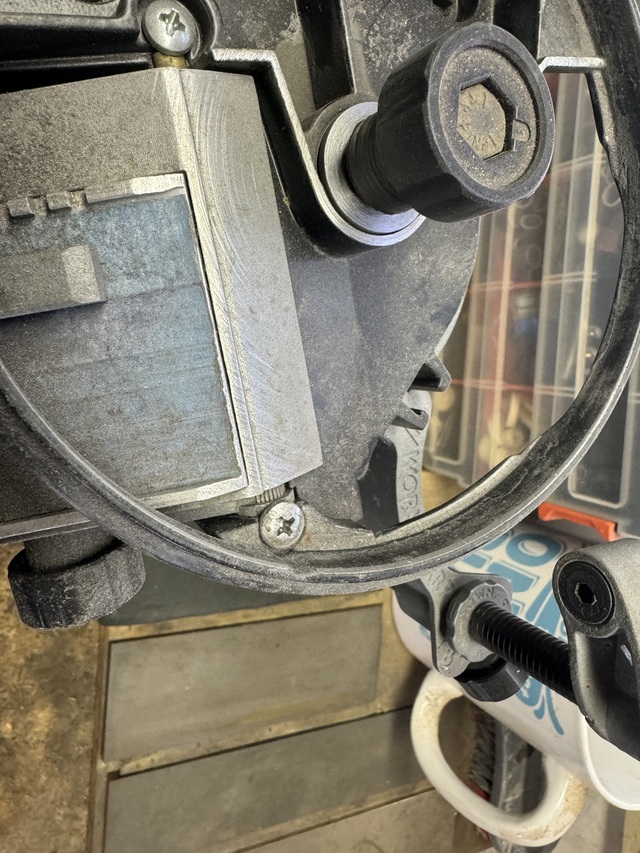
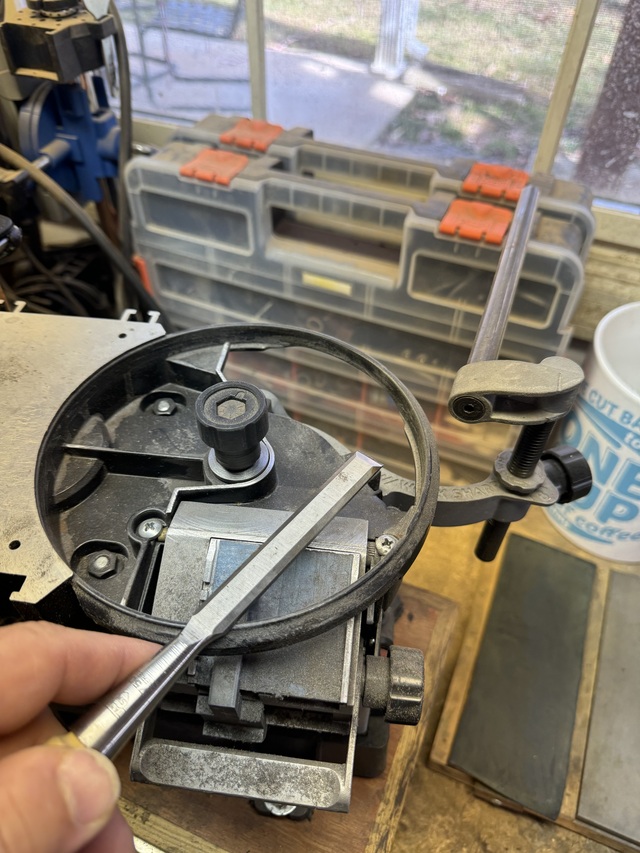
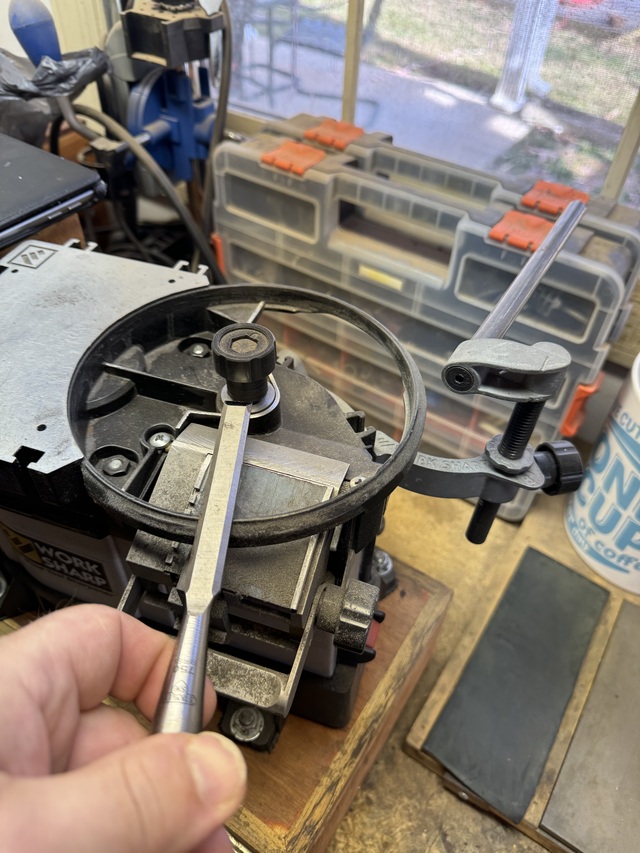
Barbara, there is a procedure in the manual for adjusting that port if your edges aren’t square to the sides. It’s in the back in the FAQ section. You loosen this screw on the right:
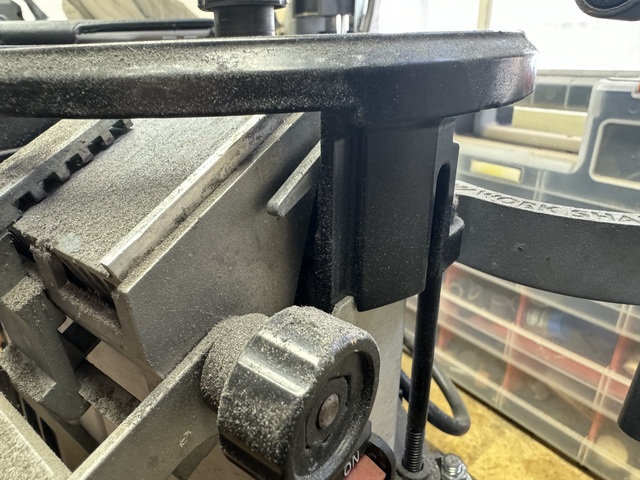
Then move this lever: to adjust the height of the right side which is what controls your angle relative to the guide fence. IME, this needs to be adjusted on every new machine but rarely needs to be readjusted.
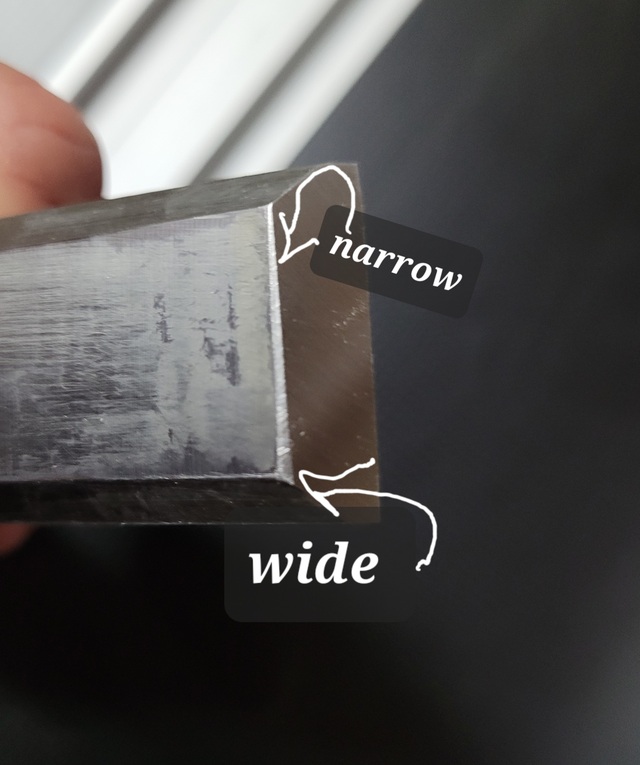
I would take something with a square edge that you can scratch up and stick it in the port just until it makes contact with the wheel. If it hits on the left side only, raise the right side. If it hits on the right side only, lower the right side. Rinse and repeat until it makes contact along the full edge. It’ll take some tweeking but it’s not difficult.
I suspect that will solve all your problems with the cutting edge squareness. Flattening the backs takes some practice. Lay it down using the edge as a fulcrum so the cutting edge makes contact last. Put your fingers on the top of the chisel to keep it flat and make light contact. No pressing down, just enough to keep it in place and flat. When it starts to feel a little warm, pivot it back up raising the cutting edge first. Cool and repeat until it’s evenly removing material. The keys are laying it down so the edge touches last and picking it up so the edge leaves first and letting the abrasives do the work. If you try to apply pressure, it will roll to the side or try to run away. Also try to point the edge along the rotation like this: and not to the center like this: If you do the latter, the wheel will try to roll the left side of the chisel under. With the former, you aren’t fighting against the chisel rolling.
Good luck! You’ll have the hang of it shortly. Work up some beaters until you do then get out the good tools.
For bevel angles, I like 30-35 degrees for bench chisels and I do all my plane blades at 25 degrees. YMMV. When it comes to sharpening, opinions are like farts. Everybody shares them but nobody likes anyone elses as much as their own😉
Ryan's #2 has been my biggest challenge with chisels and my large belt sander. Pressing down, finger in the center is where to start, but even then you might find you are still applying bias to one side versus the other. This would be my guess with your chisel.
When sharpening the bevel, I've found it helps if you have a fine point sharpie that you can mark a line (with a square) near to the tip. This gives your eye a reference to see if you are going square or starting to go astray. Moving the finger pressure to the long side and adjusting will get you back on track.
Once the bevel is flat and square I like to do the micro bevel. Makes it quick and easy to get a perfect edge when you need to refresh it.
I don't have any power tools for fine sharpening so my MKII is the go-to for the bevel and then my finger placement can adjust to the micro bevel during a refresh .
The beauty of the micro bevel is that it’s so small it takes almost no time to sharpen it back up. Just a touch on high grit and it’s done. Hell, I rarely sharpen at all because I use the strip disc very very regularly and that keeps a keen edge.
The downside of the micro bevel is that it’s so small it has to be re-touched with the exact same angle as before. If it’s off, it doesn’t want to settle back into the angle as a benchmark because there’s just not enough surface area to register off.
Before I started using a guide, I had several beautiful multi-facet bevels on some of my tools. 😖
Ryan/// ~sigh~ I blew up another bowl. Moke told me "I made the inside bigger than the outside".
HokieKen- thank you so much for all the info and pictures. Could a piece of wood be used to check square? Assume there should be even contact across the contact surface.
Splintergroup- knew I should have run back in the house to get a sharpie!
Ryan - guessing most of mine have random bevels. At thus point, straight and sharp will be success.
When I first starting using my machine I thought it was out of square also. I was adjusting it and going crazy. It does seem like it is cutting out of square but when it's all done it came out right.
HokieKen - I'm thinking a piece of walnut might work. Will have to see if I have anything else.
Already have a sharpie ready to take out to the shop!
Corelz125- not sure if my expectations are off. I expect a consistent depth of the abrasive on the bevel from the start. Right now it seems to start showing on the left and only after some time does the abrasive shift right, and start to even out.