Thanks all for looking and the encouraging compliments.
No idea what spurred me on to make this jig as I already had circle cutters... OK, at least one idea, My bandsaw jig can't make an inner circle and while my Fe$tool jig had good dust collection (approx. 75%), the cord and dusty hose was a PITA for multiple passes due to incremental depth plunge... router bits make a bucketload of sawdust.
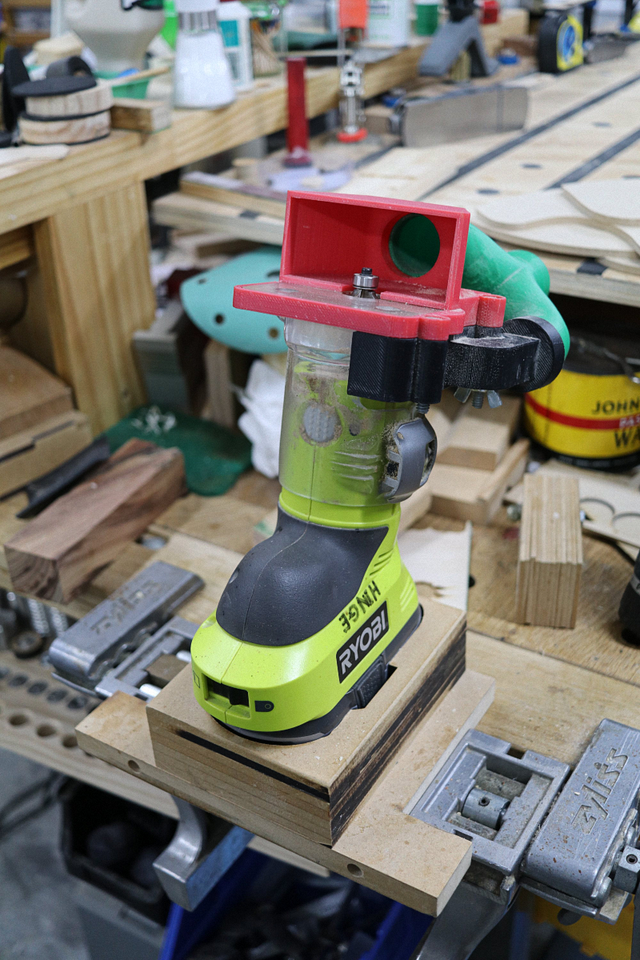
The inspiration was mainly the cordless feature. While the dust hose was designed to be inserted vertically, so as the jig was rotated, it spun on its rotating end nozzle as it was suspended from the ceiling, it was by pure chance as to it's efficiency... the flat, wide base of the jig sealed the bottom and the collar sealed the top... only one path for the sawdust. I don't believe in perfect (everything can always be improved), so I'm only bragging 99.9% dust collection... and maybe a few "dandruff flakes" on the shoulders...
The beauty of the concept is that it can be adapted for most trimmers as long as the top layer (of 3mm MDF) fits snug around the body of the trimmer (that's why it's in 2 halves... or maybe 3, for those suffering dyscalculia).
SplinterGroup commented about 12 hours ago Can't complain about double sided taping the trim router base to a scrap of masonite and having a go, but I gotta admit your device has a bit more elegance and utility! 🤠 👏
I wear the nightie for elegance... Tools/jigs are a different story. Sort of agreeing with RC about masonite... however, my simple opinion on it's use is the potential for 0% dust collection.
When it comes to 0% efficiency (dust collection), my next project to be posted, will show that in trumps....and not the Donald type.
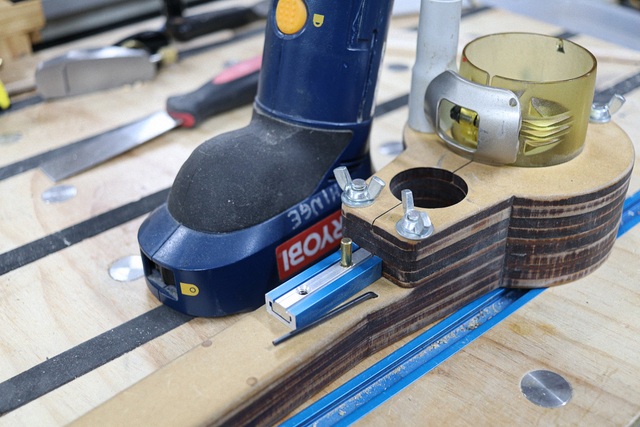
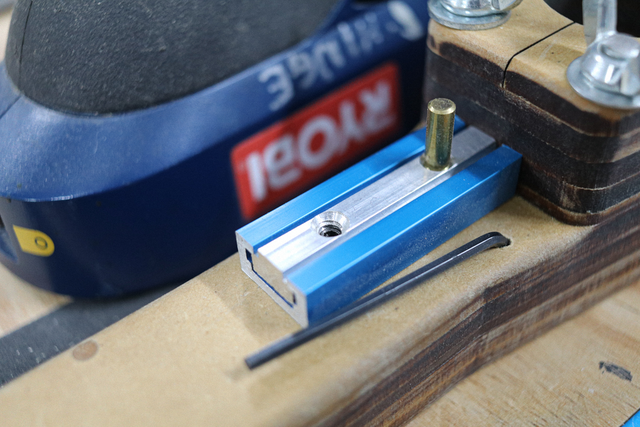
I may have mentioned in another blog that to me, micro adjustment in a trimmer/router is a must. After Ryobi upgraded their trimmers with a micro adjustment feature, I was compelled to buy it, making my rack & pinion Ryobis redundant. What better was to use one then in this jig where micro controlled plunge was not an issue
... and now sports the pivot pin mechanism unobtrusively on board... The other one is set at a constant height for my 1.5875mm (1/16" to Philistines) round-over bit, with a 3D printed dust port shroud, semi-permanently clamped to one end of my tabletop,
As for "make a lot of circles"... This is an old post moved across from Lumberjocks. At the time I used to make a lot of circles/clocks... had a lot of dirty minded (I prefer to call appreciative) HWOs (He WHo Obeys) with understanding wives... I still churn out a few a year... a dirty mind is born every day... though 365 clocks (366 in a LY) is a tad too many to make. The above linked project has a fairly good write up on the use of the jig.
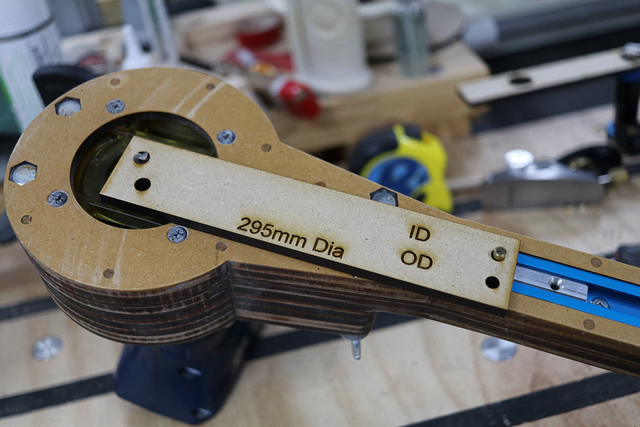
To make the jig more accurate, I laser print a gauge for desired radii, that makes bit displacement setting a no brainer, 0.001mm accurate...
It's not a matter of a "lot of circles", but just "1 large circular hole".
If your first cut is too short... Take the second cut from the longer end... LBD