


Share your craft projects
Make new craft buddies
Ask craft questions
Blog your craft journey
HTL
74 posts
and
15 followers
in over 3 years
in over 3 years
Wooden Model Making #2: 1911 Delivery Truck
This is
part 2
in a
2 part
series:
Wooden Model Making
-
Power Wagon
-
1911 Delivery Truck
- Power Wagon
- 1911 Delivery Truck
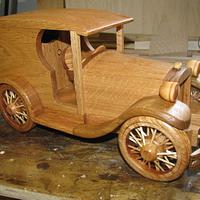
1911 delivery truck
I found some cool old plans to play with so trying the 1911 Brush Delivery Truck'
I've built this style truck before but a much newer 1930's style.
Here's the start of it.
I found some cool old plans to play with so trying the 1911 Brush Delivery Truck'
I've built this style truck before but a much newer 1930's style.
Here's the start of it.


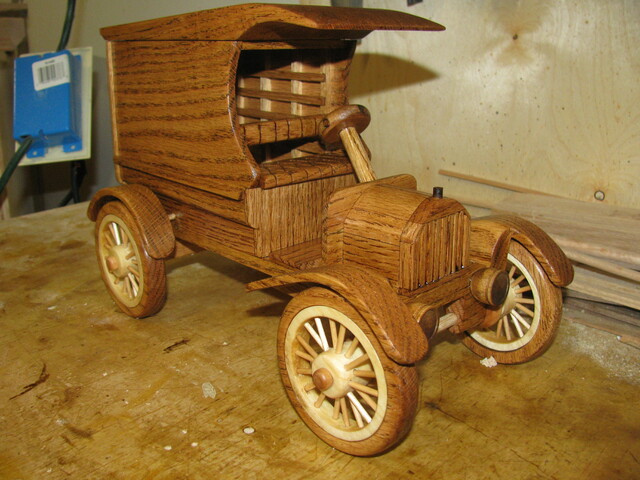
Front view

Back view

Finishing up the cab
Closed in the back.


Got the roof shaped up.


Added a little trim.

Then played with the seat.


Body work
Radiator, bonnet, and floor board check. ;-]]]


Making spoke wheels
It's time to get started on the spoke wheels so I'll know how the fenders will need to be.
I found some dowels about twice the size of tooth picks at wally world, really like the size but the drill bits I've got to work with it seem to have a mind of their own.
Come to think about it now I haven't switched out bits in quite some time so will be digging out the drill set next time I'm in the shop.
I really didn't want to use maple again but already have some blanks made up and not enough oak, I just don't have the gumption to go the extra mile for this model.
So here we go.
I'm drilling out the centers of the wheel blanks for the spokes.

The rims will need to be thinned down after I see what I have after the spokes are set.


All my hole saws use the same 1/4" guide bit so very easy to drill it all.

Drilled the out side then the center hub, then drill out the center and chisel it out.
I know I could have done this on the lathe but just not wanting to have to set it all up when I can have it done in the time it take to get the lathe set up. ;-{


Couple a minutes with a chisel and we're ready to drill the spoke holes.
I tried to set up my wheel making jig to drill the holes but the drill bits just wouldn't cooperate, so drilled all the holes by hand which I like doing any way so no problem.

If you're wondering what I'm doing here, by leaving 1/16"-1/8" of the blank still on the rims the center and rim will stay centered and I will cut the wood out after the spokes have been glued up.
I will need to thin the wheels down any way once I see how much room the spokes used.
Drilling the spokes by hand is not an exact science so will just have to see where the spokes ended up after drilling and glue up.

It helps to have a backer board screwed down as you drill all the holes.

I drilled the hub with one spoke just past the front of the center line and the other to the back, so the spokes aren't ganging up on each other, I had trouble with this on my first set of spokes.

Not to bad for 6 hours of play.


Finished up the wheels and started on fenders
Finished the wheels.


https://www.lumberjocks.com/threads/blog-post-index.331197/#post-2112151
3 Comments

I,m glad you show us this beautifull model here on CS. Thanks #4

Yes, I’ll add my appreciation to Jan’s comment, thank you Bruce.
You do a first class blog of the model build for sure!
You do a first class blog of the model build for sure!
Life’s Good, Enjoy Each New Day’s Blessings

This is really cool. I like the interior detail - most would skip over that. The seats and wheels are excellent details as well.