


Share your craft projects
Make new craft buddies
Ask craft questions
Blog your craft journey

HokieKen
8775 posts
and
55 followers
in over 3 years
in over 3 years
How I Sharpen #2: Carving Gouges
This is
part 2
in a
6 part
series:
How I Sharpen
-
Sharpening Methods - Introduction
-
Carving Gouges
-
Carving V Tool - Part 1
...
- Sharpening Methods - Introduction
- Carving Gouges
- Carving V Tool - Part 1
...
I recently bought a couple of used carving tools and decided that working them up would a good place to start this blog. The first one I tackled is a 1"-ish shallow fishtail gouge made by Ashley Iles.
When I initially took up relief carving I bought a book by Chris Pye and learned so much from the book I ended up subscribing to his site. The videos on his site are not only wonderful for learning to carve but he also gives a LOT of detail on choosing, sharpening and maintaining tools. So my method for setting up gouges is a direct adoption of his method. One thing you'll see me do is put a small back bevel on the inside of the gouge. This is something I've never seen recommended elsewhere and that most carvers say is unnecessary. So make your own decision. His reasoning is pretty simple: it allows you to turn the gouge over and use it like a backbent gouge as well as the way it's intended to be used. I've found that to be true but it also lets me control the level of polish on both sides of the cutting edge or to alter the included angle of the edge without having to alter my angle of attack or the angle I have to hold the tool at. So I do it.
Chris also insists on keeping the corners of the gouge sharp and not rounding them or sweeping them back. This makes a lot of sense to me because that's a sharp corner you can use to get into small spots. But most gouges you'll see have dubbed corners because that tends to just happen when sharpening (as you'll see later in this post...). I do however set out to keep sharp corners on my gouges but often I'll end up loosing a little bit of one or both and just let it slide.
Aside from those two things, you'll find that most experienced carvers will agree on the methodology for commissioning (or setting up) a gouge I think. And I've never seen one from the factory, no matter which factory, that was ready to go out of the package.
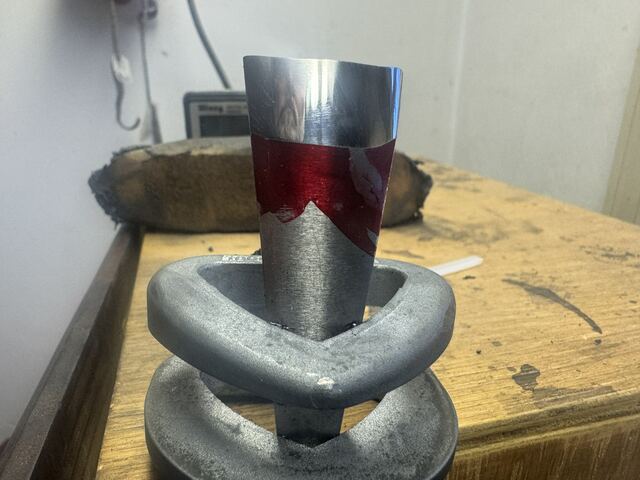
The first thing I did was to grind the end of the tool down so it is square with the axis of the handle. Sorry, I didn't think to take any "before" pics. I removed as little material as possible to get fresh steel on the whole face. Then I like to dye the tool up with machinists dye so I can see my progress as I work. This is especially valuable with gouges IMO.
When I initially took up relief carving I bought a book by Chris Pye and learned so much from the book I ended up subscribing to his site. The videos on his site are not only wonderful for learning to carve but he also gives a LOT of detail on choosing, sharpening and maintaining tools. So my method for setting up gouges is a direct adoption of his method. One thing you'll see me do is put a small back bevel on the inside of the gouge. This is something I've never seen recommended elsewhere and that most carvers say is unnecessary. So make your own decision. His reasoning is pretty simple: it allows you to turn the gouge over and use it like a backbent gouge as well as the way it's intended to be used. I've found that to be true but it also lets me control the level of polish on both sides of the cutting edge or to alter the included angle of the edge without having to alter my angle of attack or the angle I have to hold the tool at. So I do it.
Chris also insists on keeping the corners of the gouge sharp and not rounding them or sweeping them back. This makes a lot of sense to me because that's a sharp corner you can use to get into small spots. But most gouges you'll see have dubbed corners because that tends to just happen when sharpening (as you'll see later in this post...). I do however set out to keep sharp corners on my gouges but often I'll end up loosing a little bit of one or both and just let it slide.
Aside from those two things, you'll find that most experienced carvers will agree on the methodology for commissioning (or setting up) a gouge I think. And I've never seen one from the factory, no matter which factory, that was ready to go out of the package.
The first thing I did was to grind the end of the tool down so it is square with the axis of the handle. Sorry, I didn't think to take any "before" pics. I removed as little material as possible to get fresh steel on the whole face. Then I like to dye the tool up with machinists dye so I can see my progress as I work. This is especially valuable with gouges IMO.
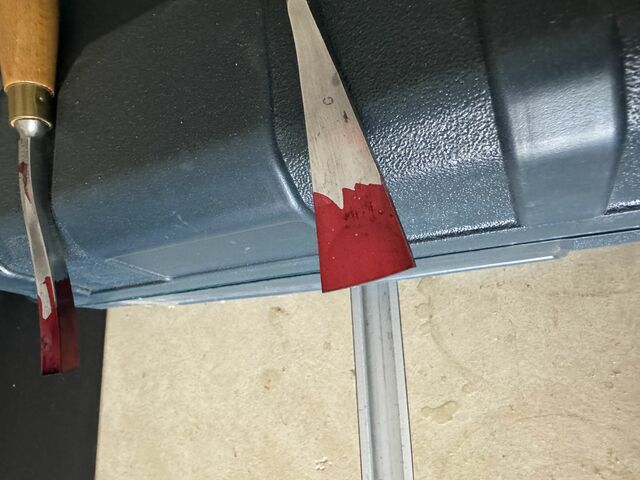
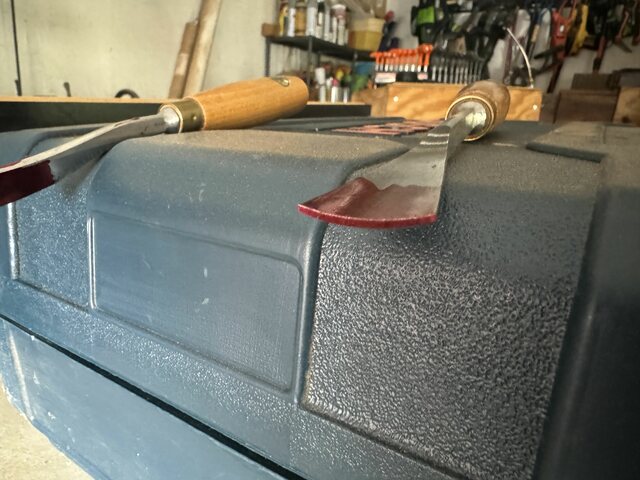
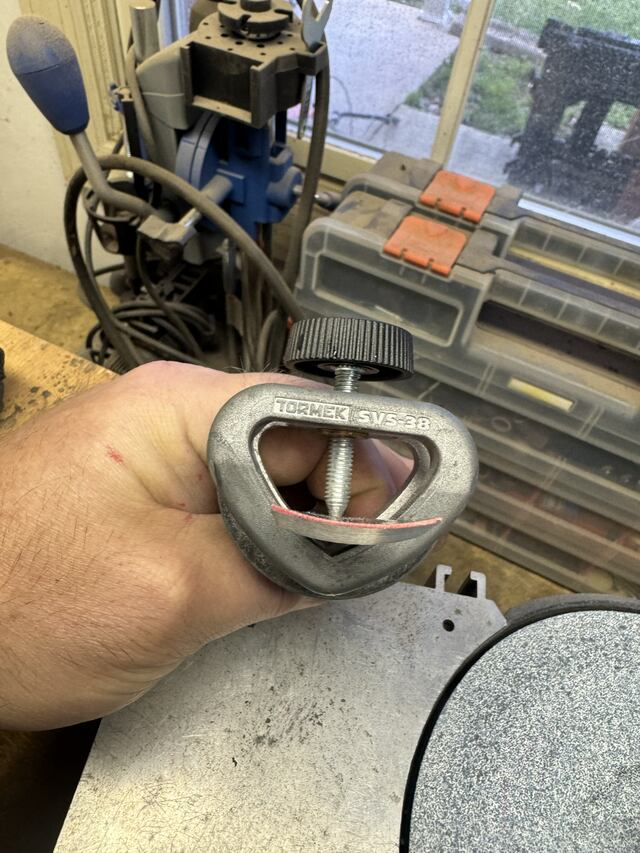
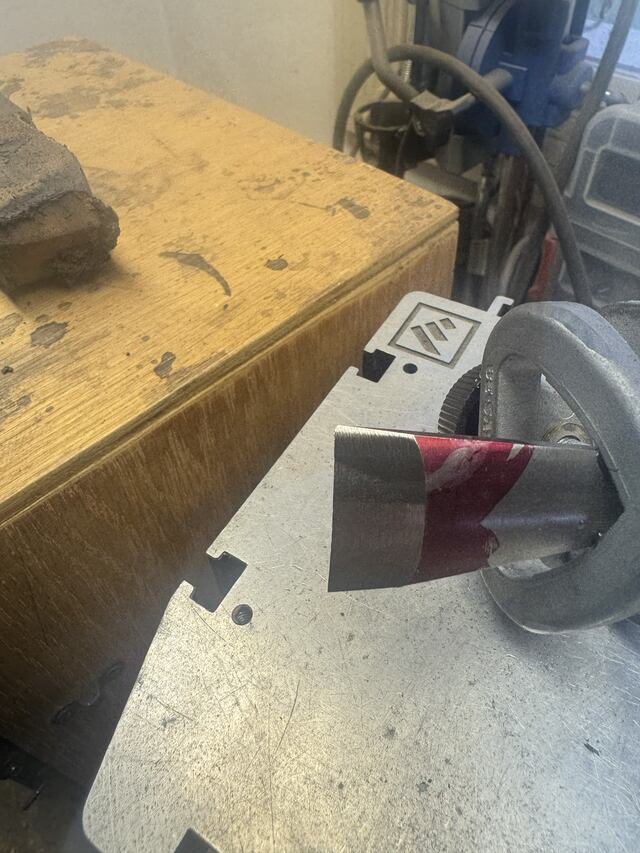
As you can see, there's a good bit of material I'll be removing here. My preferred tool for this is my Work Sharp 3000. It cuts slow and cool but much faster than diamonds. And I have an attachment for mine that allows me to use Tormek jigs which makes sharpening gouges pretty simple.
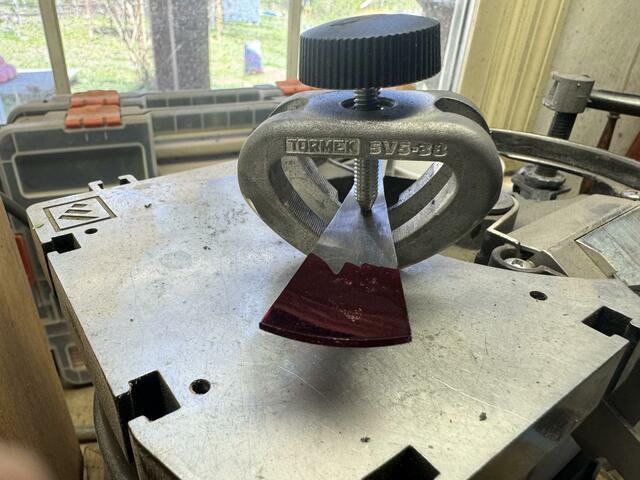
The jig straddles the bar of the attachment and let's me rotate it on the gouge section so it's pretty simple to work the whole edge evenly. One thing people ask often is "what angle should my bevel be?" Well for carving tools, the answer is pretty dang simple: whatever angle makes it comfortable for you to hold. For me, that is anywhere from about 12 degrees to 20 degrees. For this one I ended up around 17. I don't set the angle to a particular value. I just put the cutting edge on the abrasive and adjust the bar until my hands are in the position that I typically use when carving and lock it down. This is how I set up to attack this gouge.
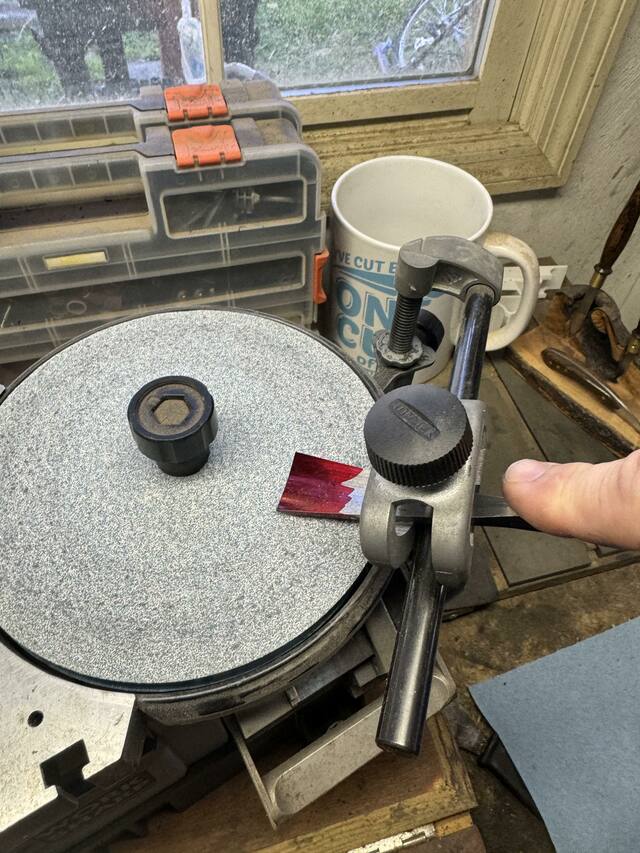
I start with 80 grit paper on the machine and work fairly quickly stopping to cool the tool occasionally and check the dye removal to make sure I'm removing material evenly across the whole edge. One thing I will note here is that I prefer to work by (a) setting one corner of the tool down until it makes contact, (b) rotating the tool all the way to the opposite corner (c) lifting the tool off the abrasive and (d) return to step a. My natural tendency is to set it down and start rolling it back and forth in both directions. The problem with that is that I end up removing metal faster from the center than on the edges because it's getting hit twice in each cycle and the corners only once. I've read two other approaches to compensate for this but neither worked as well for me as the method I described. The first is to start at the center and roll to the right. Then lift, go back to center and roll to the left. The second is to "dwell" on the corner for a couple seconds before you roll it back in the opposite direction. I just do what works for me. I will add that the tool is thicker in the center so it's okay to spend a little more time there but I prefer to try to remove material evenly until I get close to the final shape then modify my rotations to focus on the areas that need it.
After a few passes I stop and check my dye removal and make sure I'm removing material evenly on the back of the tool as well as on the end.

It's looking pretty good but there's a little more beef on one corner than on the rest so I spend some extra time there on the next several passes. I continue to grind with the 80 grit until my edge is down to about 1/32" wide and even all the way across.
At that point, I take the tool to my bench to add a back bevel. Not a big one and not a precise one. Only about 5 degrees or so and less than 1/8" long. I like to clamp the tool in a vise at the angle I want the back bevel to be and then just work it freehand with some sandpaper wrapped around a rounded piece of wood.
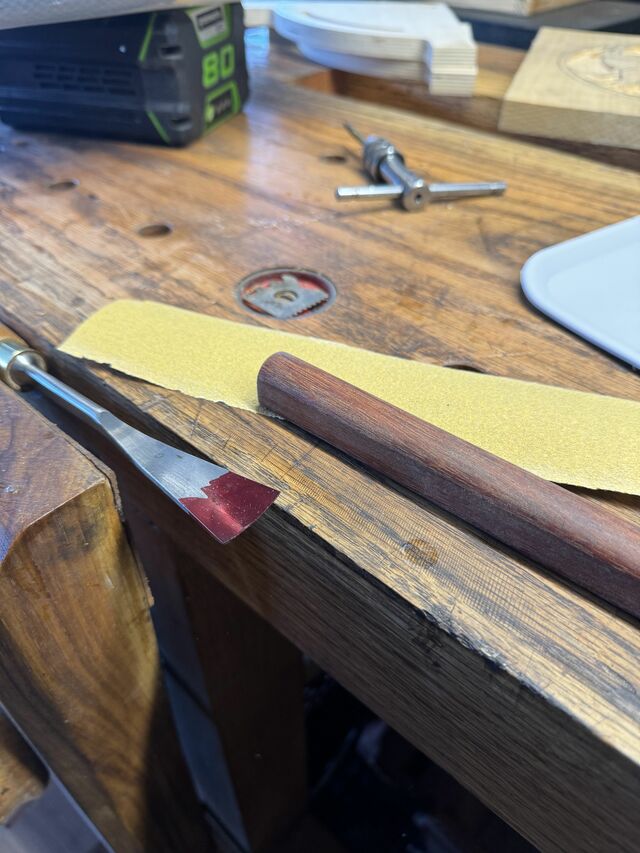
Several strokes with 120 grit and I'm satisfied with the size and angle.
Then I'll repeat with 220, 320 and 400 grit. Then I switch to slip stones to refine and polish it.
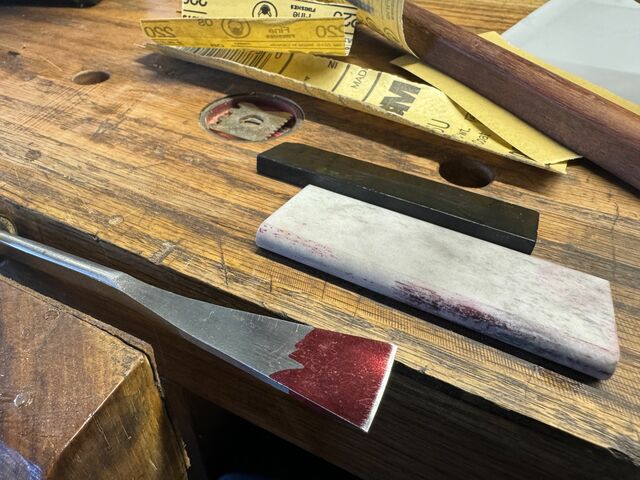
I'll further refine it with a leather strop and polishing compound but I wait and do that in conjunction with the bevel side.
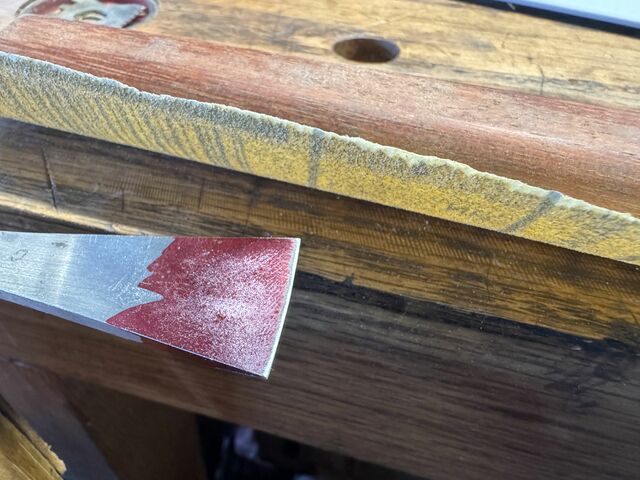
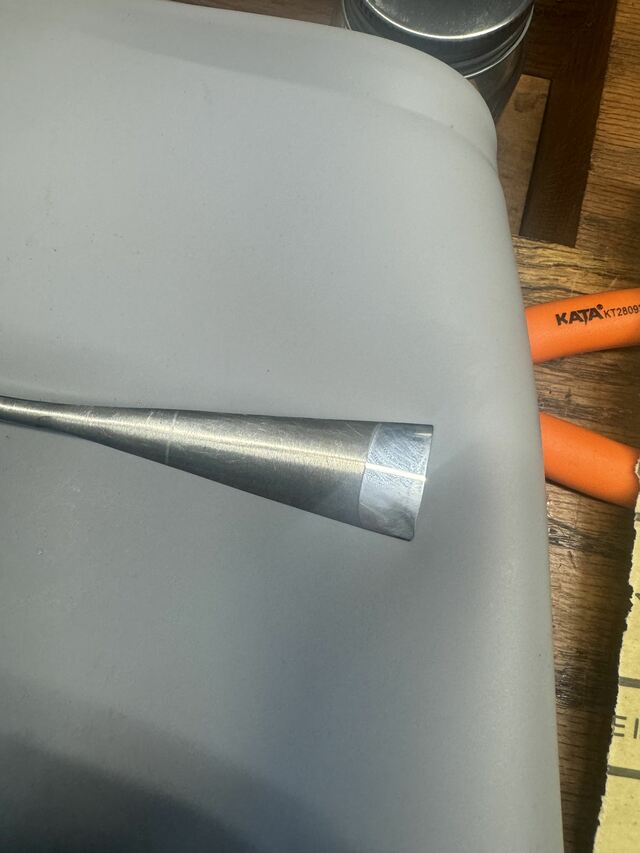
Now, back to the Worksharp and I have my bevel and back bevel set but I'm not to a sharp edge yet. So I switch to 120 grit and grind until I'm alllllmost there. I go until it feels like a sharpish edge and I can barely see any dye but haven't rolled up a burr yet. Then I switch to 220 grit to take it all the way. I go with 220 until I have a burr rolled up along the full edge. And that's where I got freaky with Fido.
It's not a huge deal and it certainly didn't warrant going back to step 1 but you can see that I slightly dubbed the corner on the top in the photo. Oh well, pobody's nerfect.
When I have the burr rolled evenly across the full edge, I work my way up through 400, 1000, 3600 and 6000 grits following the same process. The time with each of those is minimal because all I need to do is remove the scratch marks from the previous stage.
After that, I move on to stropping. I have a leather wheel for the Work Sharp that I use to polish up the outside bevel.
And a leather slipstrop I use to polish the inside bevel and I rinse and repeat until there is no wire edge remaining. Sorry but for some reason I didn't think to take any pictures of the stropping process.
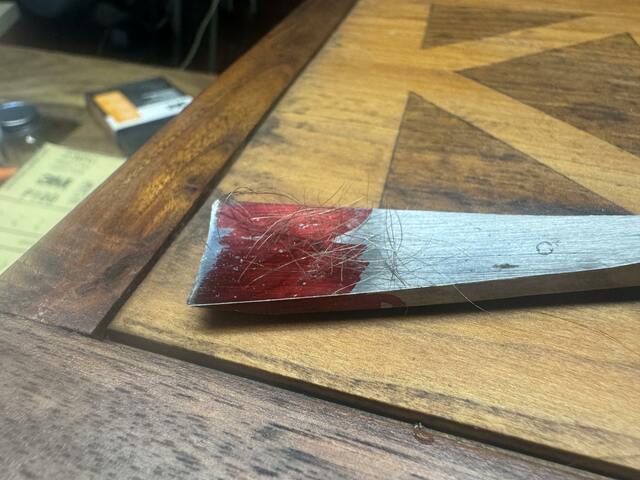
So when I'm done, I have a cutting edge that is razor sharp across the full length (ideally) including the corners. In this case, I lost one of the corners but for a gouge this size, I'm not really worried about it. For a carving tool, I want it razor sharp so I will run it lightly down my arm to make sure it will shave hair WITH the grain across the full width of the edge. Be careful, I've bled on more than one tool...
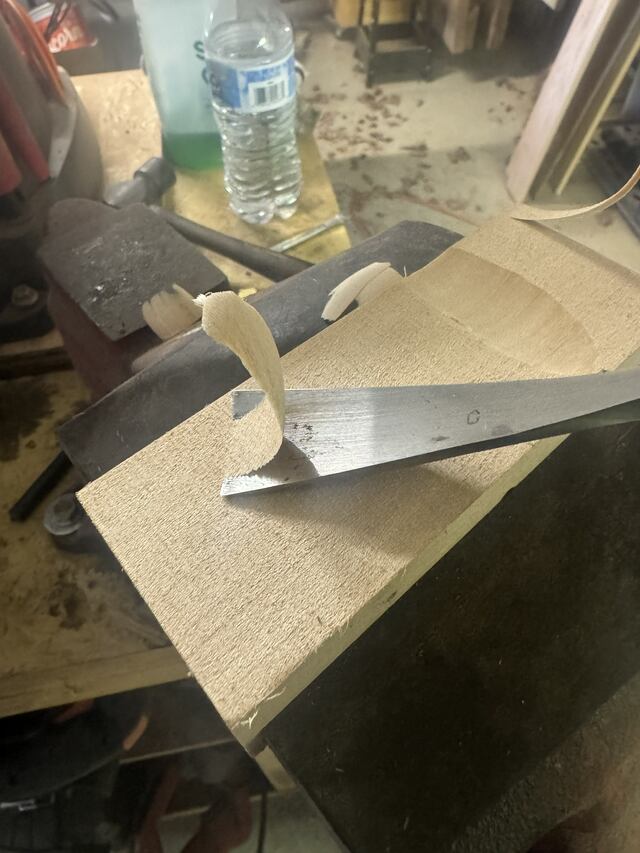
Next test is where the rubber meets the road. I test the edge on a piece of Basswood to make sure it cuts like I want in use and that the angle I set the bevel is at is comfortable for my carving stance. First with the bevel down.
It cuts through like butter. But then what about that inside bevel I spent time adding? Remember that one of the primary reasons for that bevel is to allow the tool to be flipped over and used like an incannel gouge? I test it on a corner of my test block:
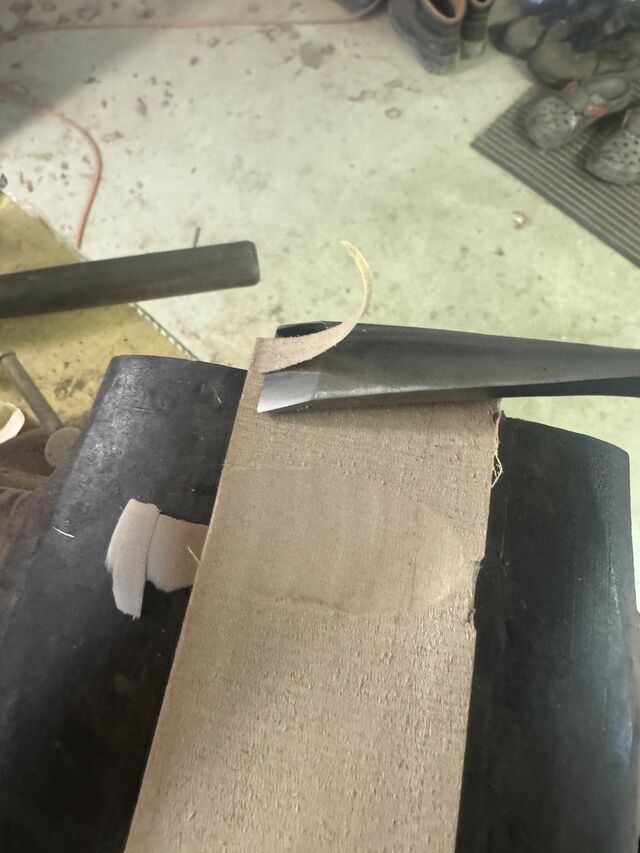
An easy, clean cut 😎 This one is ready to go in my carving box. From here on, I will maintain the edge solely by stropping unless I chip it or otherwise damage it. So it seems like a lot of tedious work to sharpen a tool like this, and it is. But the good news is that in most cases, I'll only have to do it once as long as I keep it stropped periodically during carving sessions.
So in review:
- The tool has been ground to have a bevel angle that is comfortable for ME. Every carving tool I have ever bought has had an angle that was much too steep. I suspect the manufacturers know that carvers are going to regrind the tool immediately so as a general rule, you can ignore the factory edge. It's most likely too steep and it's probably not sharp enough.
- I (tried to) maintain my corners. It's a little hard to do on some gouges but like I said, you'll probably only have to do this once and having the corners sharp for getting into odd places is worth the effort.
- I have an even, symmetric bevel. This is important because a tool with a bevel thicker on one side will want to pull to that side when carving.
- I have a small back bevel on the inside of the gouge. This allows me to refine that side of the cutting edge as needed and also expands the capabilities of the tool when carving. It doesn't need to be big but I like having it there.
- The tool is SHARP. Sharper than most tools need to be. But it does light duty in terms of material removal and you want it to leave crisp edges and a smooth bottom in your cuts. Torn fibers along the edges of your cuts or bumpy bottoms because you couldn't get it to glide smoothly through the stroke means you need to go back to your sharpening abrasives and refine it.
Now, if you don't have a Work Sharp, what then? Well the intents and methods are the same as presented above, just the processes differ. And with a large-ish gouge that requires much change to the bevel angle will be a long and tedious process but like I said, you only need to do it once.
For sharpening with stones or abrasive paper, the trickiest part is finding your angle and maintaining it. Fix your stone/plate to a bench or something that won't move in front of you with the long side running left-right. Preferably for me somewhere between your waist and bellybutton. Hold the handle of the gouge however it feels comfortable and controllable. with the bevel setting on the stone and your feet parallel to the stone. Now move the handle to where the angle of the tool to the stone is at the angle you want the tool at when carving. Generally this will be between 12 and 20 degrees. Maintaining that tool position, pull your elbows into your body and lock them and move your feet so you're holding the end of the tool close to your body. Lock your elbows and wrists and swing your hips side to side and move your forearms so the tool moves evenly from one edge to the opposite in one fluid motion and back to the beginning. Practice until you get the hang of it and check your bevel often to be sure you're getting consistent material removal all the way across. Rinse and repeat.
Sorry but that's the best way I can explain it. I use stones to shape smaller gouges because I don't want to burn them or round the edges on a powered sharpener so when the opportunity arises, I'll try to add an entry on doing one of these manually and see if I can explain it better. There are good tutorials and videos out there online that can show it better than I will ever be able to though. Chris Pye and Mary May are excellent teachers. Here is a good video from Mary May. Chris Pye monetizes his videos so they may be harder to find. I really like his teaching style though so if you are a new carver, I recommend joining his site that I linked earlier even just for a month if for no other reason than learning how to properly use, sharpen, and maintain your tools.
That's it for this installment. Questions and comments are welcome as always!
16 Comments

GREAT writeup!
I don't do any work with "curved" cutters (yet), but I gotta admire that holding fixture. I would be easy to make one for trial and slipping in a "roller" disc of different radii seems to be the dogs meow for getting the curves exact and consistent.
Are you sure that dye isn't really blood from previous carving with dull tools or the slaying of some intruder?

Of all the sharp edges I find carving tools to be the most difficult to get really good edges on, at least with consistency. I do believe this will change my approach going forward. Thank you for the complete pic post, it seems to cover a lot of bases.

I love this series - great information! I don't have a lot of experience sharpening hand tools, and I need to dedicate time to that. I've got a Tormek, so I don't really have an excuse. Thanks for sharing, Ken!
Splint, before I got that Tormek jig, I cut two pieces of angle iron and drilled and tapped them so they would sandwich the tool between them. Then I just used the legs of the bottom angle as a stop against the bar. It worked for gouges as well as skews. I still have it but I've picked up some Tormek jigs that leave it in the drawer most of the time.
Yeah George I feel your pain. It took me quite a lot of practice to get gouges to where I could get symmetric bevels and sharp corners. As you can see, even after doing 15 or so of them, I still don't have it down pat. And vee tools are even worse. That'll probably be the next post in this series 😉
Thanks Ross! In general, the Tormek should work great for most tools. It's one system I haven't tried but I know that most everyone that has one swears by it. I do really like their jigging system a lot.

Solid write up buddy. Thanks!
Ryan/// ~sigh~ I blew up another bowl. Moke told me "I made the inside bigger than the outside".

That Tormek jig is intriguing. I don't have need for that, though, in general. I do have a Pfeil #2/60 that I nicked on a screw I was holding a carving down with. 😵💫 I left it for now, but someday I'll grind it straight and resharpen.
I'm not keen on back bevels, tbh. I try to mostly cut "downhill" and take really thin shaving cuts if climbing.
I'll be interested in seeing what you do with v-tools. I have yet to trash an edge, so only use the FlexCut Slip Strop for them when they need a honing.
I'm not keen on back bevels, tbh. I try to mostly cut "downhill" and take really thin shaving cuts if climbing.
I'll be interested in seeing what you do with v-tools. I have yet to trash an edge, so only use the FlexCut Slip Strop for them when they need a honing.
The Other Steven
I can see both sides regarding back bevels DL. I have gouges without them and some with them and don’t really see any difference in how they cut. I’m generally dropping the bevel at least 5 degrees so adding a 5 degree back bevel leaves me with the same inclusive angle as the factory edge. Personally I prefer to cut cross grain when possible and downhill when I can’t. But there are always spots where uphill is the only option.


Great write up Hokie... and love the way of mixing the Work Sharp 3000 & Tormek jigs.
While I swear by my Tormek, (for sharpening/honing) I swear at it when it comes to reshaping... it's a bugga and I usually resort to my grinder... carefully... not to anneal the metal... unless the mongrel cuts me.
If your first cut is too short... Take the second cut from the longer end... LBD
unless the mongrel cuts me.
You can regrind a gouge without getting cut??!? 😳 I didn’t even know that was possible….
Ryan/// ~sigh~ I blew up another bowl. Moke told me "I made the inside bigger than the outside".

Great description, Kenny!
FWIW, I have just a few gouges, the number 11s (a u-shaped profile, aka, a veiner) in which I intentionally dub the corners. I use them for bead and barrel moulding, and part of the technique there is rocking the veiner up to cut the ends of the barrels. If the gouge has sharp pointy corners, you end up with unsightly marks down in the bottom of the groove, which is not groovy.
FWIW, I have just a few gouges, the number 11s (a u-shaped profile, aka, a veiner) in which I intentionally dub the corners. I use them for bead and barrel moulding, and part of the technique there is rocking the veiner up to cut the ends of the barrels. If the gouge has sharp pointy corners, you end up with unsightly marks down in the bottom of the groove, which is not groovy.
May you have the day you deserve!
There are definitely situations where I can see rounding the corners as an advantage Dave. I have a couple of veiners but they are still in my to-be-commissioned pile of tools so I haven't come around to figuring out how to sharpen them yet. I certainly see the need to do so for something like moulding though.

Well for carving tools, the answer is pretty dang simple: whatever angle makes it comfortable for you to hold.
Agree 100% with that statement.
I don't set the angle to a particular value. I just put the cutting edge on the abrasive and adjust the bar until my hands are in the position that I typically use when carving and lock it down.
Agree 100% with that statement too. Great minds and all that.
Andy -- Old Chinese proverb say: If you think something can't be done, don't interrupt man who is doing it.

Kenny, what is the diameter of the toolrest of the Tormek attachment you have for the WS3000? Just wondering if it is the same diameter as the standard tool rest that comes with the WS3000? I finally found a good deal on a WS and am looking for jigs. If the Short gouge jig will work with the standard tool rest, that looks like it could be a good solution; otherwise, I may have to find or design one I can 3D print.
--Nathan, TX. Hire the lazy man. He may not do as much work but that's because he will find a better way.
IIRC it’s 12.5mm Nathan. The WS one is the same as whatever the Tormek bar is. I think the short gouge jig will probably work with anything close though since it doesn’t actually slide over the bar. I have the original toolrest at home so I can check tonight and verify.
FYI, Tormek has a kit to attach their bar to any angle grinder that could pretty easily be fit to the WS. If the short angle jig is the only tormek jig you’re interested in though, I don’t believe it’s necessary.
If I were you, I’d start looking at making a table for it unless you got lucky enough for yours to have one. The table makes a world of difference for planes.
YOU SUCK
The standard tool rest on mine appears to be 12.54 mm.
Yeah, a table is on my list. I need to get some pictures of how the one that they used to sell is attached. The only obvious attachments are where the tool rest slides in. Probably why most make the table part of the cabinet.
Yeah, a table is on my list. I need to get some pictures of how the one that they used to sell is attached. The only obvious attachments are where the tool rest slides in. Probably why most make the table part of the cabinet.
--Nathan, TX. Hire the lazy man. He may not do as much work but that's because he will find a better way.
I'll consolidate responses the the other thread Nathan.