Share your craft projects
Make new craft buddies
Ask craft questions
Blog your craft journey
Karson
42 posts
and
5 followers
in almost 12 years
in almost 12 years
More from Karson
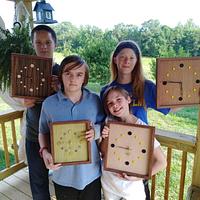
"Cuzns" making Clocks
As usually happens at our home, when school vacations come around then the children are sent to the grandparents home for a time so that the parents can unwind. This week my eldest daughter’s twins came to spend 2 weeks with us and another daughter’s children. My three daughters were all pregnant at the same time so the “cuzns” are close to the same age. They spend the night at one of the daughters farm home and then the grandmother gets to figure out what they do during the day.
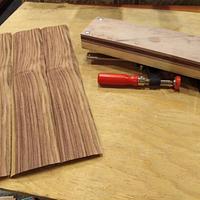
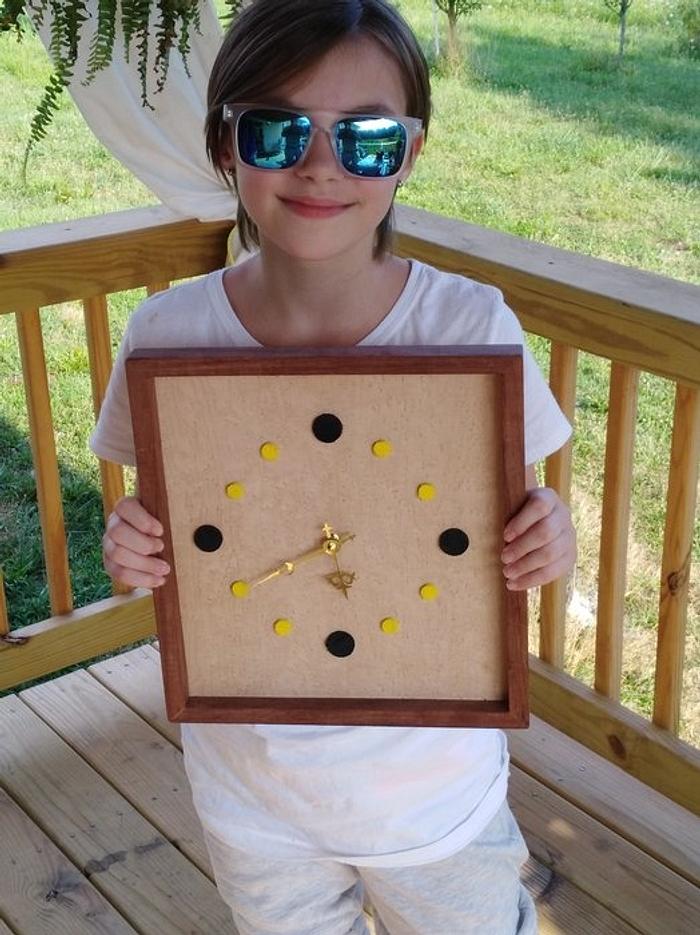
I see the four of them lounging in front of the television or reading a book or playing the video games. My veneering setup was scattered around the basement and I suggested that they might want to make a clock to hang in their room, Three of them were all in, the fourth agreed reluctantly. I had a box of cutoff veneers that I had purchased about 15 years ago that I had found a few weeks ago so they started going through the box to select the veneer for the face of the clock. One selected Birdseye Maple, another very striking Zebrawood, one a green dyed Maple or Popular. The forth is an unknown veneer but a very beautiful medium to dark brown with an iridescent glow but not chatoyance by grain movement.
Three of the selections needed to be taped together to get the required size. So they got to see how to bookmatch veneers and to tape them together. I used a 2’ X 4’ sheet of 1/4” plywood from the bigbox lumber store for the substrate for the clock. The back was Elm veneer that needed to be cut to length and book matched. I set up a 3’ X 5’ veneer bag on the end of a bumper pool table and another piece of ¾ plywood to be a taping and gluing station. So one child would tape and then glue the face veneer on their substrate and put it in the veneer bag. We would then turn on the veneer pump to help hold the veneered panel stationary while the second child did the taping and gluing. Then child three and four. Then it was back to the television for a couple of hours. I spent the time get the backing cut to size.
After 2 hours the veneer pieces came out of the bag to have the backs taped, glued in place and back into the bag. The children then went back to my daughter’s for the night. After 4 hours being pressed in the bag I took the veneered pieces out I took some random orbital sandpaper (220 grit) and a sander and some disks made from a 1/2” and 3/4” dowel for the number placement on the clock face. I went to my daughters with some homework for the kids. They then sanded their clock faces and painted the dowel disks for the clock face.
I went to the shop to select some wood for the face frames for the clock. I found a nice piece of Granadillo 7/8” thick and about 5” wide. I cut 5/8” slices and got 8 slices out of the piece. They were about 30 inches long. I then cut an approx 5/16” rabbet the full length of each piece for the clock face to fit into.
Next day we trimmed all of the glued panels to make them square or rectangle ready to be placed into their frame. They ran the miter fence for square edge and fence alignment for parallel edges. They pushed the veneered panels through the saw. After a day at the movies they show back up to my place to eat and sit in front of the tv again.
I set up the chop saw to cut the shadow box frames. I held and moved the wood while they ran the chop saw. They glued them up and glued in the clock faces. After drying they sanded the frames and filled in any gaps at the joints.
Installed the clock motors and the hands of their choice, White, Black or Gold. They then took them back to my daughters and glued on the hour identifiers.
They were all pleased with the results. And so were the families.
Wood is good
1 Comment
Outstanding! Those are a great looking group of children and the clocks are very good. The time spent with them engaged in a project with their grand parent will not be forgotten and such memories are beyond measure, cherish the time together.
-- Soli Deo gloria! ( To God alone be the Glory)


