1920's Display Cabinet

785
12
Last year a good friend who knows I do woodworking asked if I could repair a cabinet his grandfather had made in the 1920's. Sight unseen I accepted the project. I received it in a large plastic bag with a number of broken pieces loose in the bottom. This was not a repair but a rebuild. It sat in my shop for a few weeks while I considered the ramifications of re-making this heirloom cabinet. We all know that the builders imperfections are part of the character of their projects. After a time I realized that in the condition it was in it could never be displayed and would eventually be discarded. With that to fortify me I finished it's disassembly, sanded what was salvageable and patterned new parts from what could not. Originally assembled with steel brads, this time all joints would be poly glued together. Construction was spread out over a week so parts could be stained and finished prior to the next stage of assembly. It was a clamp intensive project as you can imagine. I squared up and tightened all the joints and remade only a handful of pieces. Even sanded and saved the drawer pulls. Applied a dark stain as original for a satin finish. My trepidation was completely unfounded as the owner was overjoyed with the returned cabinet and I was rewarded with a 400 year old piece of mesquite that he had salvaged years ago on a hike in the desert. I turned him a wood carvers mallet from it but that is another post.

Some of my most creative moments have been when I've had to cover up an error in my woodworking.

12 Comments

yeah i agree. nice one joe.

working with my hands is a joy,it gives me a sense of fulfillment,somthing so many seek and so few find.-SAM MALOOF.

That definitely has an Escher thing going on. Nice!
Cool snowflake, I see it too.

Have to say to much for my mind this evening. Started my next project that I want to build. Lofting off a table of offsets currently, works on the brain for sure.

Main Street to the Mountains

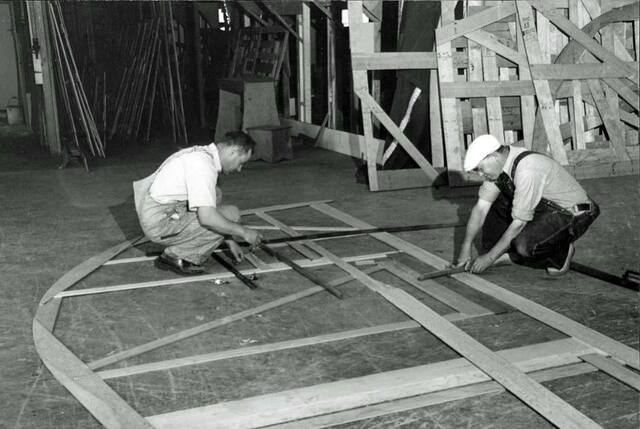
You're speaking my language Eric. Our big loft was 60' X 250'. With a table of offsets we developed patterns and full sized templates for every part of the vessels we were building. Sadly all gone now.


Some of my most creative moments have been when I've had to cover up an error in my woodworking.

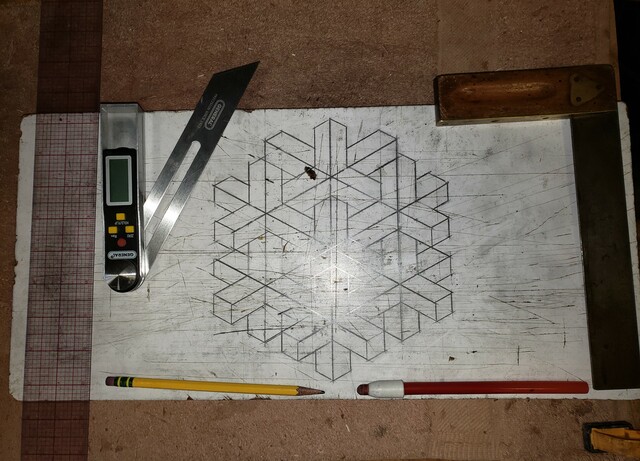
I did a model years ago, that I had scaled down using a table of offsets. At the time I thought this is easy, now trying to do it again, I struggled a bit, but it is slowly coming back. Not as big as what's in the photo. I do like the old school methods. 

Main Street to the Mountains

Damn SJ, I wanna know more! What are the thickness and maybe a tad more construction pics.... or is it a secret?

SWMBO cannot be questioned!

Cheap and woodwortking in the same sentenc is an oxymoron!

This is the only other pic for this one. Draw it, build it, erase it and do another. All of my builds are made from 1/2"X1/2" material. Hard maple, domestic cherry and black walnut.

Some of my most creative moments have been when I've had to cover up an error in my woodworking.

Nice, I gives me double vision if I look too long. LOL!

-- Paul--- Creativity is allowing yourself to make mistakes. Art is knowing which ones to keep. — Scott Adams

Thx SJ.

Cheap and woodwortking in the same sentenc is an oxymoron!

These are all really cool! Forgive my density-are these inlay or 3D? 

Steven- Random Orbital Nailer

Forced perspective 3D.

Some of my most creative moments have been when I've had to cover up an error in my woodworking.