Wheaties - Bruce A Wheatcroft ( BAW Woodworking)
in about 11 years
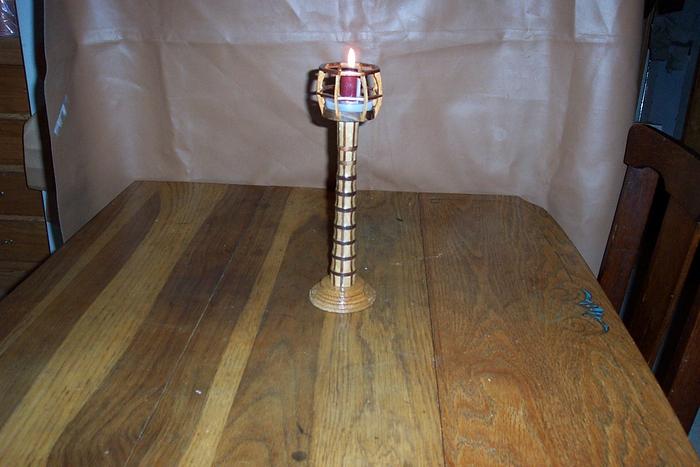
Lighthouse candle holder
Well this projects looks a lot easier than it was . First of all it is not layered . I started with a piece of catalpa wood in the lath. I tapered it from 2" to about 1". Then I made I made 8 equally spaced marks on the 2" end. Then I made 8 grooves the length of the pc on the table saw . I then put it back in the lathe where it was weeks to finish . First step was to cut grooves in the stem . I then used 2 different size hole saws to make rings out of walnut . After making the rings I broke them in half , inserted them into the grooves with glue and used hose clamps to shove them into the groove and dry over night. Once I got all the rings in place I had to had cut walnut pieces to fit between each groove . 8 pieces for each one . Once all that dried I lathed the shape I wanted . Then I made the base out of red oak. I cut a hole in the center of the base about 10 thousands smaller than the diameter of the stem . Glued and installed the stem . Next I did the same with the base for the top. Then I cut 8 pieces for the uprights for the crows nest . Next step was to cut and glue the horizontal pieces in place . Using a small piece of square stock to hold them at the right height , I could only do 2 a day .The top rail sits on top of the vertical pieces so I installed 2 of them each day and used a small piece of wood and a 3" screw to clamp them in place .After everything was dry I sanded and shaped the crows nest and then used spray polyurethane for the finish . All total there is 96 pcs of red oak, catapla , walnut and oak in this project.
Wheaties
6 Comments
Very cool
woodworking classes, custom furniture maker
Looking Good!
-- Soli Deo gloria! ( To God alone be the Glory)
Turned out nice and yes slowly building up the column and top takes time
I know that from making laminated rolling pins .
Klaus
really great looking
Nice job. That’s a lot of work. Very creative too.
Losing fingers since 1969
Now my wife tells me she once another one exactly the same . Soooo here we go again .
Wheaties


