


Share your craft projects
Make new craft buddies
Ask craft questions
Blog your craft journey
Horologist
17 posts
and
5 followers
in over 12 years
in over 12 years
More from Horologist

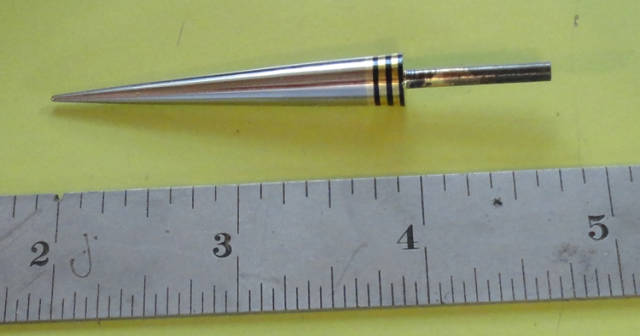
Sewing Stiletto - Awl


In our family we have a tradition, you draw a person’s name and you have to make them a gift.
Alas, the procrastination gene is strong in my family so typically these gifts are assembled in the days just before Christmas and have been the source of late night project frenzies Christmas Eve.
I really did intend to start this one earlier but things got hectic at work, for the last two months I’ve had very little shop time and of course, everything always takes longer than you think it will.
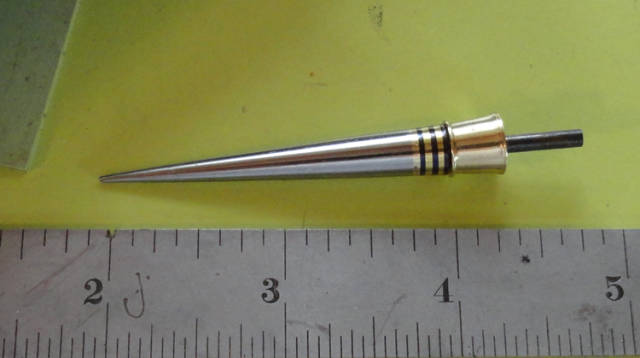
Cathy had purchased a stiletto, a low quality import, and as you can see it wasn’t too durable.

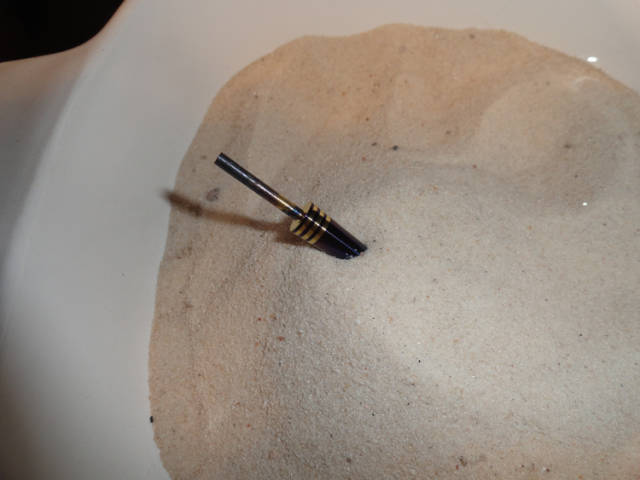
It did serve as a reference though. The tip must be sharp, but not too sharp, and apparently this one had a suitable point. I guess these things are used to poke holes in fabric or even leather and to shift stitches in knitting. If the point is too sharp it can damage the fibers.
Day 1
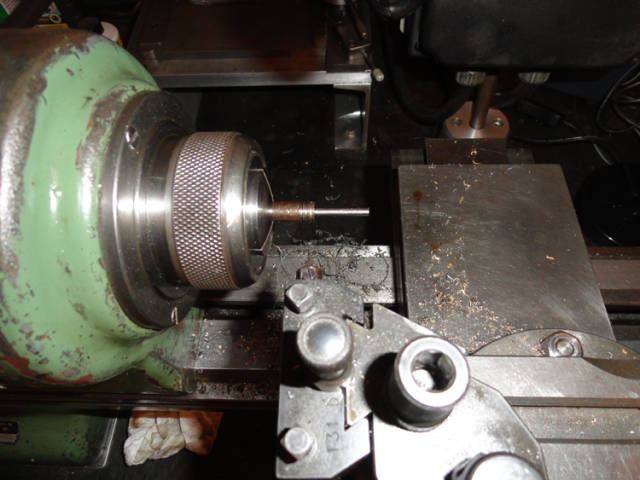
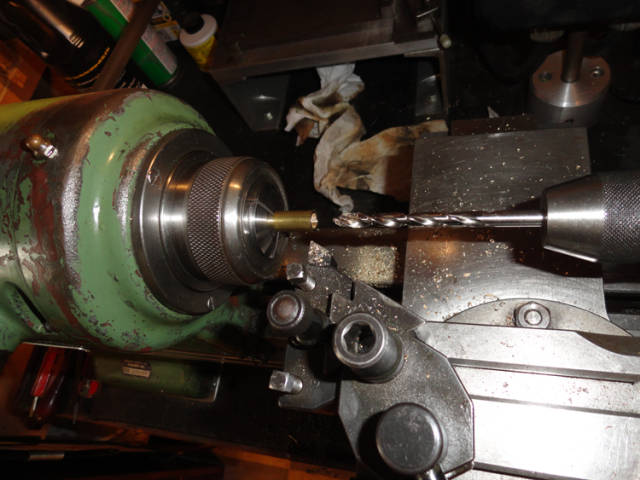
Start with some O1 drill rod.
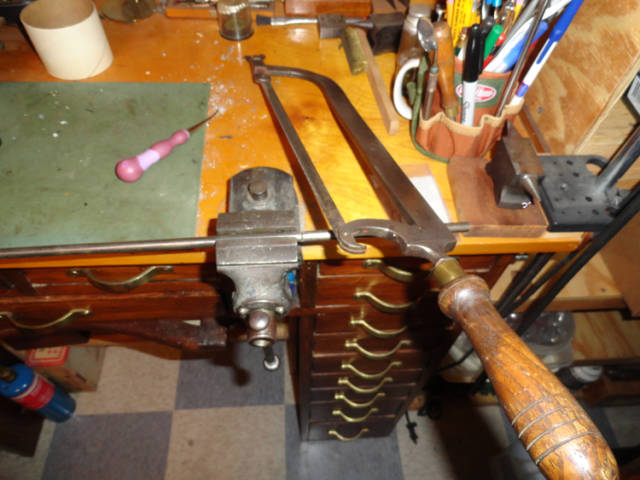
I cut the shank and then the three grooves for the brass rings.
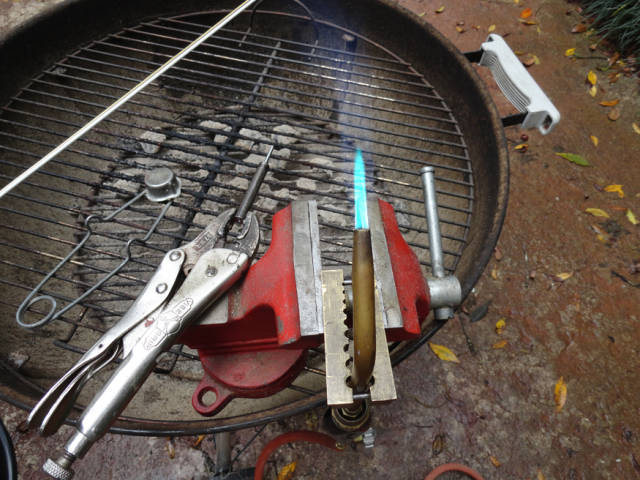
I have no experience with brazing or welding but watched someone braze a broken clock part for me once. It seemed like it might be possible to create brass inlays with this method.
The brazing studio.
There are things I would do differently, first I would use the plain rod instead of the rod coated with flux. Current theory is that the flux is the source of the pockets in the brass which were exposed later on. Second, I would perform the brazing operation before turning the shank portion down. It got hot enough that it slumped and made subsequent turning operations more difficult.
Next is back to the lathe to cut the taper. Sorry no photo, thought I took one but suppose it isn’t all that necessary. I turned and polished the taper and then blued it to get the color for the rings. I did experiment to see if I could use the cold blue liquid on a scrap, as expected the color was flat and more black than blue. When rebluing clock screws I like to use a laboratory hot plate that I can set to a precise temperature and cook while I do something else. This technique produces a much more uniform color and is a lot easier than more traditional methods. I had hoped to be further along at this point but call it a night.
Day 2
Christmas Eve, and a new wrinkle to the tradition is that we open the handmade gifts after dinner on Christmas Eve and I am a long way from completing this thing. The blade goes back in the lathe and I carefully polish away the bulk of the blue leaving the bands between the brass rings.
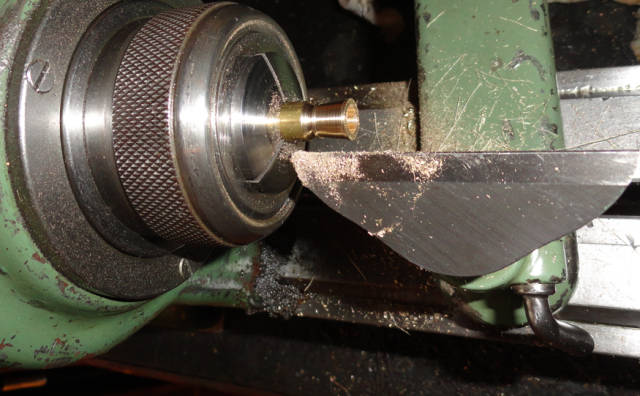
I had purchased some brass tubing to make ferrules for handles, but on examining the tubes I realized that they were too small. They have some larger diameters at Ace hardware but I didn’t want to take the time to drive there and hate to shop anywhere on Christmas Eve as it only encourages places to open on the holidays. Instead I chucked a scrap of brass in the lathe and made a ferrule, this proved to be an advantage later on.
First I drilled a pilot hole for the blade shank and then I opened a portion up for the handle.
Next install the T rest and shape the outside of the ferrule, turning metal this way isn’t much different than turning wood.
A little polishing and that makes two out of three components.
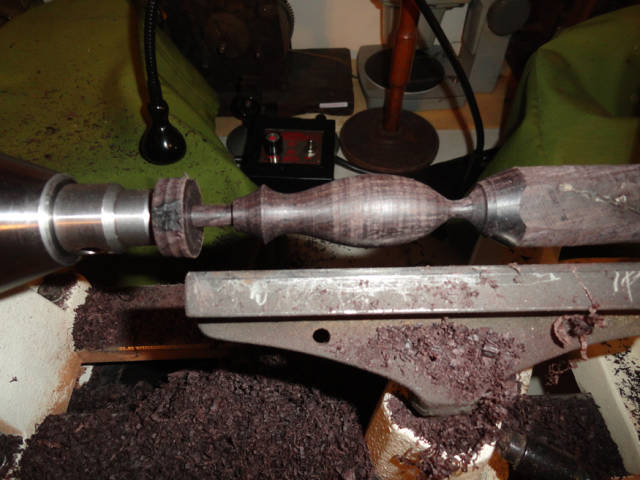
Finally the handle, an African blackwood pen blank. I started by turning the portion that goes into the ferrule to the correct diameter. This wood has turning properties similar to ebony and I was able to get a very close fit with the ferrule.
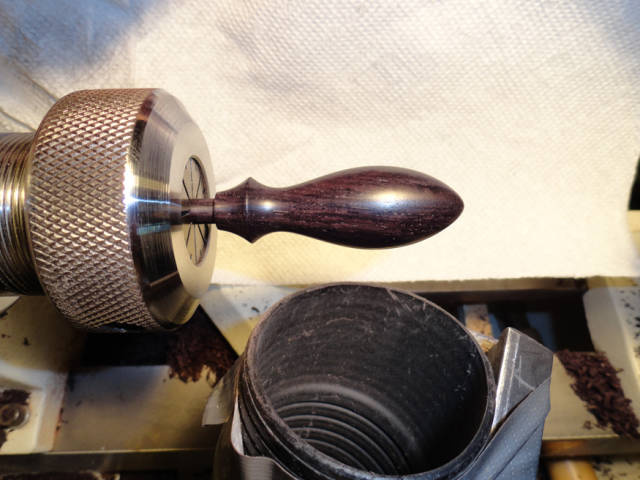
Once shaped, it is time to put the handle in the collet chuck, clean up the end, and sand. The handle is now ready for finishing. I used Liberon Woodturners’ Lathe Polish, great stuff, looks nice and dries quickly.
While making the handle I was too pressed for time to take many photographs. There were a couple of hiccups. I had planned on using a hollow tailstock center to permit drilling the hole for the shank but this didn’t work out. Instead I used the ferrule as a drill block and placed the end of the handle in the tailstock hole as a guide. The hole for the shank needed to be very precisely on the axis of the handle or there would be gaps. Speaking of gaps, I failed to get the shoulder on the handle perfectly square so there was a gap between the ferrule and the handle and it was no longer possible to mount the handle in the lathe. Instead I wrapped the ferrule in a layer of duct tape and put it back in the lathe to undercut the rim.
To assemble I used liquid hide glue since it is reversible and I wasn’t sure if I was going to have to make any modifications.
Finished at about 4 pm with just enough time to take a shower and head into town!
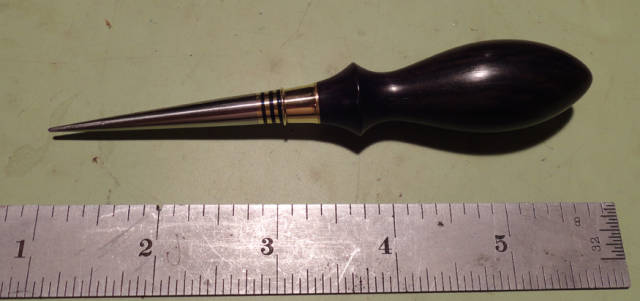
Merry Christmas.
— Troy in Melrose, Florida
Troy in Melrose Florida
3 Comments

What a wonderful hand made (heirloom) tool.
You do like to cut it close don’t you Troy.
Merry Christmas.
The early bird gets the worm but its the second mouse that gets the cheese.

Absolutely awesome tool. Is even better when it’s hand made but this is a work of art as well.
CHRIS, Charlottetown PEI Canada. Anytime you can repurpose, reuse, or recycle, everyone wins!

Wonderful work,thanks for the great photo work up.
woodworking classes, custom furniture maker
More from Horologist