


Share your craft projects
Make new craft buddies
Ask craft questions
Blog your craft journey

Peepaw
64 posts
and
9 followers
in over 11 years
in over 11 years
More from Peepaw


Baby Rattle


Of all the toys I have made, these baby rattles are perhaps the most fun. Each rattle is made from five 1/8 wooden planks. This project os small enough to allow me to use scraps and cut offs.
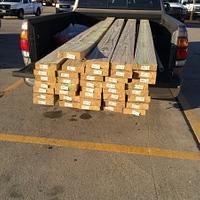
Step 1. Cherry, maple, walnut and other fruitwoods are re-sawn and planed to thickness.
Step 2. Three of rhe pieces are glued in alternating species and dried.
Step 3. A 1-5/8 inch hole is drilled through all 3 pieces.
Step 4. The final two pieces are glued and prepared for clamping. Prior to clamping the cavity created by the hole has a small amount of seeds installed to make the sound. (I have experimented with popcorn, rice, dried peas, and smaller seeds such as celery seed. The small seeds produce a soft soothing sound while popcorn produces a louder playful sound.)
Step 5. Each stacked blank is cut to a rough shape on my band saw and prepared to be turned on the lathe.
Step 6. The fun part. The final shape is achieved by turning them on the lathe. I allow the wood to speak to me. I have no planned concept when I start. I will caution you to be careful. The blanks are 5/8 × 2-1/2 inches and starting slow is essential.
Step 7. The rattle is sanded while on the lathe using 320 grit and finished with a blend of beeswax and food grade oil to achieve a splinter free, baby safe surface.
I offer clients the option fof laser engraving with D.O.B., Name, or Monogram and a keepsake matching box.
To date I have made more than 26 rattles with no two the same.
The real joy comes from receiving photos of happy babies with rattle in hand.
RFloydWright
12 Comments
They look so nice i would almost hate letting my kids play with them, they look like show pieces, not toys.

Beautiful. These are surely heirlooms. I am liking everything you make, fantastic skills!
CHRIS, Charlottetown PEI Canada. Anytime you can repurpose, reuse, or recycle, everyone wins!
Very nice, great job
Thanks for the complements. I’m enjoying seeing snd hearing about everyone’s projects and techniques. I’ll never be too old to learn.
RFloydWright

That’s a great idea! I’m going to start one tonight for my 9 month old.
Losing fingers since 1969
Good luck Brian, I’m happy to answer any questions you might have
RFloydWright
Thanks for the offer to help because I’m in need now. :-) I started it today. Got it glued up and roughed out on the bandsaw. I used popcorn. Thanks for that tip! It sounds great.
Now here’s the question: I would like to paint it with oil enamel. Is that baby safe?
Losing fingers since 1969
Sorry Brian but I can’t help with that one. All my child toys are nontoxic woods and only food grade finishes. I don’t use paint.
RFloydWright
I did a little research. I’m going to try dewaxed shellac with some food coloring to tint it.
Losing fingers since 1969
Here it is. Super simple. I used a reclaimed leg from a dismantled coffee table. I think it’s poplar. Very boring stuff for a project like this. I don’t have a lathe so I had to shape the handle with my sander after roughing it on the bandsaw. It kind of looks like a chicken leg because of that. LOL! The finish is zinsser seal coat (dewaxed shellac) with food coloring to tint. It’s smooth and safe for baby’s mouth.
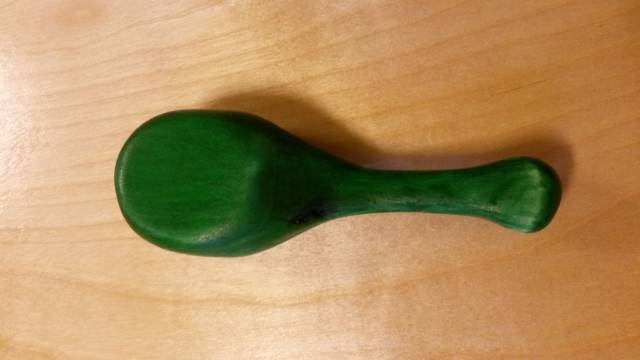
It didn’t take long to make. Maybe an hour and a half altogether. I think I want to make another one that looks nicer like yours. I have some oak and maple. And I will burn in my sons name or initials too. That’s a nice touch that you put on yours.
Well, thanks for the inspiration. You kind of unleashed a monster I think. :-)
Losing fingers since 1969
Brian, I’m glad you enjoyed making the rattle. Pretty good job right out of the gate. I made a few trial and error versions before I got the look i wanted.
Just don’t let that monster get too out of hand. Keep me posted.
RFloydWright

A very cool idea.
woodworking classes, custom furniture maker
More from Peepaw