


Share your craft projects
Make new craft buddies
Ask craft questions
Blog your craft journey

retired_guru_tech
67 posts
and
1 follower
in about 11 years
in about 11 years
More from retired_guru_tech
Woodworking on a Half-Shoestring #7: Refurbing a Harbor Freight Folding Trailer - Pre-Blog Inquiry
Woodworking on a Half-Shoestring #5: Powertec USA - USPS Resolved
Woodworking on a Half-Shoestring #4: Seeds for Insanity: Sorting Screws, Bolts, Nuts, Washers...
Woodworking on a Half-Shoestring #3: Making Progress: Breathe..
Woodworking on a Half-Shoestring #2: The Future in the Fast Lane
Woodworking on a Half-Shoestring #6: Creamer and Sugar Bowl Carrier - Build Progress
This is
part 6
in a
7 part
series:
Woodworking on a Half-Shoestring
...
-
Powertec USA - USPS Resolved
-
Creamer and Sugar Bowl Carrier - Build Progress
-
Refurbing a Harbor Freight Folding Trailer - Pre-Blog Inquiry
...
- Powertec USA - USPS Resolved
- Creamer and Sugar Bowl Carrier - Build Progress
- Refurbing a Harbor Freight Folding Trailer - Pre-Blog Inquiry
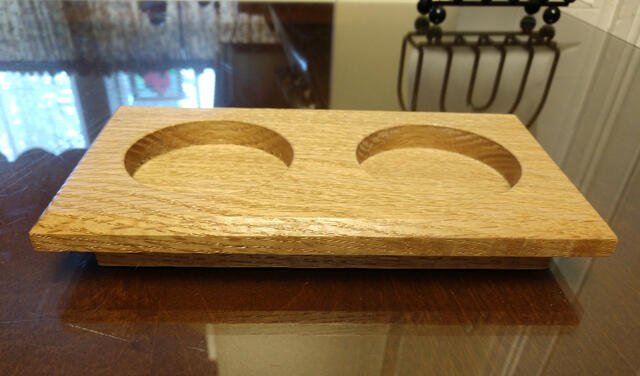
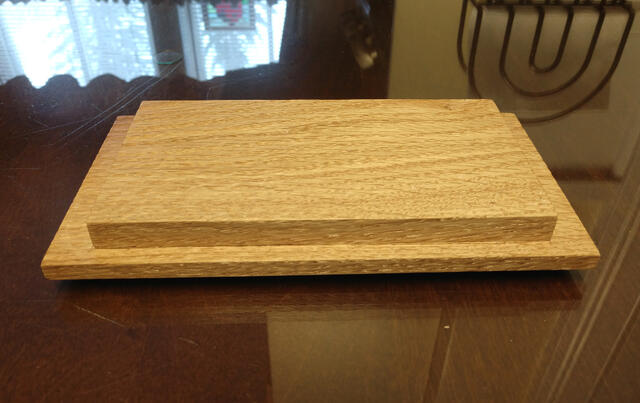
With the workshop mostly reorganized, I’ve started to get at projects already started and on my To-Do list. A simple project I had been putting off was a small carrier for our Nortake creamer and sugar bowl set. The design is similar to the one used in the salt and pepper mill carrier I made a few years back.
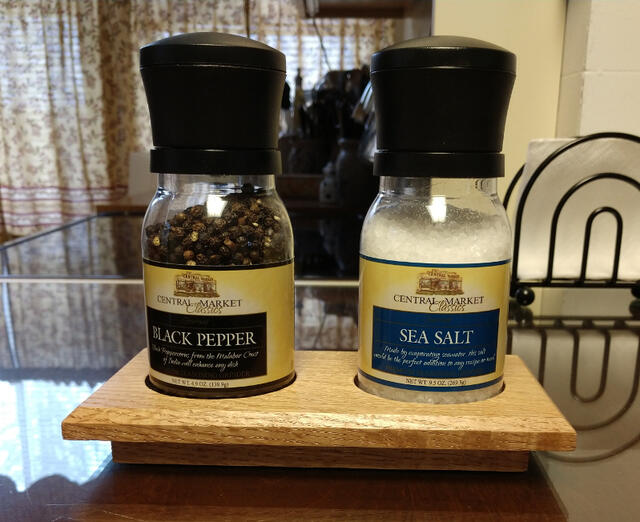
The design incorporates two different size boards glue together to give the top ledge look, which also simplifies the build process by using a hole in the top board to create a recess once the boards are laminated together. I’ve included the salt and pepper mill carrier pics. Both carriers will be side-by-side on our kitchen table.
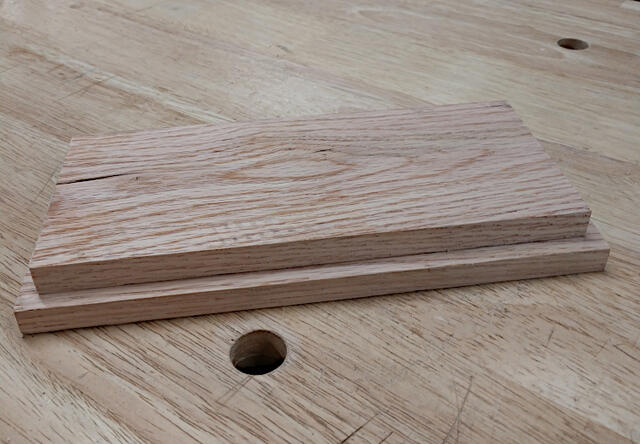
I used red oak for this project, to match the wood used in the salt and pepper mill carrier. As with the previous project, the oak is from a pallet I deconstructed a few years back.
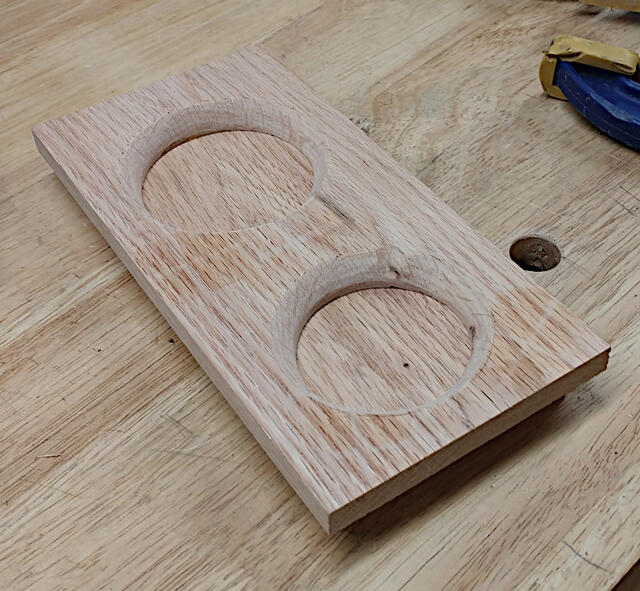
The holes made in the top board were of two different dimensions, both larger than the largest Forstner bit I owned. I bored a couple of holes large enough for a clean-cut jigsaw blade to fit and removed the waste accordingly. A little time on the oscillating sander cleaned up the circumferences.
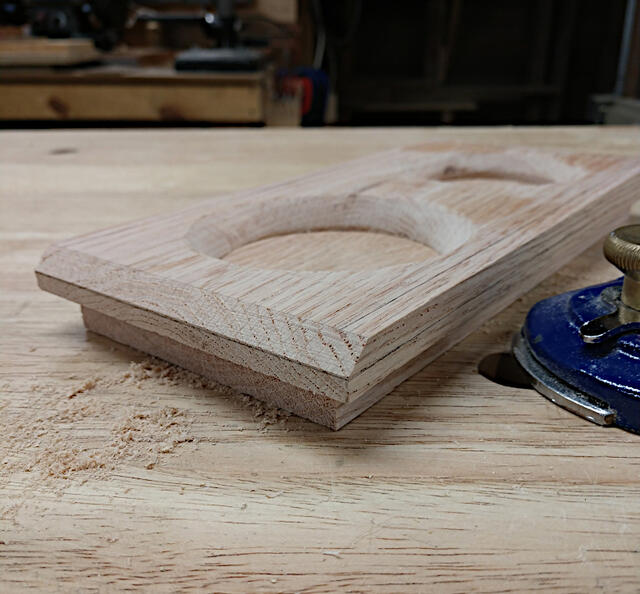
It was at this point in the construction that I realized I didn’t prepare for the chamfering of the holes to accommodate the sloped bottoms of the creamer and sugar bowl. There were only two options that made sense: 1) make a router template and use a trim router with a top bearing 45 degree bit to bevel the holes, 2) mark the dimensions for the chamfers and remove the waste with a rasp. I opted to use the rasp. I added a small indent for the creamer handle. When finished, the boards were joined with Titebond I PVA glue.
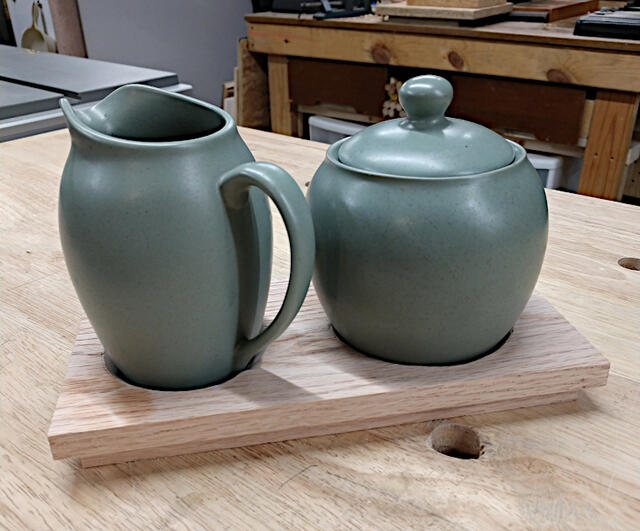
A pretty good fit. Should be just enough play to deal with humidity changes in the kitchen.
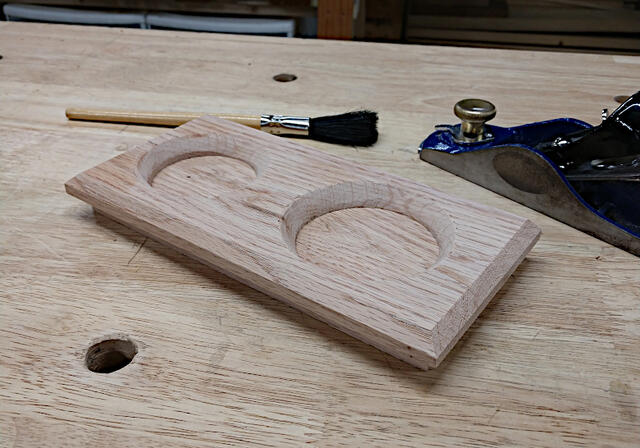
As long as the router was being shunned, I decided to use a block plane to create the 45 degree chamfers on the top edges. I knocked off the opposing corners before skewing the block plane across both ends to eliminate blow out.
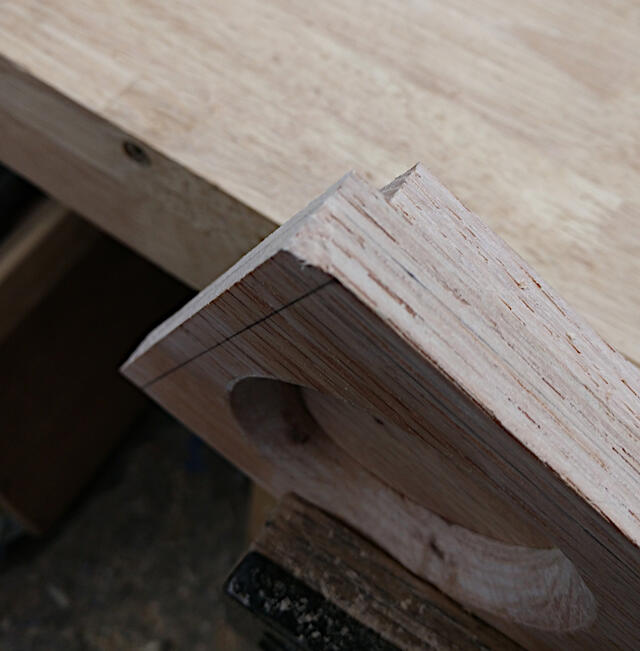
I have to say, I was impressed with how well the first chamfer went, since I didn’t make an effort to sharpen or hone the iron beforehand.
With all four chamfers done, sanding, sealing, and top coat finishing is left.
The salt and pepper mill carrier was finished with spray shellac. Because this carrier will have the potential to receive milk spills, I will be top coating with Minwax Polycrylic instead.
Here is what the salt and pepper mill carrier looks like:
I will post the finished build as a completed Project.
2 Comments

That’s a nice way to display and organize your dining table. I need to do something similar to clean up our table clutter.
L/W
“Those who would give up essential Liberty, to purchase a little temporary Safety, deserve neither Liberty nor Safety.” Benjamin Franklin
Thanks. It’s a simple, functional design that is quick and easy to make. If you do make an organizer, tag me in on the post. I’d like to see it.
More from retired_guru_tech
Woodworking on a Half-Shoestring #7: Refurbing a Harbor Freight Folding Trailer - Pre-Blog Inquiry
Woodworking on a Half-Shoestring #5: Powertec USA - USPS Resolved
Woodworking on a Half-Shoestring #4: Seeds for Insanity: Sorting Screws, Bolts, Nuts, Washers...
Woodworking on a Half-Shoestring #3: Making Progress: Breathe..
Woodworking on a Half-Shoestring #2: The Future in the Fast Lane