


Share your craft projects
Make new craft buddies
Ask craft questions
Blog your craft journey

Lightweightladylefty
1217 posts
and
27 followers
in over 12 years
in over 12 years
More from Lightweightladylefty
RECALLS #23: TTI Consumer Power Tools Recalls RIDGID Framing Nailers Due to Laceration Hazard
RECALLS #22: Hart Consumer Products Recalls Nailers Due to Injury Hazard; Sold Exclusively at Walmart
RECALLS #21: DeWALT Recalls more than 1.2 Million Miter Saws Due to Injury and Laceration Hazards
RECALLS #20: Children’s Tool Kits Recalled by Grizzly Industrial
Morris chair restoration #4: The seat cushion
Morris chair restoration #5: Assembly: I might be considered square, but this chair certainly wasn’t.
This is
part 5
in a
5 part
series:
Morris chair restoration
...
-
The seat cushion
-
Assembly: I might be considered square, but this chair certainly wasn’t.
...
- The seat cushion
- Assembly: I might be considered square, but this chair certainly wasn’t.
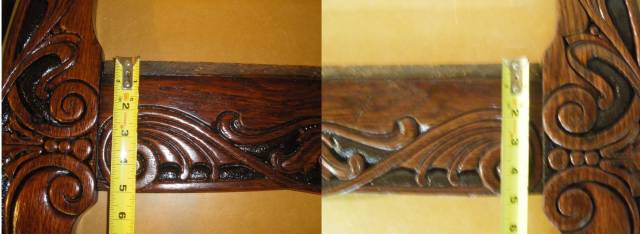
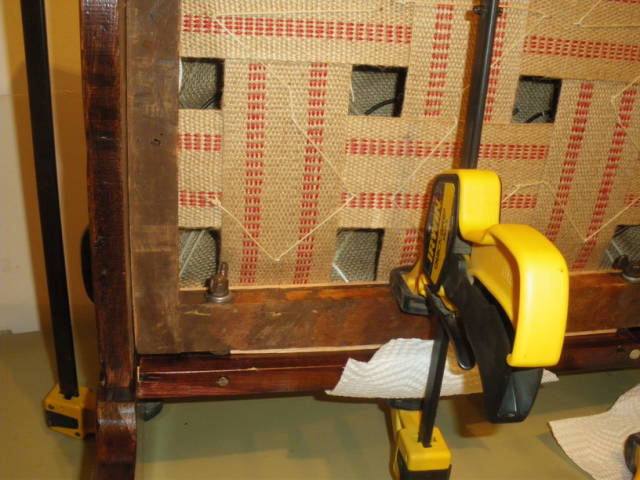
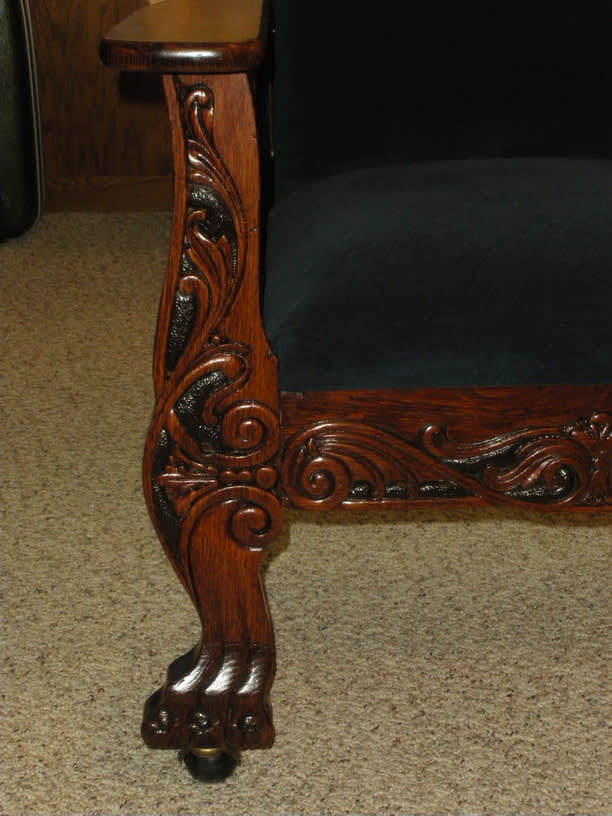
Absolutely nothing was even close to square. The left side of the front rail was ¼” taller than the right side.
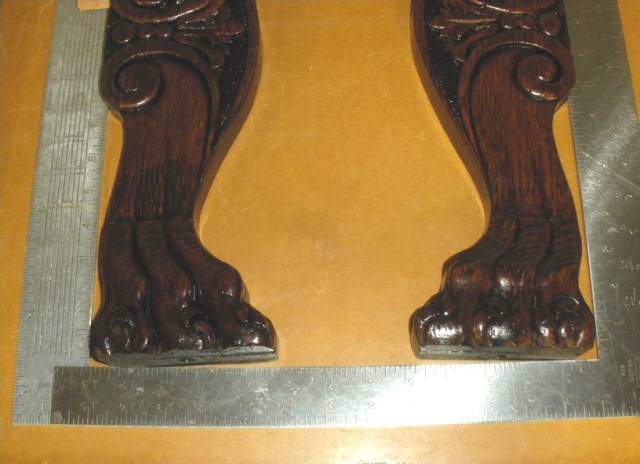
The legs (front and back) were not square to the frame.
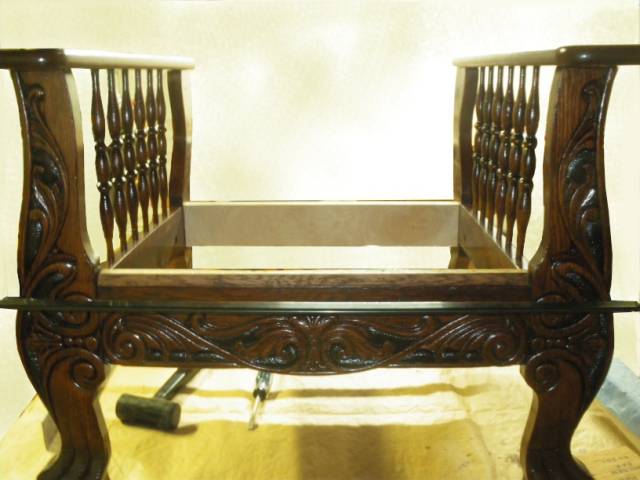
You can see that the cushion frame is crooked as it attaches to the wooden framework.
The back horizontal piece was too twisted to retain so I replaced that part. The arms, spindles, and carved parts of the chair were oak, but the remainder is a conglomeration of other woods, although mostly maple.
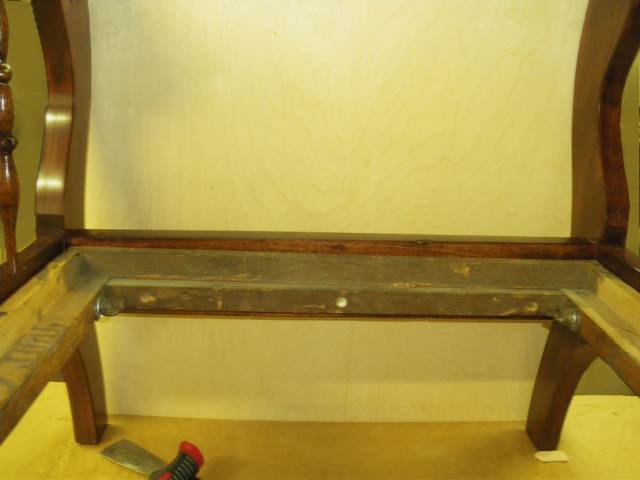
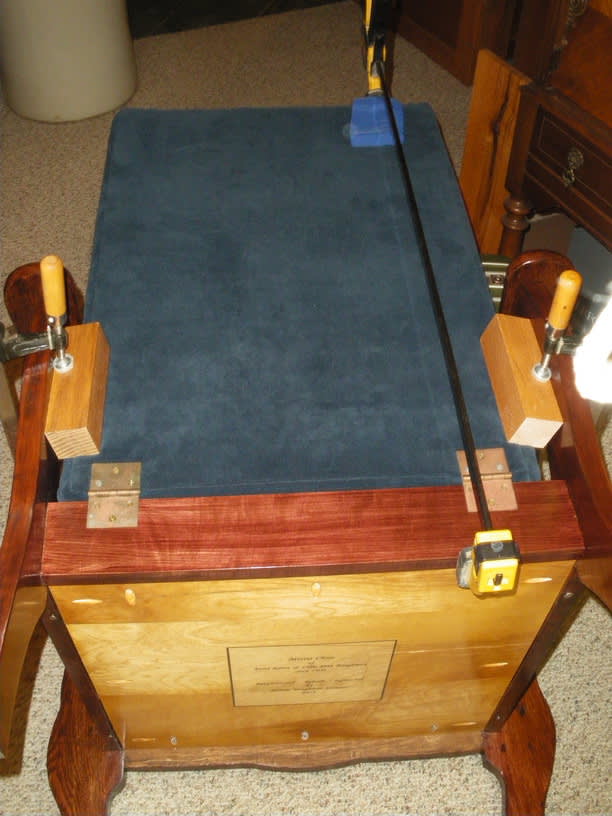
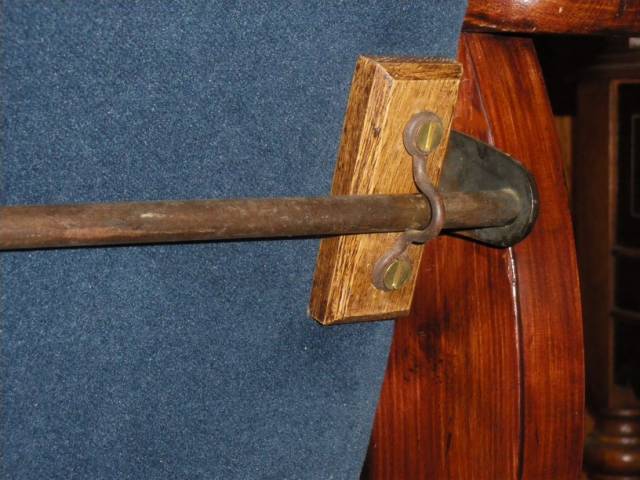
The seat portion has dowels for aligning it with the legs but those parts are not glued together; it is bolted together as you can see in the photograph below. Eyebolts go into the side parts, held in place by nails, and tightened with wing nuts. I added lock washers in the hope that the framework would stay tight and sturdy.
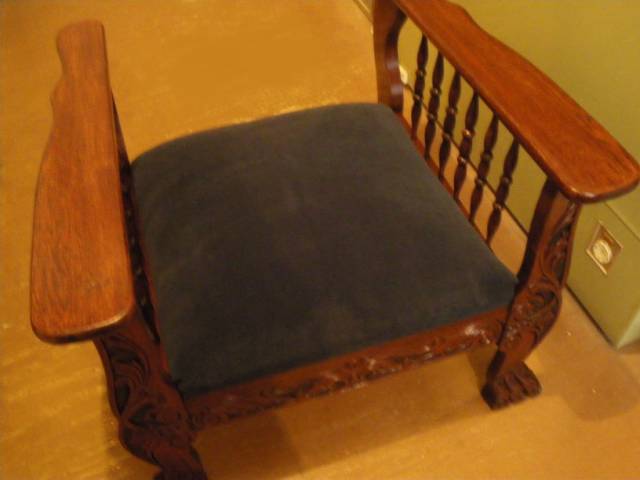
The assembly of the lower section of the chair is complete with the seat cushion.
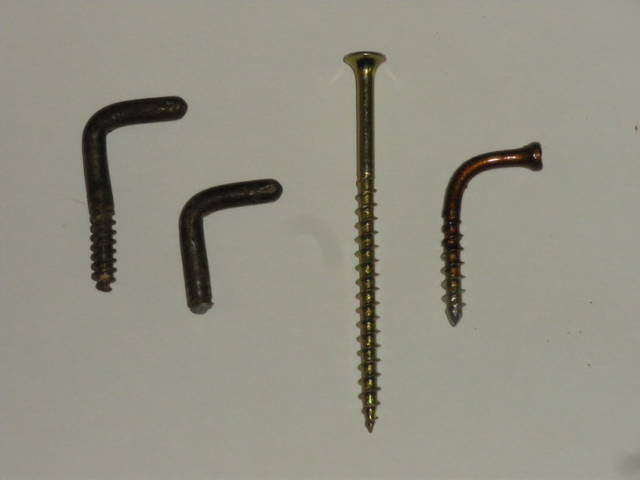
When I finally reinstalled the hardware to hold the adjustable seat bracket, I broke one. Not being able to find another that was suitable, I ground down the heads of construction screws and shortened them to the proper length to make two replacements. My husband then heated and bent them. (The torch scares me!)
Installing the hinges required more creative clamping since I needed to squeeze the cushion sufficiently to attach it correctly. I added a plywood panel on the bottom with pockethole screws in the hope that the chair won’t fall apart for another century. On the panel, I included a little information for the next generation.
I installed two small wooden pads to the chair back to keep the rod from damaging the fabric.
The final step was installing the new casters which ended up being another fiasco. The old casters (which not even my 102-year-old Dad remembers) were missing. The metal sockets had rusted and only the inside part was remaining on one. It wasn’t easy getting it out without damaging the hole. I had considered wedging the feet to make them level, but decided to take a chance on the casters instead since the chair sets very low and casters make it much easier to move it to get behind it to adjust the back.
I’m very pleased with the final outcome but I, absolutely, don’t ever want to repeat the process. If it falls apart in my lifetime, someone else will need to repair it if they don’t want it tossed out.
Check out my project listing to see the end result!
“Those who would give up essential Liberty, to purchase a little temporary Safety, deserve neither Liberty nor Safety.” Benjamin Franklin
3 Comments

You had quite the challenge Lefty but it looks like after the battle you came out on top, great Job! A unique chair and project.
woodworking classes, custom furniture maker

What a nice job LLL and what a wonderful thing to pass on to family. ( hopefully many many many years from now). Thank you for sharing the process.
Jack
Jim, Actually, I can’t remember too many projects I’ve completed that haven’t had some pretty major pitfalls. My husband says that’s what makes them exciting. I’d like to avoid the excitement for once!
Jack, I’ve got good genes so maybe I’ll be able to enjoy it for many years before it’s passed down to another family member.
L/W
“Those who would give up essential Liberty, to purchase a little temporary Safety, deserve neither Liberty nor Safety.” Benjamin Franklin
More from Lightweightladylefty
RECALLS #23: TTI Consumer Power Tools Recalls RIDGID Framing Nailers Due to Laceration Hazard
RECALLS #22: Hart Consumer Products Recalls Nailers Due to Injury Hazard; Sold Exclusively at Walmart
RECALLS #21: DeWALT Recalls more than 1.2 Million Miter Saws Due to Injury and Laceration Hazards
RECALLS #20: Children’s Tool Kits Recalled by Grizzly Industrial
Morris chair restoration #4: The seat cushion