


Share your craft projects
Make new craft buddies
Ask craft questions
Blog your craft journey
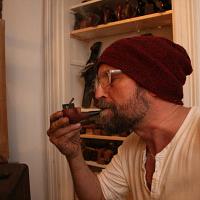
MaFe
50 posts
and
24 followers
in about 12 years
in about 12 years
Fibonacci gauges #1: for the joy of beauty...
This is
part 1
in a
6 part
series:
Fibonacci gauges
Fibonacci gauges
for the joy of beauty…
Hi Craftisan’s.
Last week I were going to post a small blog, about a Fibonacci gauge I made ten years ago, but never posted anywhere on the internet – but then I thought hmmmmmmmmm, why not make a new one, why not make a few more Fibonacci gauges and see what I learned during those ten years, to share some work methods, jigs and ways of working, with you here.
It’s going to be a full detailed build, even measures and a full detour blog with my ramblings and grand dad humour, so I will split it up in several parts.
Here it is, with your guys ’n’, women’s in mind:
Spoiler alert, don’t look at first picture, if you want to be surprised at the end of the blog… laughs.

Fibonacci gauge / Golden mean caliper, or what ever you like to call it.
This is what we will be making in this series, with
What is a Fibonacci gauge, you might ask and I would reply, that’s a really good question…
Gauge meaning: An instrument that measures and gives a visual display of the amount, level, or contents of something.
In this case a really simple gauge, that are made to simply keep the famous Leonardo Fibonacci ratio of 1.618 to one, no matter how much you open the legs on the gauge.
What is this number 1.618? – it’s also known as the golden ratio or golden mean (greek, middle way), or Phi, a proportion that we find pleasing to our eye and Fibonacci’s spiral is said, to be everywhere in nature, but that’s a myth, even though we will find the spiral opening in a fixed ratio many places, just not exactly the 1.618.
How can I use it? – When making layout on projects, it can be a box, a drawer front, or what ever, the gauge can be used to give quick suggestions to a ratio, that will be pleasing to the eye. You don’t have to be super precise and once you get it under your skin, you can start playing with it, I find that combining the 1-1.618 with the square 1-1 ratio that we also find calm and easy to understand, so if you want a long drawer, you can take the ratio 1 for the height and then add two times 1.618 for the length, or it can be 1:1.618+1.
Do I need this? – nope, but you might learn to get deeper into the game of proportions and start being able to create, more beautiful projects due to this.
What you should never do, is becoming a fanatic, that’s not pleasing to a design, to your soul, or the people around you, smiles.
Rules are are made as guidelines, the true beauty comes in understanding that game and then give it, that little twist, that makes you notice it.

Well no more talking, let’s get into my workshop.

Ok, one more thing, this is the so famous Fibonacci spiral, that I spoke about.
(Drawing from one of my sketch books).

Here we are at the heart of the workshop, with some wood on the workbench, basically that’s enough to make me happy, but I have to select some.
Ash, Mahogany and Walnut, so I have to make three…

First ripping up the wood on the table saw.
Notice the gauge I made more than ten years back are on the right here.

47cm / 18,5 inches long strips, three of them for each gauge.
(I normally never do measures, but in this blog you will get them all, so it can be used as a full build guide).

Put the brain on repeat.

Trim to length.

Three sets – the dimensions comes now, but you don’t have to follow them exactly, excepts for the holes and lengths, as these are making the ratio work.

13 mm wide.

0.5 inch.

5,5 mm thick

0.2 inch.

And here you can see the length of each part, at this stage in oversize.

This is what we are making and the measures needed.
You can find this drawing all over the internet, I just made a rough sketch, to bring to the work table.

The holes are marked up, here the small arm.
That’s the distance between all holes, except the extras I made on one leg for hanging it on the wall, that one you should just make app. 1 inch or 2,5 cm.

No you don’t have to go looking for your glasses now.

To find the middle of the wood, I like to use a marking gauge.

If you go in from each side and hit the same spot, you are there and you will be dead on spot.

Using an awl to make a starting point for the drill.

I’ll use these screws, as I did last time, I think they are called Binding screws in English. Gürtelschrauben in german, I know this because I just ordered some from E-bay, smiles, those I have are the wrong size… I use them for leather craft projects. I have no idea what they are called in my own language, Danish by the way…

Ok this is where I take a detour again… We need to protect these fine pices of wood, so I cut a couple of plywood strips…
Yes, it’s a push fish! As you can see it has marks from the saw blade, so that would have been my fingers otherwise.

Now I can clamp the pieces together with lots of pressure, without leaving marks in the wood.

So we can start drilling some holes.
I have stacked them all, so the holes will be the same, in that way the chance of failure are minimal.

The shortest arm are used as a guide and all the rest lined up, except the the arm we want longer, that have to stick out.
Notice I put some scrap wood under, to avoid a blow out, when the drill goes through.
This is where we stop today, it’s late and I have to get home and make some dinner, see you soon.
In next part, we will start by making a jig for a sander, to round the ends of the gouges wood arms and then drilling the extra holes for hanging the gauge up on the wall.
Hope it can be to some inspiration, or at least some joy.
Best thoughts,
MaFe
MaFe vintage architect and fanatical rhykenologist.
4 Comments

Thanks for posting this presentation of the Golden ratio scale. I have made these scales and used them and the Golden Ratio many times. Though Leonardo may have made this commonly known to man he is not the creator or the first to use it. It is the work of a Holy God the creator of the Earth and all there is in it. You see this ratio all through Nature I have enclosed a link to just a few of the proven examples below. You can find many other such evidences all around if you will take notice of the Creation.
https://www.mathnasium.com/examples-of-the-golden-ratio-in-nature
https://www.mathnasium.com/examples-of-the-golden-ratio-in-nature
-- Soli Deo gloria! ( To God alone be the Glory)
Nice blog and a handy tool.
Angellos
Hi guys,
Thanks for the fine words.
Olddrivers:
As an Architect student, I spend a lot of time, to study if there were some kind of rule and the more I looked the more I became aware, that we see what we want to see. Why people also can see the golden ratio, in almost any thing, if we just split it down enough, but most of the time, it is all about finding what we want, not what we actually see.
It's like we see yellow cars all over, as soon as we buy one.
Watch this video, he explains why nature and ? goes hand in hand.
The Golden Ratio: Is It Myth or Math? - YouTube
The golden ratio cannot be applied precisely because it is an irrational number.
Myth-busting the Golden Ratio - University of Edinburgh Science Media (eusci.org.uk)
Somehow that says it all.
Best thoughts,
Mads
MaFe vintage architect and fanatical rhykenologist.

Thank you for sharing, Mafe. I like the push fish.
Main Street to the Mountains