This series of blog posts describes the design, planning, and construction of the giraffe bookcase I built in 2021 for my daughter, son-in-law, and their upcoming new baby (their first, and our first grandchild).
This bookcase is a replica of a discontinued commercial product, so the original design is not mine. My task was figuring out how to replicate it.
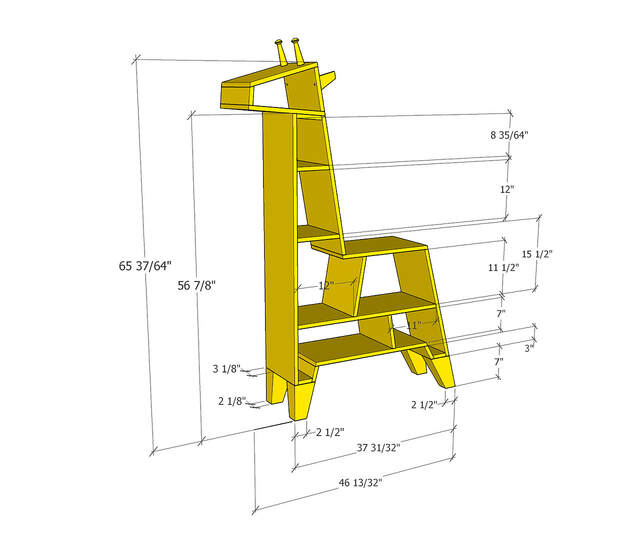
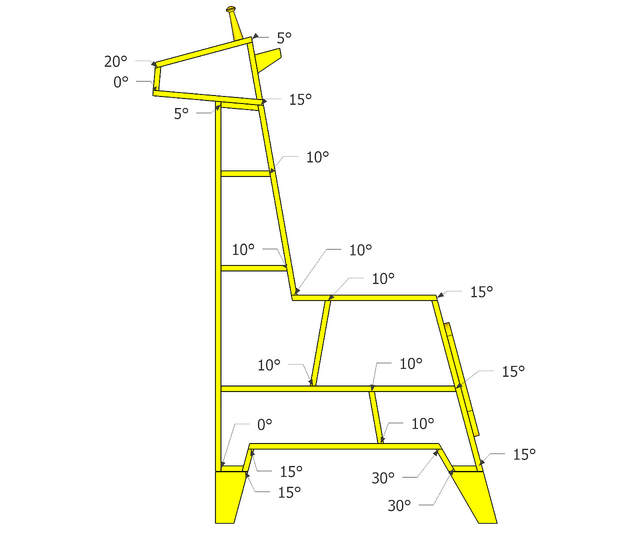
From the first look, it was very apparent that I'd be making a lot of beveled crosscuts and that, aside from the legs, ears, and horns, every part was unique. Using the dimensions and photos of the original as a guide, I was able to create a basic SketchUp model. Then I refined it, with the goal of minimizing the number of bevel angles required. I was able to reduce it to six: 0, 5, 10, 15, 20, and 30 degrees (relative to vertical).
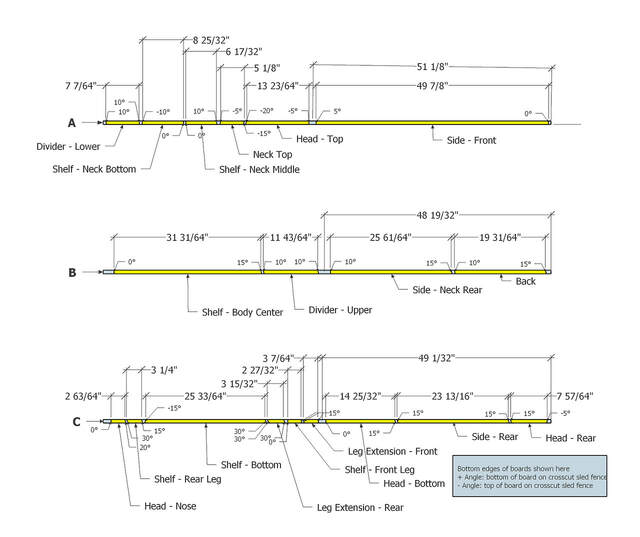
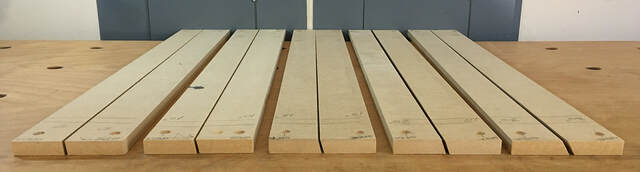
Next, I created detailed cut sheets, laying out the case parts on three eight-foot 4/4 boards and the legs on a shorter 8/4 board. In addition to the part lengths, the case cut sheet also shows the angle of each end of each part.
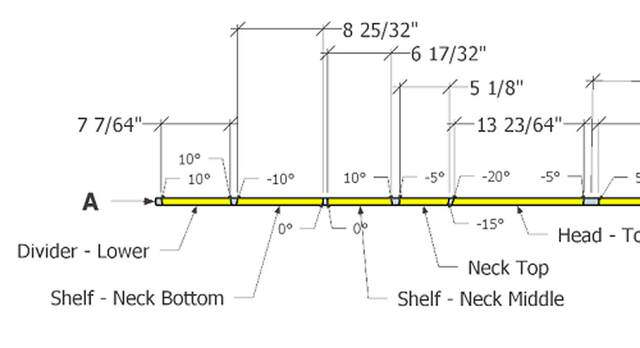
The case cut sheet is difficult to read at the limited size of inline images, so here's a close-up of the upper-left portion. (By the way, I had no illusions about measuring or cutting parts to a 1/64" tolerance, but I used the dimensions SketchUp computed and got as close as I could in real life.)
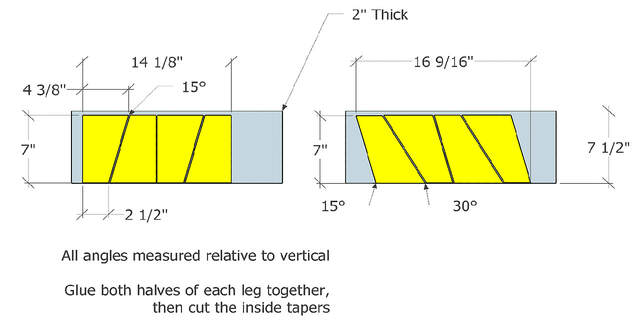
The cut sheet for the legs shows each leg twice because each is a lamination of two halves.
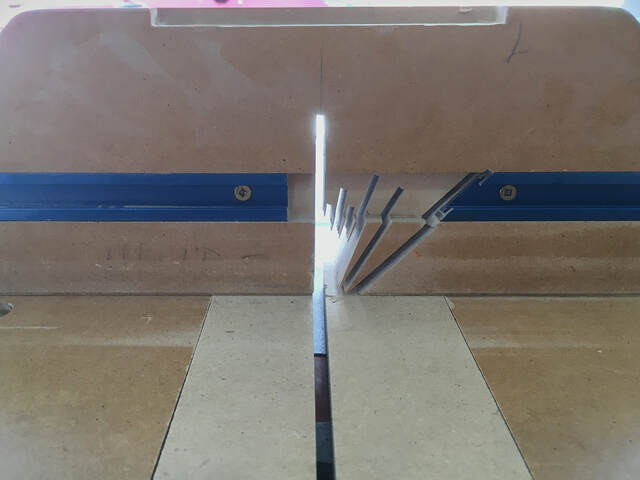
Now the model was basically done (except for the details of how I was going to mount the ears and horns, and the final shape of the tail). The next step was preparing my table saw crosscut sled to make the various bevel cuts.
When I built my sled years ago, it worked only for 90-degree cuts. Later, I needed 45-degree cuts, so I modified the sled to accept screw-in inserts. For this project, I cut five more inserts for the new angles I needed. My Wixey digital angle gauge came in very handy here.
My sled's fence ended up a bit of a mess, but that's the price of progress. One day I'll either modify the fence to accept replaceable inserts or build a new sled with integrated bottom and fence inserts.
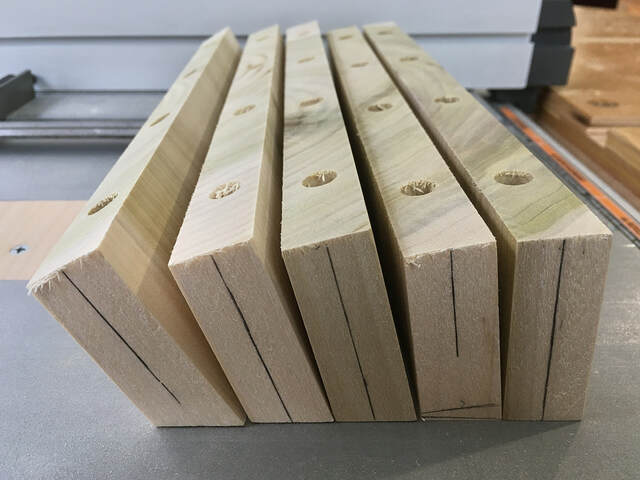
Early on, I decided to use dowel-reinforced butt joints for the bookcase. I knew I could use my JessEm doweling jig to drill the holes in part ends, but not for the corresponding holes in part faces.
To help with the face holes, I needed angle-specific drill guide blocks. I couldn't make them until later (after I ripped my all of boards to their final width and started cutting out the parts) but I wanted to show them here because they are logically part of the prep work.