


Share your craft projects
Make new craft buddies
Ask craft questions
Blog your craft journey

Ron Stewart
953 posts
and
24 followers
in over 3 years
in over 3 years
Giraffe Bookcase #2: Cutting the Case Parts
This is
part 2
in a
9 part
series:
Giraffe Bookcase
I found four good 8' long, 12" wide, 4/4 poplar boards at the lumberyard, along with a 4' long, 7-1/2" wide, 8/4 board for the legs. Theoretically, I should have needed only three 4/4 boards, but I knew I'd have to cut around a few knots, and I wanted some extra to deal with any mistakes.
I planed the boards to 3/4" and jointed them using a table saw jig I built for a previous project. That's when I learned that the narrowest board was less than 12" wide, so I decided to make the bookcase 11-5/8" deep instead of the 12" I had modeled. It wouldn't make any practical difference.
I planed the boards to 3/4" and jointed them using a table saw jig I built for a previous project. That's when I learned that the narrowest board was less than 12" wide, so I decided to make the bookcase 11-5/8" deep instead of the 12" I had modeled. It wouldn't make any practical difference.
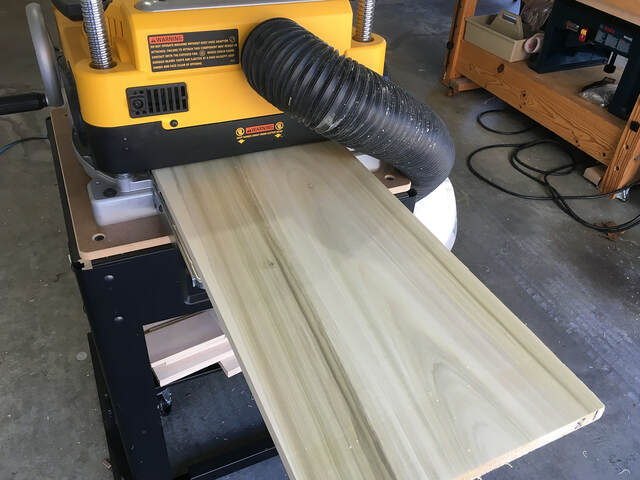
I laid out and labeled every case part. I did end up moving a few parts to locations that didn't match my cut sheet (to avoid knots and some minor snipe at the ends of some boards), so that extra board came in handy. Then I ripped all of the boards to a uniform 11-5/8" width and crosscut each board roughly in half (to the nearest part boundary)-the halves would be much easier to manage for my bevel crosscuts than the full-length boards. Now I was ready to start in earnest.
Cutting the parts required a lot of bookkeeping because I couldn't fully cut out one part before moving to the next. Setting the saw's bevel angle and attaching the corresponding insert to the sled was time-consuming enough that I wanted to do it as few times as possible (ideally just once for each angle), so my process went something like this:
- Set the saw blade to 5-degrees, and attach the 5-degree insert to the sled.
- Using my cut sheet and angular dimension drawing as a guide, cut the 5-degree end of every part that needed it.
- Label the angle at the end of the cut part and mark that end on the cut sheet.
- Save a cutoff at least 2" wide to use to make the 5-degree drill guide block. (The cut sheet does not show these cutoffs.)
- Repeat Steps 1-4 for each additional angle.
I had to be very careful about two things during this process.
First, I needed to make sure I was measuring the correct side of the board when drawing cut lines. (It's easy to get confused and measure the wrong side.)
Second, I needed to make sure to orient each board so the angled cut was in the correct direction. (It's also easy to get confused and make a left-tilting cut when a right-tilting one is needed.) On my cut sheet, I had labeled each angle as either positive or negative. For positive (left-tilt) angles, I placed the bottom edge of the board against the sled fence. For negative (right-tilt) angles, I flipped the board around so the top edge was against the fence.
I did numerous test fits along the way to make sure I wasn't making any mistakes.
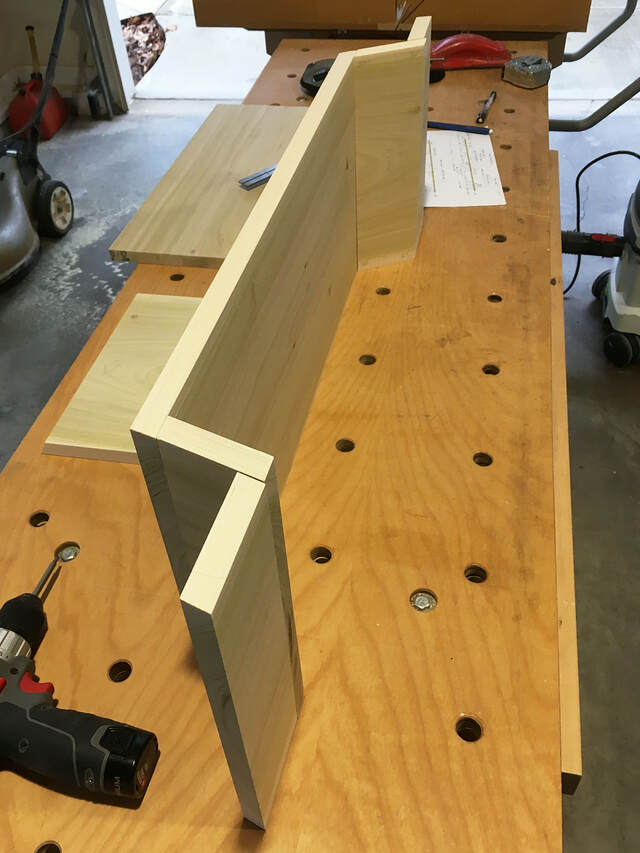
I tested the short extensions that form part of the front and back legs and support the bottom shelf.
I tested all of the parts that form the long bottom shelf (the giraffe's stomach and thigh bottoms).
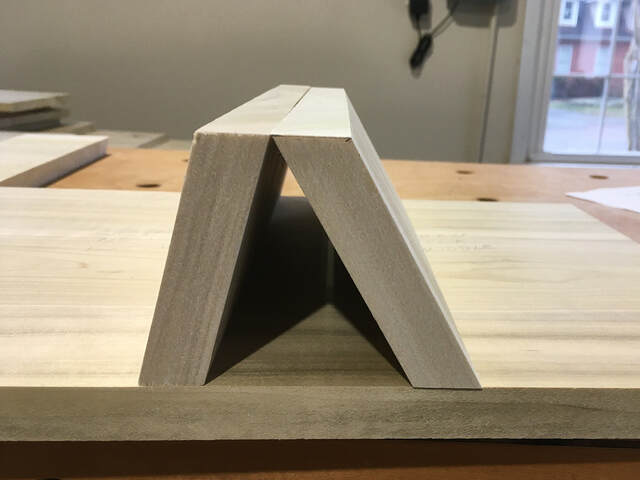
I tested three of the four parts of the head. The angle at the bottom of the nose is 90-degrees.
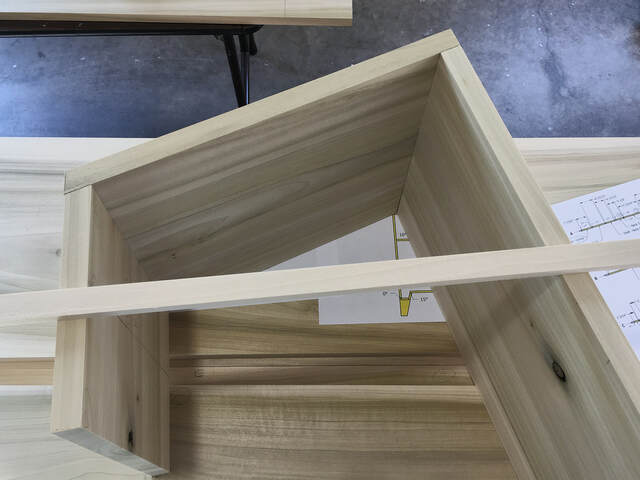
I tested all of the parts that form the case perimeter. I left the bottom of the head and the long front panel of the case oversized until I cut and checked all of the other parts. I wanted to have a little wiggle room to compensate for any accumulated length errors in those other parts.
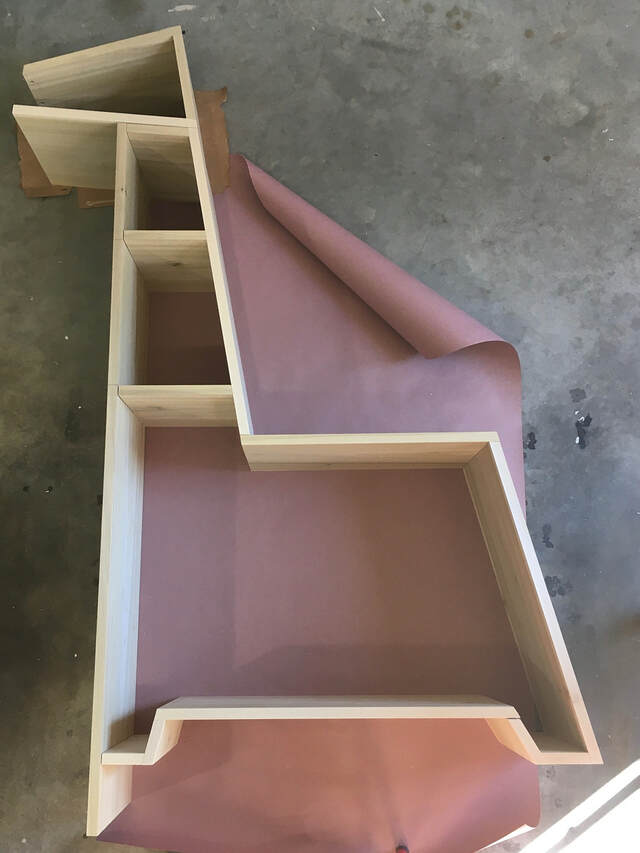
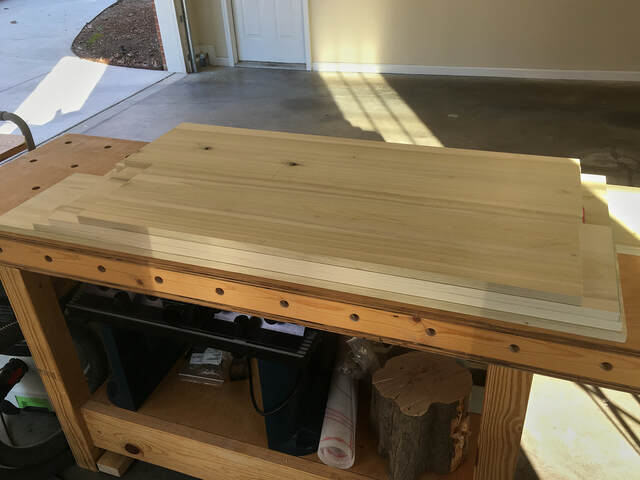
Here are all the parts cut to their final sizes. As you can see, I don't have a table large enough to hold the entire bookcase, so I had to use the garage floor. Once I had all the parts in place, I traced their outlines on the red rosin paper as a reference. It sure felt nice seeing everything laid out like that.

Later in the project, I bought a nifty mechanical protractor from Lee Valley. It would have been really handy during this phase of the project. It ended up being very handy during glue-up, so I'll mention it again in a later post.