I had some questions regarding how I made gears and I thought I might as well give you the complete rundown. Perhaps the best thing to know is that gears are not terribly difficult. Some techniques require precision in the initial set up or jigging, while other ways to make them include printing off a template and gluing it onto your blank first.
Lets see if I can explain better.
Here is the first gear I ever made. As you can see it is very basic, though for the job at hand at the time it worked just great. The gear itself was fairly easy to produce with 16 teeth. While there was a bit of calculating to work out so that the teeth weren't too big or too small, this was the final sizing proportion that I went with. Note, this gear was made from 1/2" plywood so that the 'short grain' teeth didn't chip under load. I found it important to make a testing spot so you can monitor how it functions in case something needs tweaking. The gear was carefully laid out on the bandsaw and leaving the line, only to clean up to removing half the line with the small upright belt sander. The rail was created from many test trials increasing and decreasing the gap until it worked just right. I saved you from looking at the kindling and just showed you the final working templates. Had I needed to produce more then just one gear I would have adopted the strategy from the last gear type in this blog.
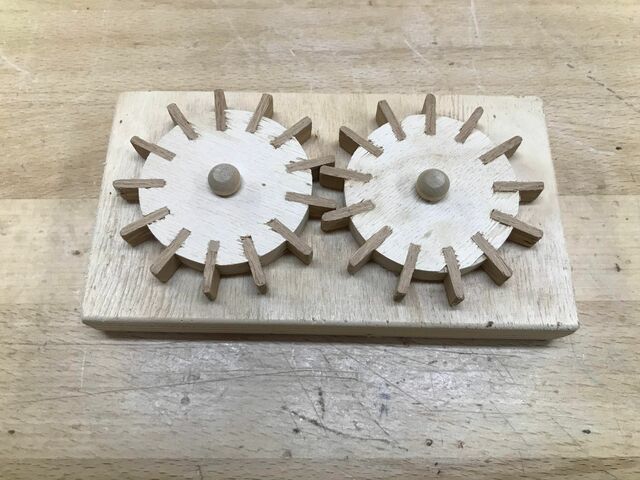
Next up is what I call the Paddle Wheel Gear. As you can see it can be attractive to look at as well as requiring quite precise cutting. It is super critical to do your math right if you need perfect gears, after that it's a breeze to make. This plywood mock up is a bit rough to look at, but I am sure you can see how different colored woods would be fun here, and with no 'short grain' issues. The one trade off is that this type might not offer you the precision you need in how they operate together. The paddle wheel type generally has a little slop when you reverse directions, as seen in the picture below to be about a 1/4".
Note: A testing block is essential for finding the optimal pin distance for the gears to operate. While you can't see it here in this picture, a fixed pin and one pin that can slide left or right will make that easier.
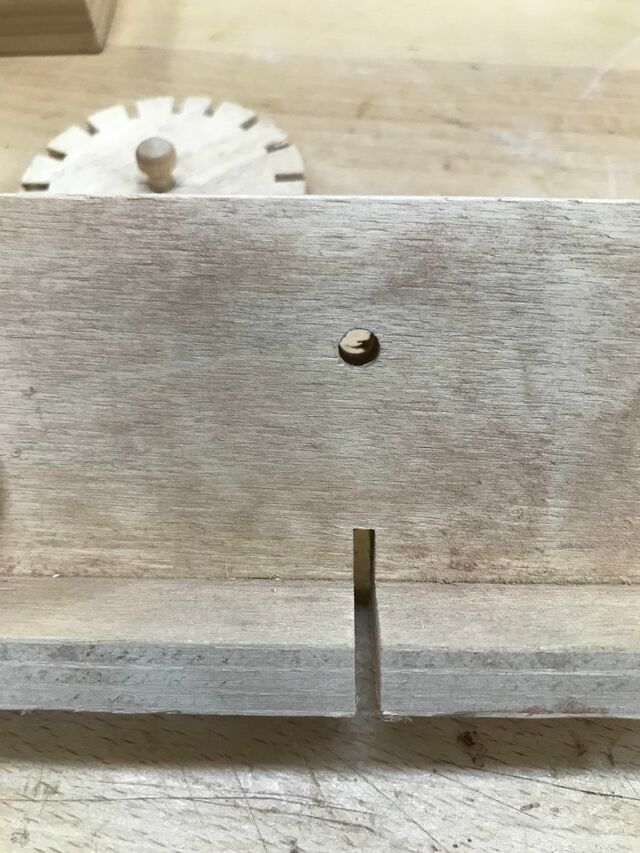
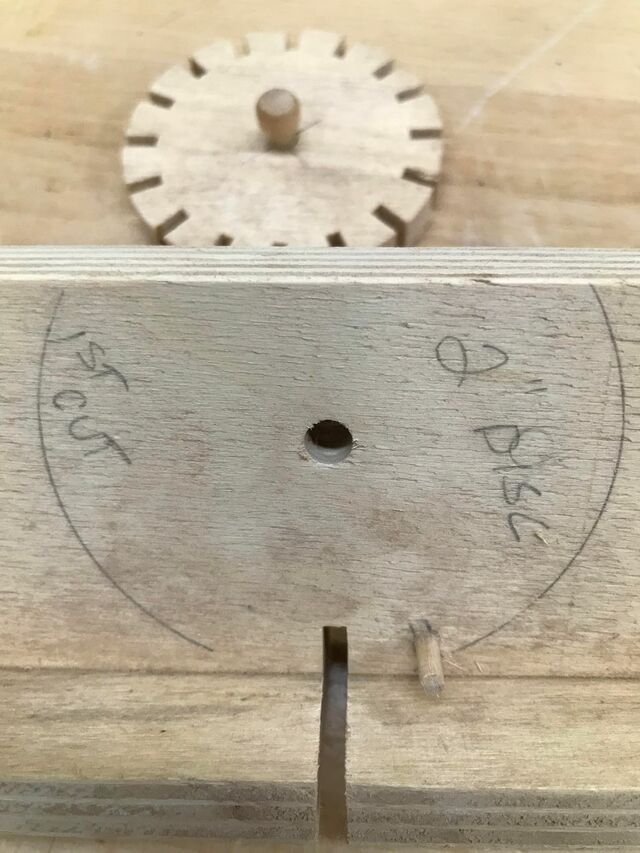
I made up a simple 90 degree jig for my table saw shoot board. I drilled a hole in the back of the fence for the gear blank that has been precut to a circle (methods on that in another blog if needed) and drilled at center. I used one of those craft pegs for axles, they are just under a 1/4" I believe. Anyway, just pop the blank on the jig and use a spring clamp to hold it secure while you make the first cut. This is the only cut you make with this part of the jig.
On the jig, just further down will be another set up, but this one will make the rest of the cuts on the gear blank. If you have carefully marked out the segments on your intended gear then you can make your second cut hovering over the kerf in the jig. Some experience as to whether you want to cut right on the line or to the left vs right of the line will take some practice. In the rough jig I had made you can see that the last tooth spacing was not exactly like the others, so the second jig I made (and since have lost) would have that tiny correction. If you have the right spacing that you feel will give you the best results, then drill and glue in a 1/8' dowel pin into where the first cut would align. After that, every time you rotate the gear blank on the pin, it will line you up perfectly for the next cut until complete. Once dialed in, this method will produce the most gears with the least effort.
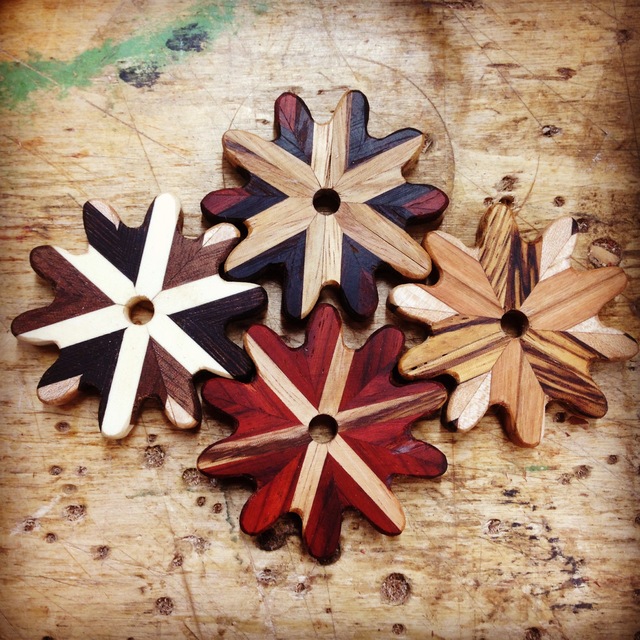
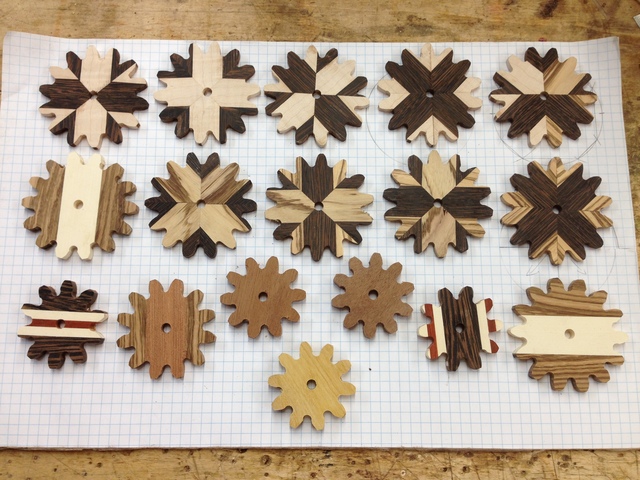
The next gear type is my most favorite, and the most work to create. I think the end result is worth it if the gears are to be visible.
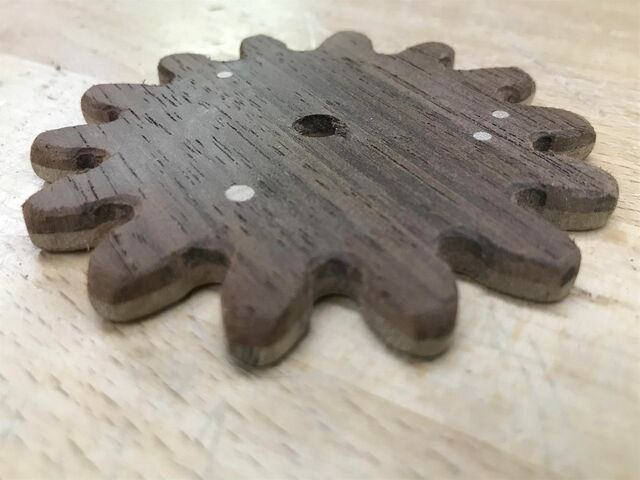
With wooden gears we need to be careful with the vulnerability of the teeth. When the grain is running long with the tooth, it is strong, but when the grain is running across the tooth, it can be prone to chipping. In my early efforts I tried segmenting the pieces together. It created very stunning visual results but took a lot of time to build.
These days I laminate two layers of contrasting 1/8" materials together where the wood grain run perpendicular to one another. All the teeth will be equally strong now. The little maple pins were just for dramatic effect for a project I was working on and not needed for part integrity.
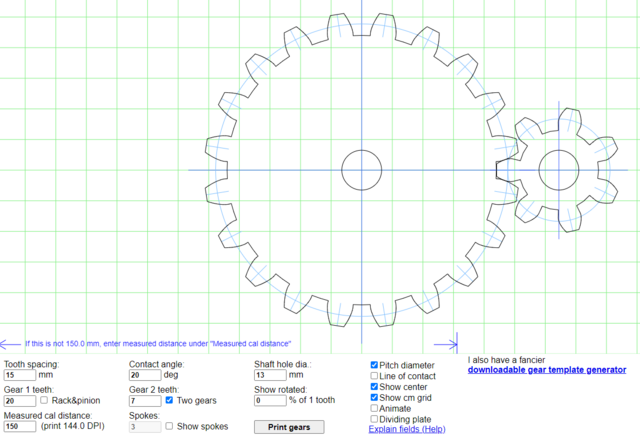
To make these I went to a website by a fellow named Wendal Mathias https://woodgears.ca/gear_cutting/template.html and used his free gear template generator to create all sorts of gear sizes. On his site you can change all the criteria, it's a lot of fun actually. So now what?
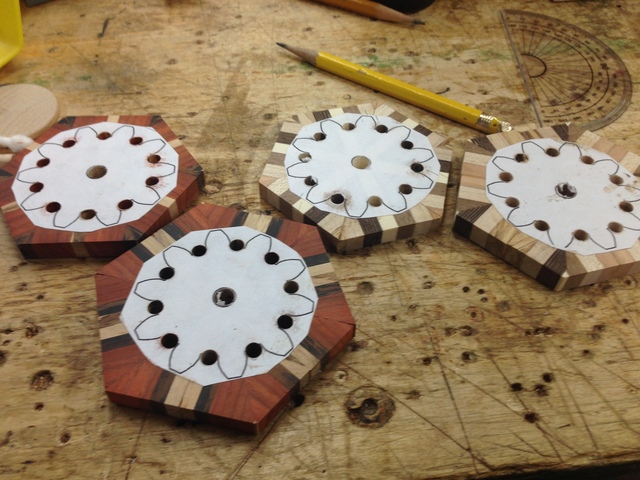
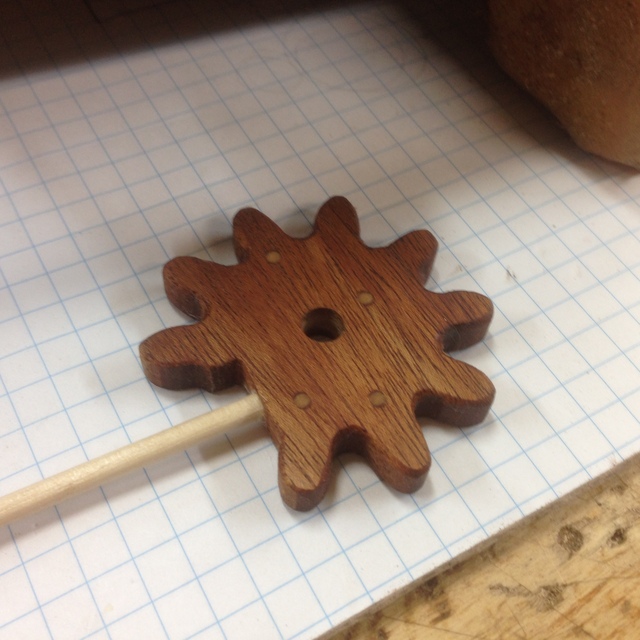
After I print them out to the actual size I need, I cut them out a little and then spray glue them onto my gear blanks. It is best if the spray glue doesn't keep it too glued to the wood and can easily be sanded off later. I then put the 5/32" drill bit and carefully cut out the bottom of the gear. As you can see I managed this all by eye and no special set up was needed. After the drilling, I took the gear blank to the bandsaw and trimmed around the circle shape being careful to leave the line. Next, I carefully cut into the gear, being careful to leave the line. Once you have the pieces all cut out, then its off to the upright 1" belt sander. Here you will want to carefully sand the edges of the teeth. If you can consistently sand to half the line then you will have one very precise gear.
I wish I could say that you are done at that point, but sadly no, lol. With a round fine jewelers file you will want to go around and break all the edges on the teeth. The good news is that after this you can put a finish on them, ya!!
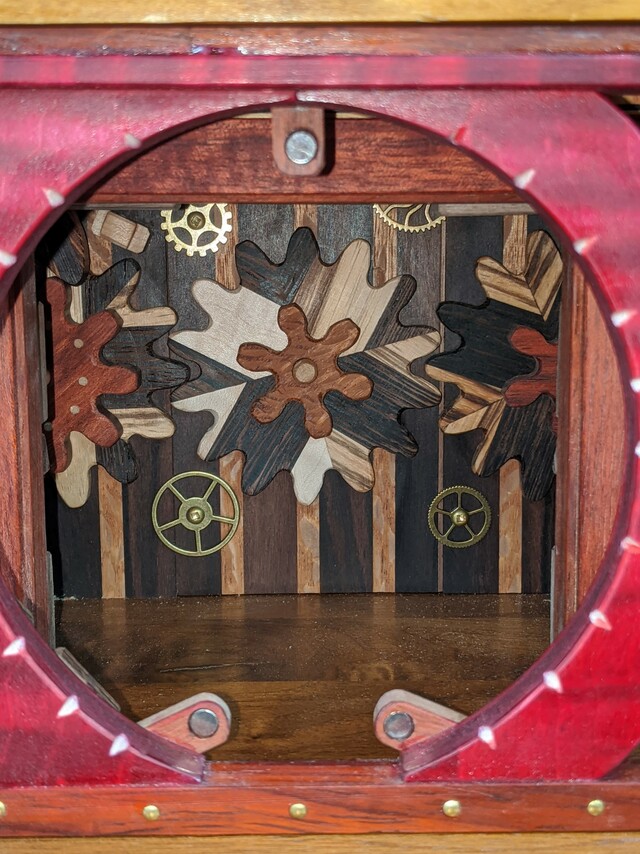
So after I make them? Not all gears end up being whole, sometimes they can have a function, like in the image below.
Sometimes gears have a function that looks like movement, but actually disguise a secret function and are intended to be disassembled to get at the real goal.
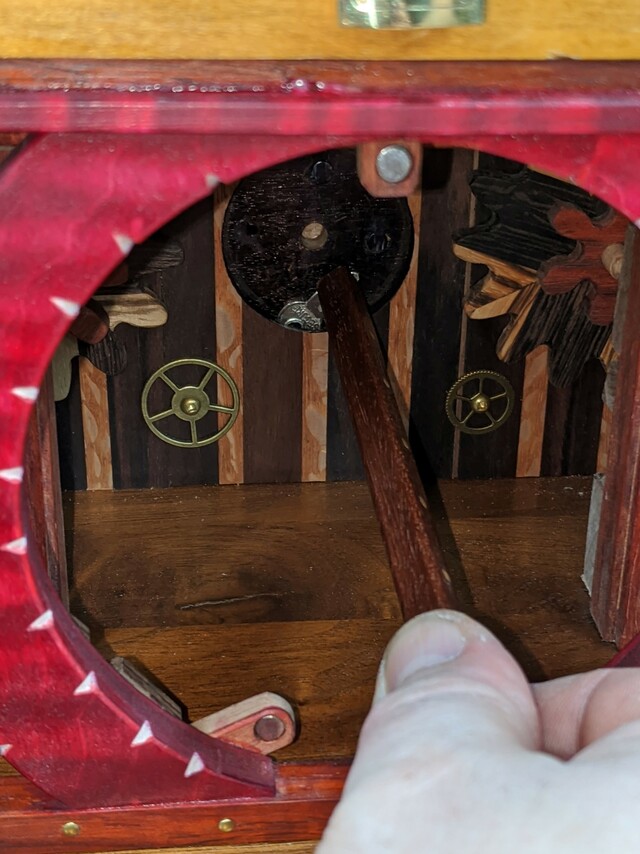
With some of the gears removed you can see that there was a secret tunnel in the back wall that allowed me to hide a little key that was found with a magnet wand.
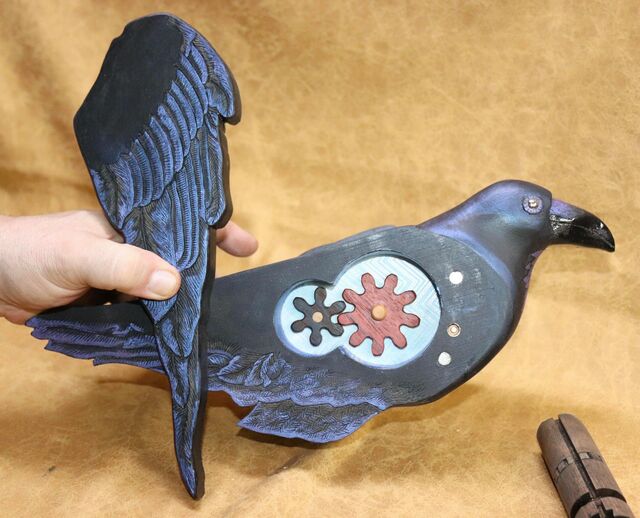
And lastly, two gears hide under the wing of a Raven....
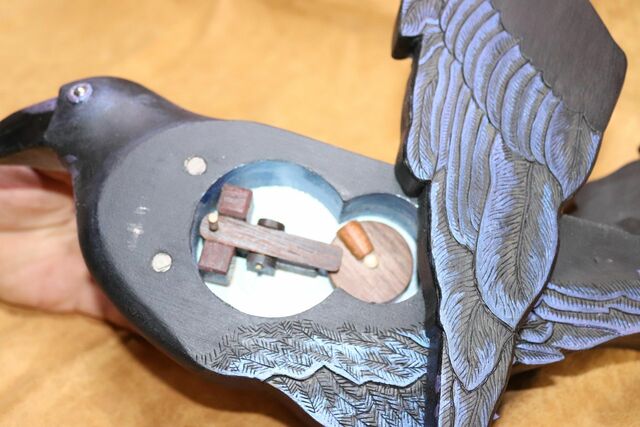
While on the other side and under the bird wing hides the cam operated wing pin.
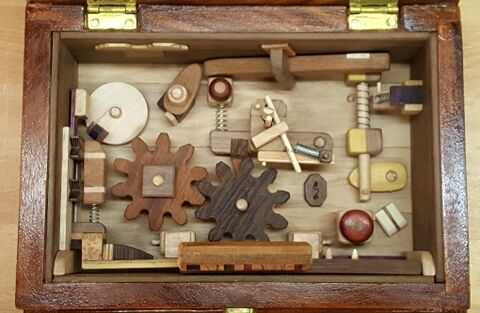
And one last pic of a puzzle using gears, here the gears will slide a front panel once unlocked. Ha, too much fun!!
Cool presentation Snake... Love all the interesting/diverse way you integrate parts together.
Nice move in highlighting Mathias's woodger program... I bought it a few years ago and it has served me well in many diversified jigs... haven't graduated to incorporating into puzzles... yet. Having a cutting laser certainly makes integrating the gears much simpler (for me in construction).
If your first cut is too short... Take the second cut from the longer end... LBD
Hey thanks LBD, oh such a lucky guy, a laser would be amazing! I guess some collectors have come to like the hand hewn effect that only crafting something by hand can achieve. Personally I like both, just don't have the option for both.
I used to be a hybrid (with all these sex diversification I can now come out of the closet) and fess up to using both machines and hand tools (don't listen to that guy with the "whispering chip" on his shoulder, that keeps knocking the hand jobs...
I have the laser (long story) and have found, in the words of Swaze, "Never put Baby laser in the corner", and have started to use it more and more. It's precision certainly makes my life easier at my age and dexterity.
If your first cut is too short... Take the second cut from the longer end... LBD


Dodgy%20City%20Blue%20Devil.png)