


Share your craft projects
Make new craft buddies
Ask craft questions
Blog your craft journey
kiefer
470 posts
and
61 followers
in over 12 years
in over 12 years
BUTTERFLY CONSTRUCTION BLOG #1: BUTTERFLY CONSTRUCTION PART ONE
This is
part 1
in a
1 part
series:
BUTTERFLY CONSTRUCTION BLOG
-
BUTTERFLY CONSTRUCTION PART ONE
- BUTTERFLY CONSTRUCTION PART ONE
Here is the first part of the promised BUTTERFLY Blog to go with the project post .
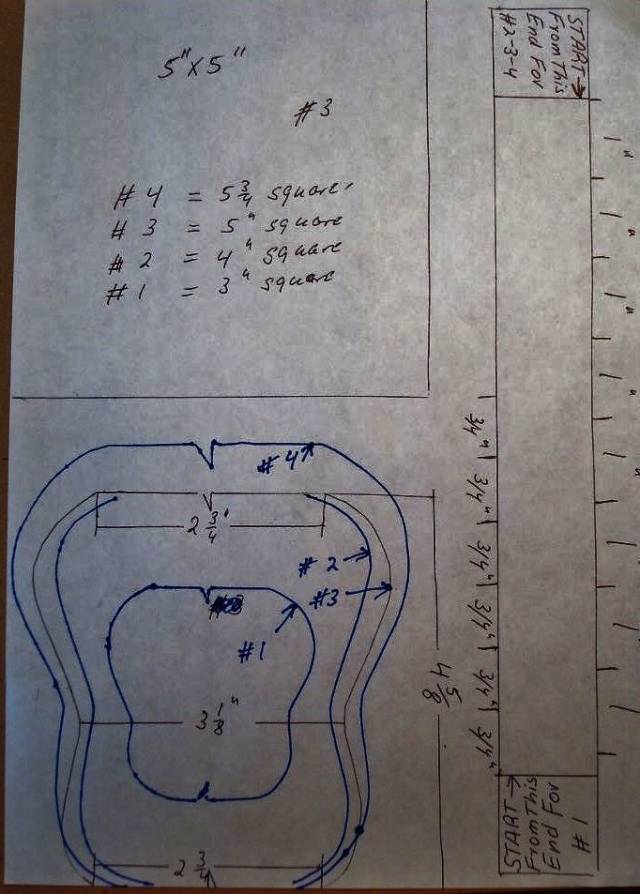
I will start with a sketch of the clear plastic templates which is a set of four pair and a indexing ruler .
I am giving the sizes for the square patterns and the shape and dimensions for the curves parts and the shape for these and easily be completed by adding the curves with a FRENCH CURVE drawing set as the shape is not that imported and all the sizing for the ruler is there including the start line info .
In this example I am using the #3 templates .
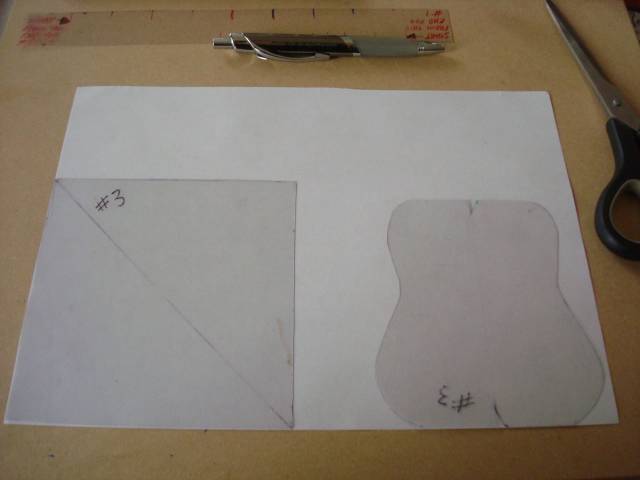
For this tutorial I am using a white piece of paper just to show the marks and process more clearly and in a later part I will use the real paper where the pencil marks will be hard to see and photograph .
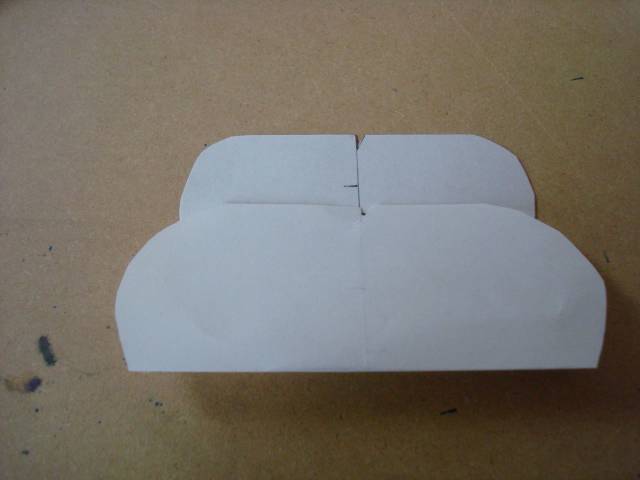
I will start with placing the templates on the paper and trace the shapes .

Now I cut the shapes out
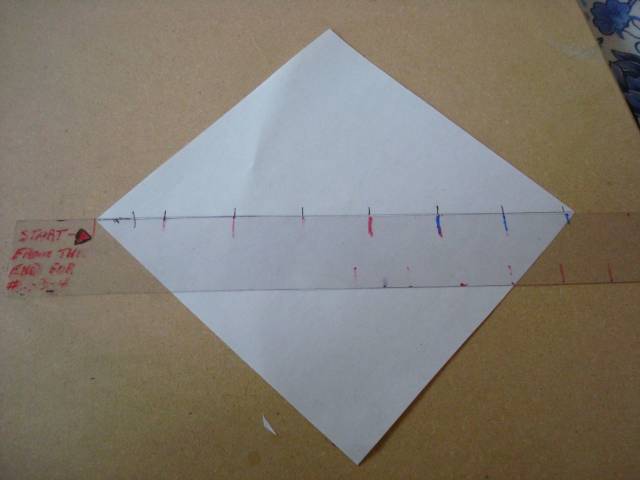
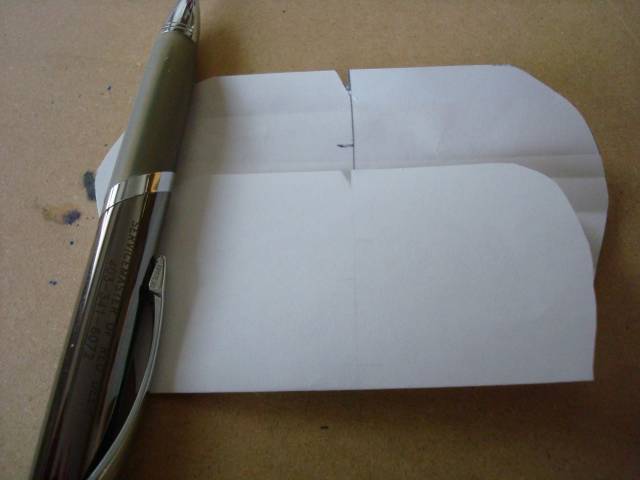
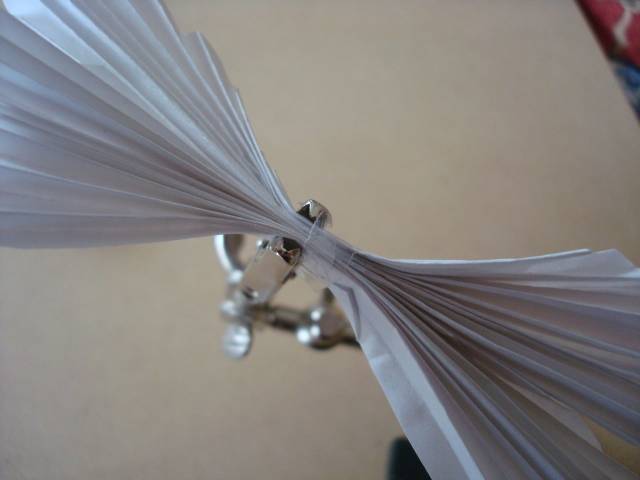
I draw a centre line on the backside of the paper on both pieces and a T on the square piece to indicate the direction of what will be the top or front of the butterfly and place the ruler in position and mark the position of the fold marks . (A better view of the ruler in picture #1

Here I turned the paper 180 DEG. and place the fold marks in the opposite direction .

All the folding marks done and the two little cut outs you see at the ends will be used as alignment marks during assembly.
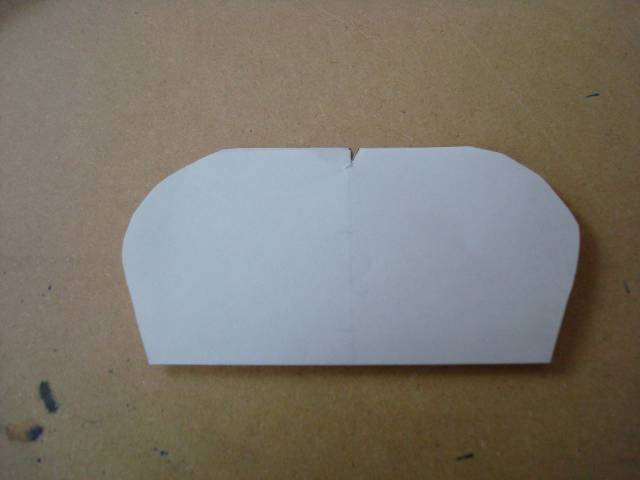
Now the folding begins by folding the paper in half and then followed by using the fold marks to the right of the centre line for each consecutive fold ,this is done in both direction and the same sequence on both pieces .
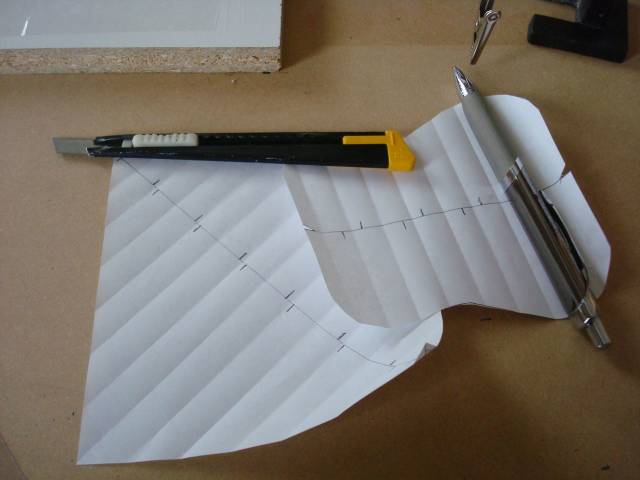
All the folds done and it may look a little weird but it is the way it should be .
Now the second folding is done by folding to space between the first set of fold lines .

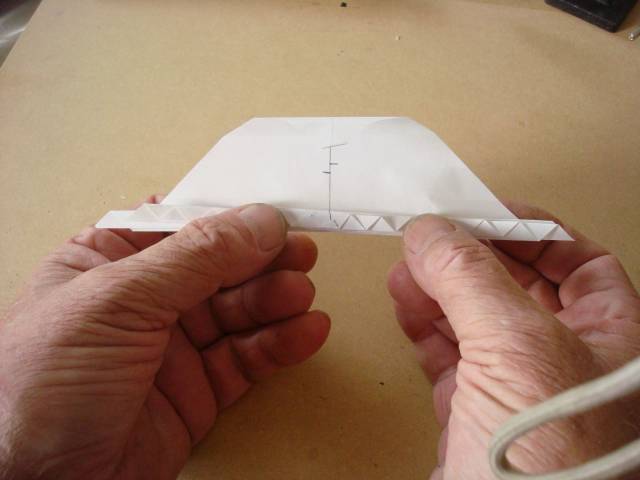
This is what it should look like when all the folding is complete and I place the first piece in my third hand while I work on the second one .When both pieces are done I put them together in the right direction with the T mark to the front and the larger end of the bottom piece against the top piece using the alignment marks to centre them . the assembly of the two pieces is placed in the *
third hand *again and a strip of packing tape about 3/16” wide is wrapped a couple of times around straddling the centre line .
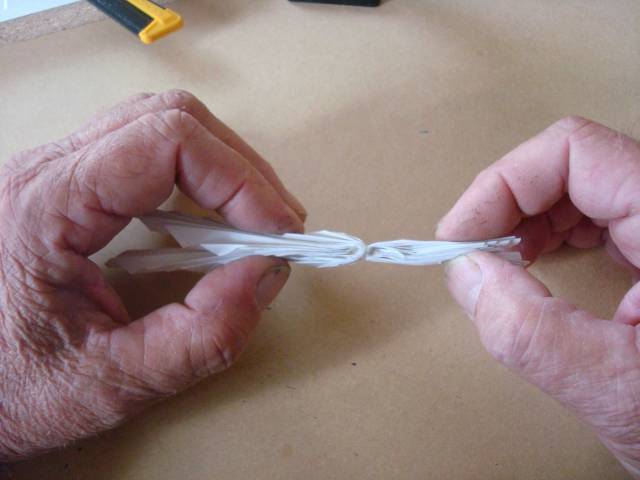
Here I am bending the top and bottom to create some form and separation of the two sides and top and bottom section
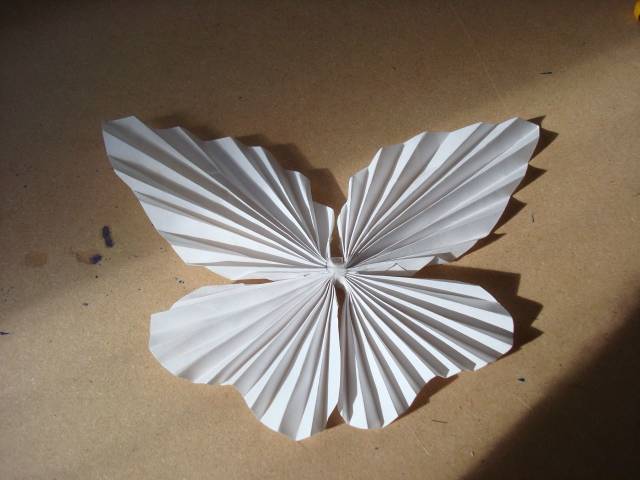
This is followed by spreading the four wings by manipulating them into the desired shape .
I will stop here and will post the second ( part 2 ) soon .
Hope you enjoy and that I have been clear enough with my explanation but if you have questions let me know .
Klaus
— Kiefer 松
4 Comments

Thanks for showing us how to make these Klaus. My 21 year old granddaughter is afraid of butterflies, (only the live ones). I guess she must have had a bad experience with one when she was little. We don’t tease her about it, but I find it a little amusing as I can’t think of anything more harmless than a butterfly.
Mike, an American living in Norway

Thanks for sharing the steps …

Very nice. It’s so clear the way you photo editing and explained it.
CHRIS, Charlottetown PEI Canada. Anytime you can repurpose, reuse, or recycle, everyone wins!

Great instructions. Thank you!
Jeff Vandenberg aka "Woodsconsin"