Share your craft projects
Make new craft buddies
Ask craft questions
Blog your craft journey
MJCD
173 posts
and
9 followers
in almost 12 years
in almost 12 years
More from MJCD
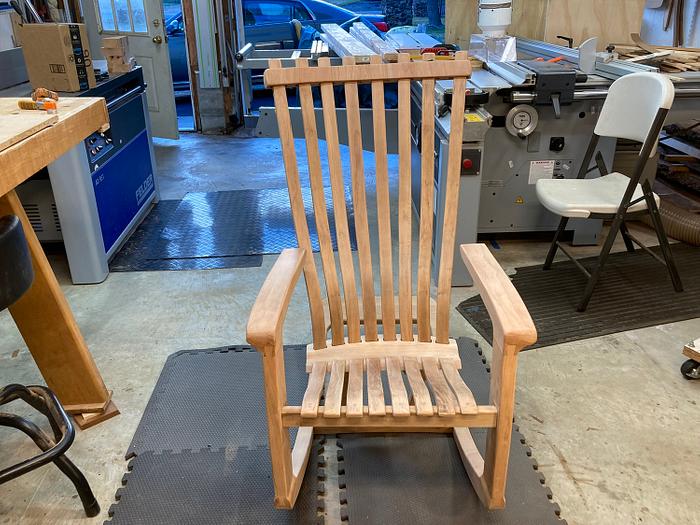
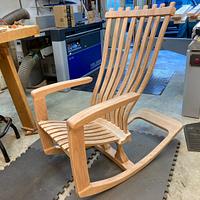
Rocking Chair Prototype
I posted this to Lumberjocks, but am more interested in posting here. Since my last post... some time ago... I've worked primarily on commissioned tables and desks. As these were fairly straight-forward pieces, they didn't meet my criteria for posting - I limit my postings to original design work.
I’ve had the opportunity to build 8 of the Hal Taylor-design classic rocking chairs, and then left behind rockers for perhaps 5 years now. Several contemporary desks and side tables later, I wanted to revisit the rocking chair from a different, non-classical, perspective.
I’ve had the opportunity to build 8 of the Hal Taylor-design classic rocking chairs, and then left behind rockers for perhaps 5 years now. Several contemporary desks and side tables later, I wanted to revisit the rocking chair from a different, non-classical, perspective.
This is a prototype, and while I started with a full-scale drawing of a rocking chair, the end-result bears little resemblance to the original design. As everyone knows, design-while-building is both fascinating and frustrating.
For those interested in the general design, I’ll offer that this is a very buildable chair, based on templates and common tools; the challenges arise in precise layout and execution, and maintaining a holistic sense of how the parts interact with each other: one example (we’re getting ahead of ourselves here…) - the Lower Cross Member (below the Seat) must remain square to the Front Cross Member, and everything in-between must also be square and align properly)… the challenges are subtle and demanding.
Design Considerations
This design departs from virtually every convention I know, except for the Rocker Rails… which are necessary for it to be… a rocking chair: the back has no fixed support, no legs to speak of, and I substituted sliding dovetails for the traditional Maloof/Taylor joinery.
Touching on each of these points:
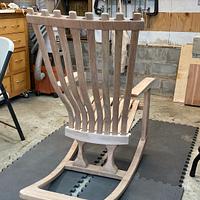
The floating back is carried forward from my High Back Chair (see my Projects section, here), and relies on the Back Braces being captured in a loose deep mortise, at the base of the ‘seat’, and the top being captured by a moveable Crest Rail.
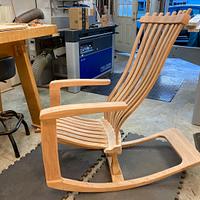
Sliding dovetails streamline the otherwise bulky Maloof/Taylor joint for the Arms/Front Risers/Front Verticals (legs, if you will). The traditional joint is beautiful… when used in a classic design; but out of place within contemporary chairs.
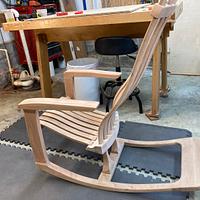
An under-seat ‘back riser’ arrangement supports the seat… these streamline the sides of the chair, and are sized to be the primary load-carrying element – I’ll re-visiting the ones used here, as their shape is my least favorite aspect of the chair.
The chair tapers 3 degrees front-to-back, which creates different sized cross-members (Front, Lower and Rear End Cap).
A final note on visual weight: this design places considerable physical and visual weight on the front half of the chair: the Front Risers, the large end of the Rails and the full weigh of the arms. This required the addition of the Rear Cap – to offset the otherwise front-end load of the parts, as well as to draw the eye along the full profile – it would not work to have so much going on forward of center, and nothing but thin sticks behind center.
Wood Selection
From prior builds, I had sufficient Cherry in the shop to complete the build. Billets for each piece begin life at 6/4, and are 5/4+ finished – the Rails are an exception, as I start at 8/4, and finish at 6/4+.
From prior builds, I had sufficient Cherry in the shop to complete the build. Billets for each piece begin life at 6/4, and are 5/4+ finished – the Rails are an exception, as I start at 8/4, and finish at 6/4+.
Build Approach
I work from templates whenever possible: these allow standardized parts, and design changes are first made to the templates, and the parts remade.
I work from templates whenever possible: these allow standardized parts, and design changes are first made to the templates, and the parts remade.
Festool Dominos are my go-to joinery application, and these are used for several of the joints; however, I found these to be problematic when first connecting the Rails, Front Verticals and Arms… I substituted sliding dovetails to spread the load across the joints – I made these exposed, rather than blind, for aesthetics, and practiced a great deal prior to making the cuts on ‘good billets’ (having said this, I still need more practice).
Seat Support (Back Risers)
I went through several profiles on the Back Risers prior to settling on the ones used … I need to revisit these – my daughter says she likes them… though, I’m not sure that she’s an un-biased critic.
I went through several profiles on the Back Risers prior to settling on the ones used … I need to revisit these – my daughter says she likes them… though, I’m not sure that she’s an un-biased critic.
Floating Back
I first incorporated the Floating Back in my High Back Chair. The design premise is that the Back Brace bottoms are angled (30 degrees) into individual deep mortises (in the seat), and are held in place by the pressure of the sitter’s weight. The floating Back Braces have both considerable flex front-to-back, and are constrained by the Crest Rail. This approach creates a very comfortable envelope for the sitter.
I first incorporated the Floating Back in my High Back Chair. The design premise is that the Back Brace bottoms are angled (30 degrees) into individual deep mortises (in the seat), and are held in place by the pressure of the sitter’s weight. The floating Back Braces have both considerable flex front-to-back, and are constrained by the Crest Rail. This approach creates a very comfortable envelope for the sitter.
Transition Block (Seat)
The Seat comprises two parts: Seat Slats (5 one-eighth inch x 18” slats bent and glued via a form) and the Transition Block – this piece receives both the back end of the Seat Slats and bottoms of the Back Braces… the piece serves to transition the visual line from the Seat Front to the top of the Back Braces (these elements are aligned to help support this).
The Seat comprises two parts: Seat Slats (5 one-eighth inch x 18” slats bent and glued via a form) and the Transition Block – this piece receives both the back end of the Seat Slats and bottoms of the Back Braces… the piece serves to transition the visual line from the Seat Front to the top of the Back Braces (these elements are aligned to help support this).
The mortises are cut using a trammel router jig – typically, I’ll use a 35” to 38” radius – both the Transition Block and the Crest Rail need to be made using the same radius.
Crest Rail
The Crest Rail is comprised of 8 blocks of glue-up mirror dados, which is then shaped via a compound arc: 35”-38” front-to-back, and 41”-45” top-to-bottom. The Crest Rail is made by ripping a 2” thick, 5” wide board on the bandsaw; these haves are cleaned on the jointer, and thicknessed on the planer. Dado locations are marked such that 5/16” is removed from each side in matched pairs (for 8 slots – one for each Back Brace. The two haves are glued together to create 8 through mortises. Individual blocks are then cut to separate the mortised pieces. These pieces are then mitered at 3 degrees on each side; then glued to form the desired arc. (there is considerable math behind this Once all eight pieces have been glued, the appropriate horizontal (front-to-back) arc is formed… then draw the desired vertical (top -to-bottom) arc, and cut on the bandsaw.
The Crest Rail is comprised of 8 blocks of glue-up mirror dados, which is then shaped via a compound arc: 35”-38” front-to-back, and 41”-45” top-to-bottom. The Crest Rail is made by ripping a 2” thick, 5” wide board on the bandsaw; these haves are cleaned on the jointer, and thicknessed on the planer. Dado locations are marked such that 5/16” is removed from each side in matched pairs (for 8 slots – one for each Back Brace. The two haves are glued together to create 8 through mortises. Individual blocks are then cut to separate the mortised pieces. These pieces are then mitered at 3 degrees on each side; then glued to form the desired arc. (there is considerable math behind this Once all eight pieces have been glued, the appropriate horizontal (front-to-back) arc is formed… then draw the desired vertical (top -to-bottom) arc, and cut on the bandsaw.
As I stated at the outset… this is a prototype… with the primary purpose to assess proportions and workflow. The fact that the design changed during the build means that I may need to build another chair to lock down all of the variables.
Local feedback has been interesting… my sister and daughter find it very comfortable; my wife is not a fan of contemporary designs… and she’d be happy if I just sold my equipment and took-up a different interest… and… so it goes.
I have not applied a finish to this chair; as I have to attend to other things for several weeks. When I do get to the finishing stage, I will use 2 coats of Zinsser Seal Coat (or Deft Lacquer Sealer) and several coats of Deft Clear Acrylic Wood Finish.
As always, I’m look forward to comments and constructive feedback; and I’ll try to answer questions as thoroughly as is practicable.
Everyone, Stay Safe and Chill-out (man, things have become tense out there).
2 Comments
Nice rocker with a very interesting design, Great job!
-- Paul--- Creativity is allowing yourself to make mistakes. Art is knowing which ones to keep. — Scott Adams
Nice rocking chair MJCD! Thanks for sharing such a great write up!!


