Share your craft projects
Make new craft buddies
Ask craft questions
Blog your craft journey

Ron Stewart
936 posts
and
25 followers
in over 3 years
in over 3 years
More from Ron Stewart
Small Yucatan Rosewood Ring Box
I built this box in 2014 and originally posted this project on January 17, 2016 (LumberJocks). This project marked several firsts for me: my first decorative box, one of my first experiences with solid lumber and wood movement, and my first (and only) experience with barrel hinges. I remember making drilling jigs for the hinges and a router jig for hogging out the box/lid interior, but I didn't take any photos. (This was before the time I always had a camera in my pocket.) It was a good learning experience, and my daughter is still using the box.
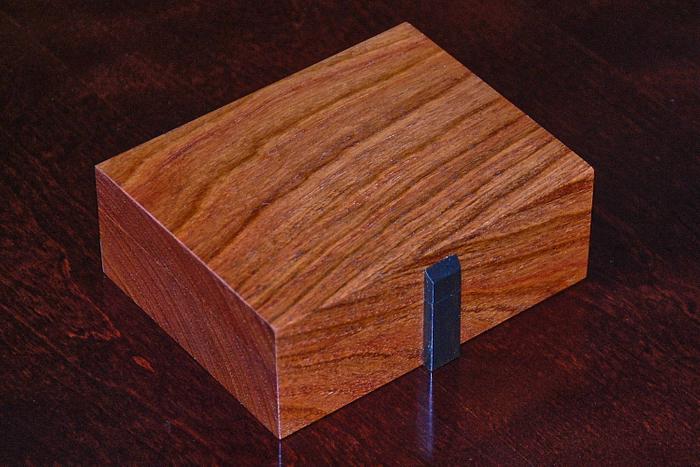
I made this box for my daughter about two years ago. She needed something to hold her small but growing collection of rings, so I saw an opportunity to try my hand at box making and learn some new techniques. I decided to try to build a box that looked like a solid, seamless block of wood with a nice grain pattern.
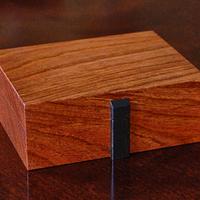
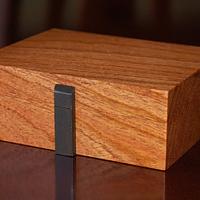
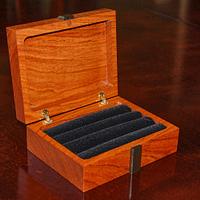
This box is a hollowed out block of Yucatan Rosewood with 10mm barrel hinges and a magnetic "clasp." I found the ring bars at Amazon (called velvet ring trays there). The dark brown accent strip in front is stained maple. It wasn't part of the original plan, and I'll talk more about that in a minute.
Most of my projects use veneered MDF or surfaced, dimensional hardwood. For this one, I ordered a 6"x6"x3" Yucatan Rosewood turning blank from Rockler. I didn't realize that turning blanks were coated in wax. I spent a lot of time trying to scrape it off with a putty knife, then decided I'd just saw off thin slices from each side instead; that was much faster.
To hollow out the box, I started by drilling a lattice of holes with a 1/2" Forstner bit and my drill press. I then made a template and used my router and a 1/2" pattern bit to clean up the cavity and flatten the bottom and top recesses.
For the clasp, I embedded 1/4" disk magnets in the front edges of the box's body and lid. I covered the magnet in the lid with a small slice of a cherry dowel. I didn't want any visible traces of the magnet in the body, so I drilled a hole from the bottom up (not all the way through, but ending about 1/16" from the top edge of the lip). I inserted the magnet, glued in a dowel, and trimmed it flush the the bottom. That worked well.
Now I'll describe that accent strip.
Above, I mentioned I don't have a lot of experience with solid wood and its movement. I'd have that box and lid matching perfectly one day, only to see a gap the next day because the lid had bowed slightly. I'd sand out the bow, only to have it come back. When it finally seemed to stop moving, I ran the whole box through the table saw to shave a bit off the faces to make everything flush.
Well, when I shaved the front face, I exposed the front edge of the dowel and magnet. It looked like a perfectly vertical wormhole with a shiny metal tip. (As Homer Simpson would say, "Doh!") I thought it looked sort of interesting, but neither my daughter nor my wife considered it an aesthetic improvement, so I had to improvise. The best idea I came up with was covering the mistake with a small strip of wood. All I had on hand was some maple, so I stained it and glued it in place.
To finish the box, I used boiled linseed oil to pop the grain, sprayed on a few coats of shellac, and finally applied some paste wax.
I saw the box a month or two ago, and it is still fitting together pretty well-not perfectly, but pretty close. If I had to do it all over again, I'd use more standard techniques (mitered sides, separate top panel, etc.). Even so, I'm glad I tried it this way; I learned a lot. Plus, my daughter likes it, and that's the most important thing.
8 Comments
Beautiful piece of wood. I wouldn't even have knew it opened if you hadn't shared the last pic of it.
Nice
Nice
Figuring out how to do something you have never done is what makes a good challenge.
Very eye catching.
I noticed the block of wood. Very interesting. I have not made one of those.
I noticed the block of wood. Very interesting. I have not made one of those.
Petey
Beautiful gift! Neat design.
Do you think the wood movement may have been "heightened" (made worse) due to being in the wax that comes around turning blanks? Or maybe that type of wood (grain is spectacular)?
Do you think the wood movement may have been "heightened" (made worse) due to being in the wax that comes around turning blanks? Or maybe that type of wood (grain is spectacular)?
Thanks for your comments. That was a nice looking chunk of wood.
Barb, I don't know if it was the wax, or if it was just the release of internal tension from cutting the block in two(ish). It seems like I see some movement every time I cut a thick piece of wood in two.
Barb, I don't know if it was the wax, or if it was just the release of internal tension from cutting the block in two(ish). It seems like I see some movement every time I cut a thick piece of wood in two.
simple elegance. let the wood do the talking.
working with my hands is a joy,it gives me a sense of fulfillment,somthing so many seek and so few find.-SAM MALOOF.
Nice little box, and a great design for the rings. I have always used a card scraper to remove the wax when needed.
Main Street to the Mountains
Thanks, pottz and Eric.
A card scraper would have been perfect. I still don't have one, and I probably didn't even know what one was at the time.
A card scraper would have been perfect. I still don't have one, and I probably didn't even know what one was at the time.
I took a small block of 1/2" tock about 2" x 6" and cut a groove in the end to house a utility blade, that works too.
Main Street to the Mountains


