


Share your craft projects
Make new craft buddies
Ask craft questions
Blog your craft journey

RyanGi
9008 posts
and
59 followers
in over 3 years
in over 3 years
More from RyanGi

 - Project by RyanGi")


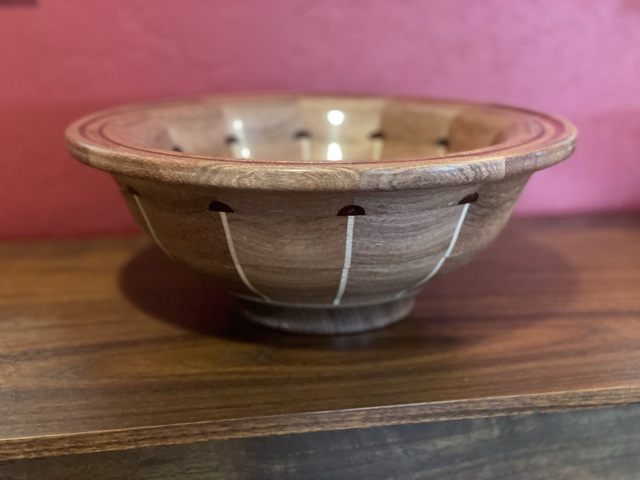
Segmented Bowl


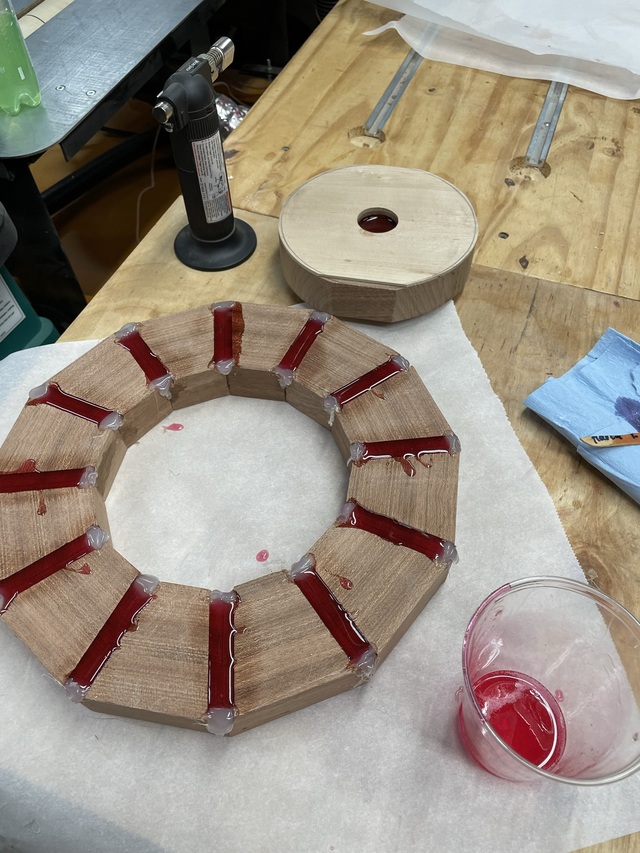
This was my entry for the Turning Swap at the other place. I’ve never done a segmented bowl, but I kind of had an idea what I wanted to do with it. As the idea evolved, I had the idea to add some epoxy and create sort of flowers or Lolly pops (or something) up the sides of the bowl. In retrospect, lining up all the vertical pieces was harder and more exacting than I probably should have undertaken for a first attempt, but it didn’t come out terrible. I also inlayed an epoxy disc on the bottom, as well as two inlays along the rim of the bowl.
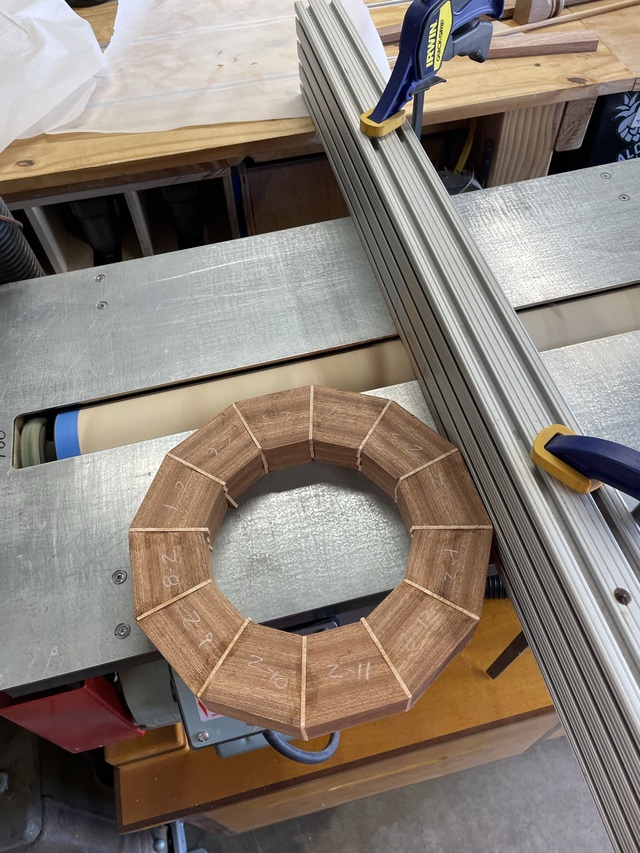
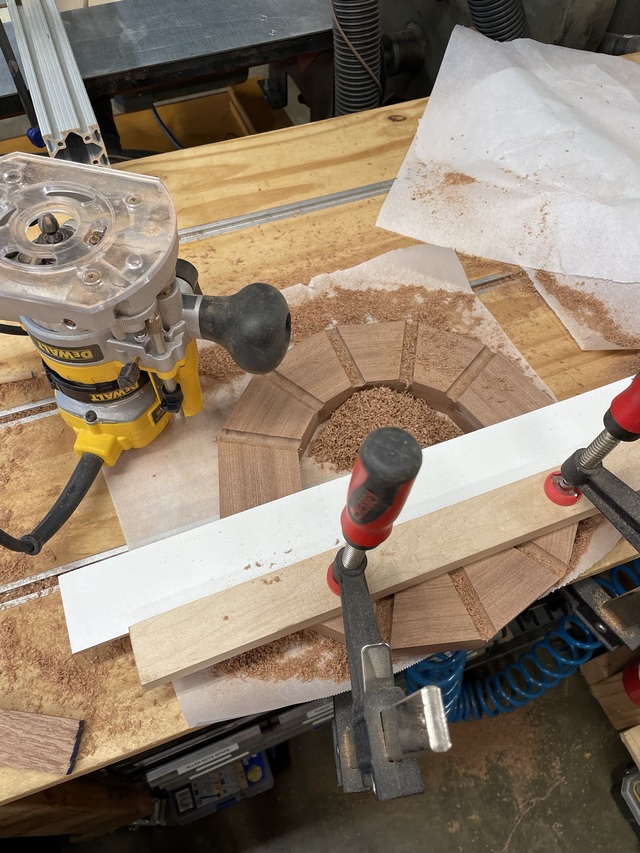
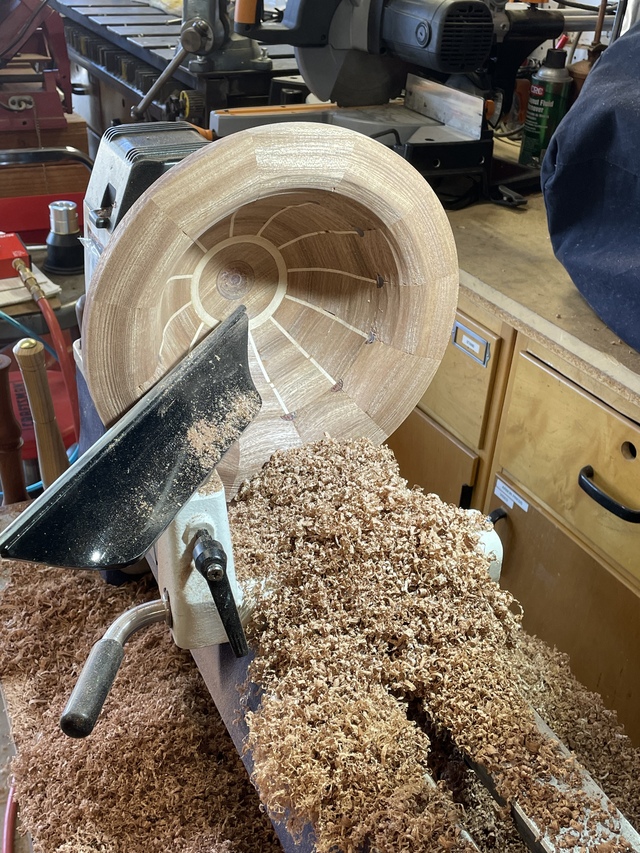
I didn‘t use a wedgie sled to cut my segments, rather my Incra HD miter gauge. It’s very accurate and produced great angles. I also didn’t use hose clamps to hold the rings together. Rather, I laid out a piece of blue tape along the bench and placed the wedges and accents tightly edge to edge, then rolled them up into a ring, securing in place the tape at the end. This resulted in very tight rings. What I did notice, however, was that I used tape narrower than the height of the wedges, and i didn’t concern myself too much with whether the tape was centered in the middle of the wedge’s height. Anyone who uses the blue tape trick for edge banding or glueing knows how tight you can get it. Well, making the rings tight with tape, and having the tape end up slightly off center resulted in a very slight skewing of the blocks, which resulted in a couple very small gaps that wouldn’t have been there otherwise. The learning point for me on this one is that the blue tape clamping works great, but the tape should be at least as wide as the wedges are tall so that you get even compression all the way across the ring. That aside, I’m pretty happy with how it came out.
I didn‘t use a wedgie sled to cut my segments, rather my Incra HD miter gauge. It’s very accurate and produced great angles. I also didn’t use hose clamps to hold the rings together. Rather, I laid out a piece of blue tape along the bench and placed the wedges and accents tightly edge to edge, then rolled them up into a ring, securing in place the tape at the end. This resulted in very tight rings. What I did notice, however, was that I used tape narrower than the height of the wedges, and i didn’t concern myself too much with whether the tape was centered in the middle of the wedge’s height. Anyone who uses the blue tape trick for edge banding or glueing knows how tight you can get it. Well, making the rings tight with tape, and having the tape end up slightly off center resulted in a very slight skewing of the blocks, which resulted in a couple very small gaps that wouldn’t have been there otherwise. The learning point for me on this one is that the blue tape clamping works great, but the tape should be at least as wide as the wedges are tall so that you get even compression all the way across the ring. That aside, I’m pretty happy with how it came out.
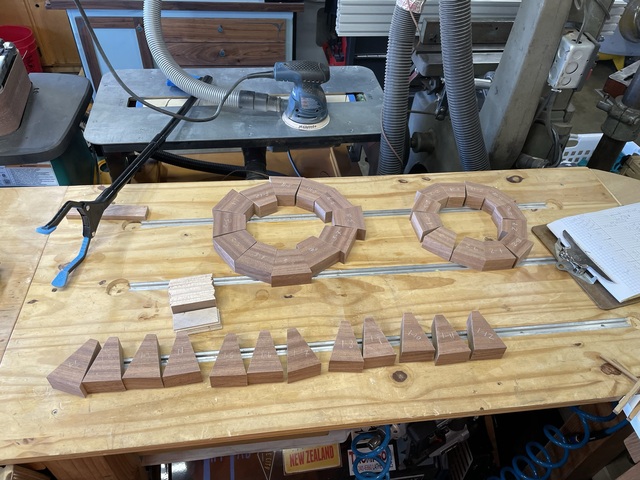
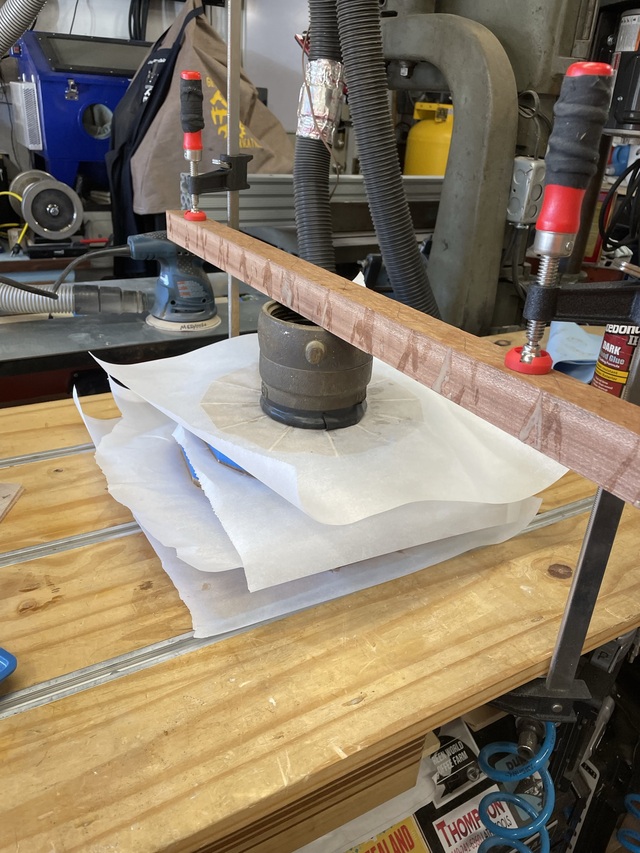
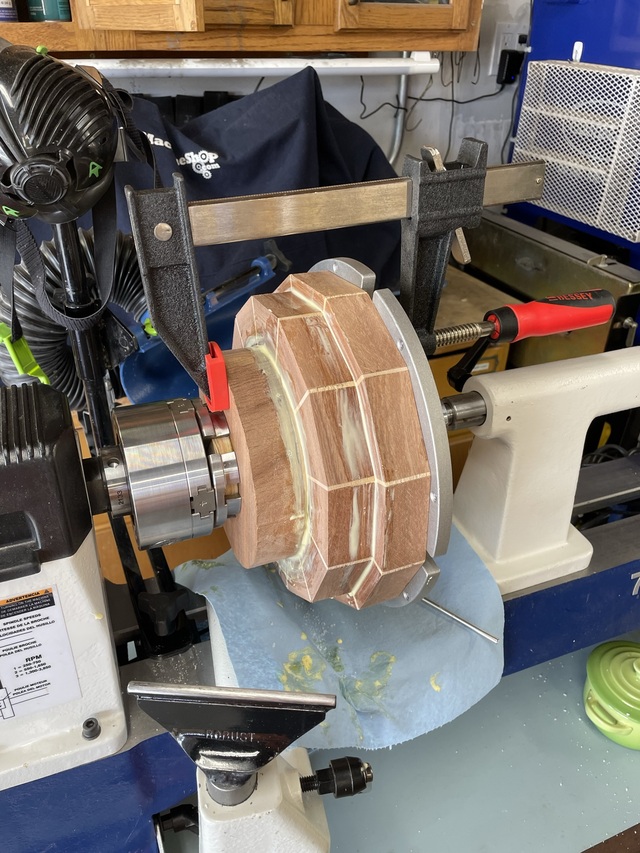
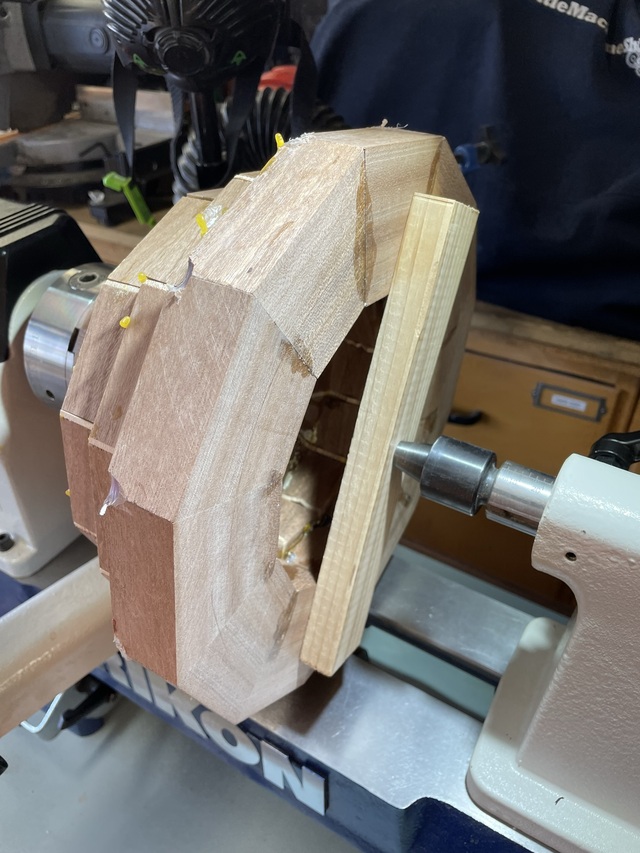
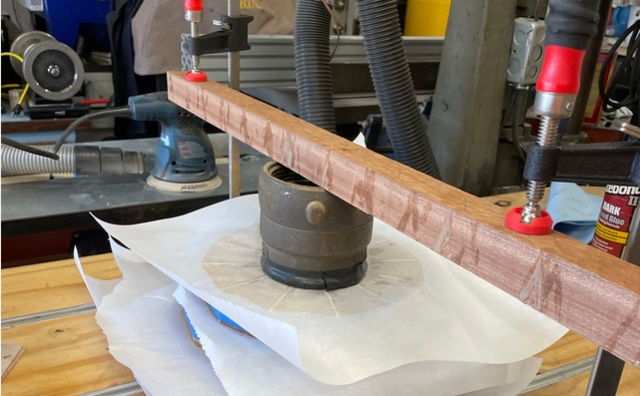
Sanded the rings flat on my FlatMaster, and assembled them using the tail stock of the lathe and a Jumbo/Lomgworth style chuck.
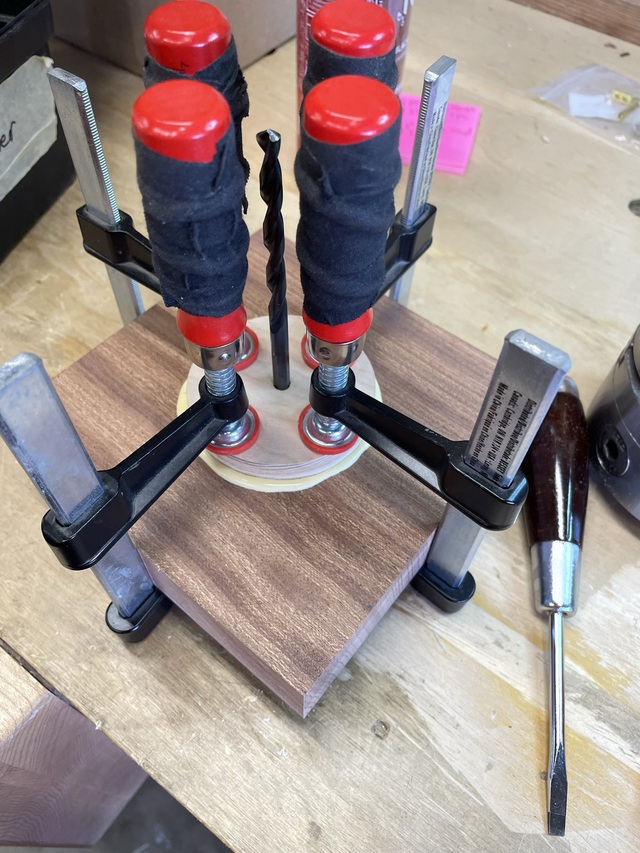
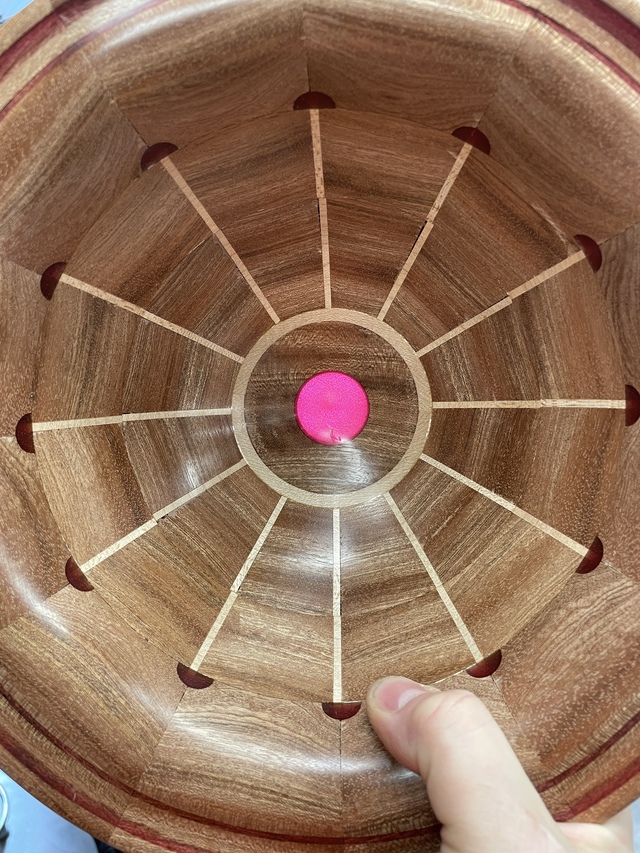
For the epoxy portions, I drilled the bottom hole, routed flutes in one of the rings, and ended up turning recesses in the rim…and backfilling them with epoxy, then turning them down…but all at different times during the build. This made for some pretty complicated planning (especially for a first attempt) but the result looks like it was all done at once with the same color.


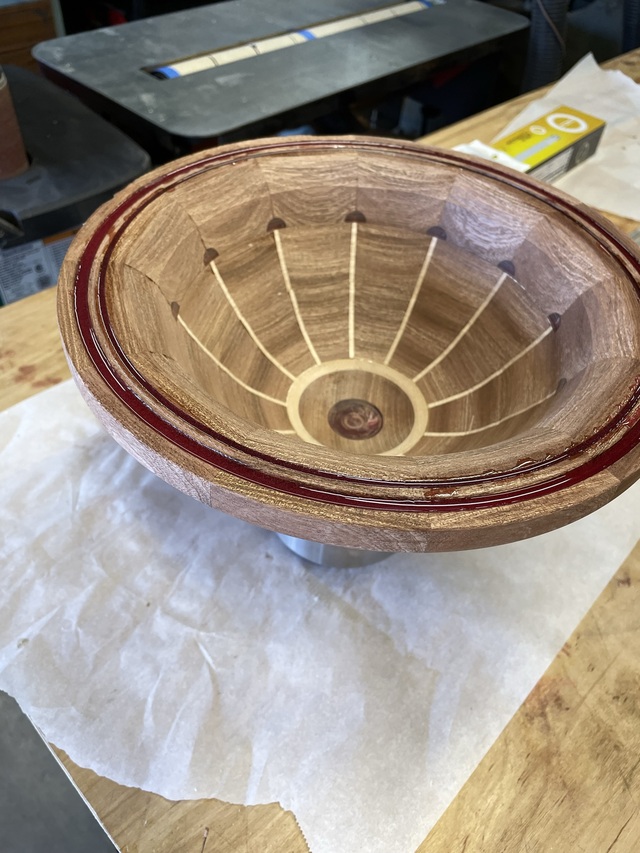
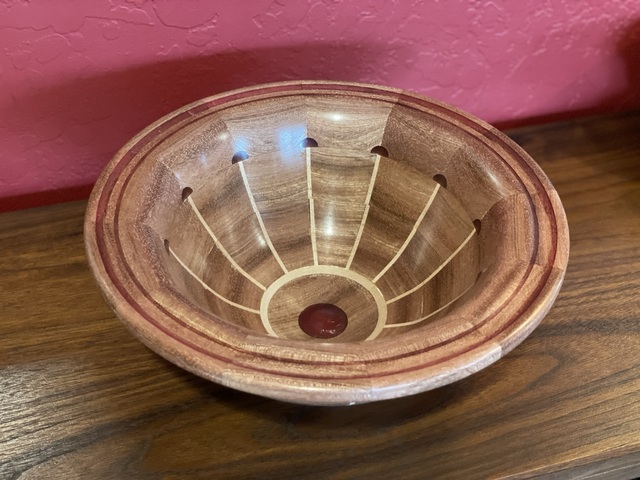
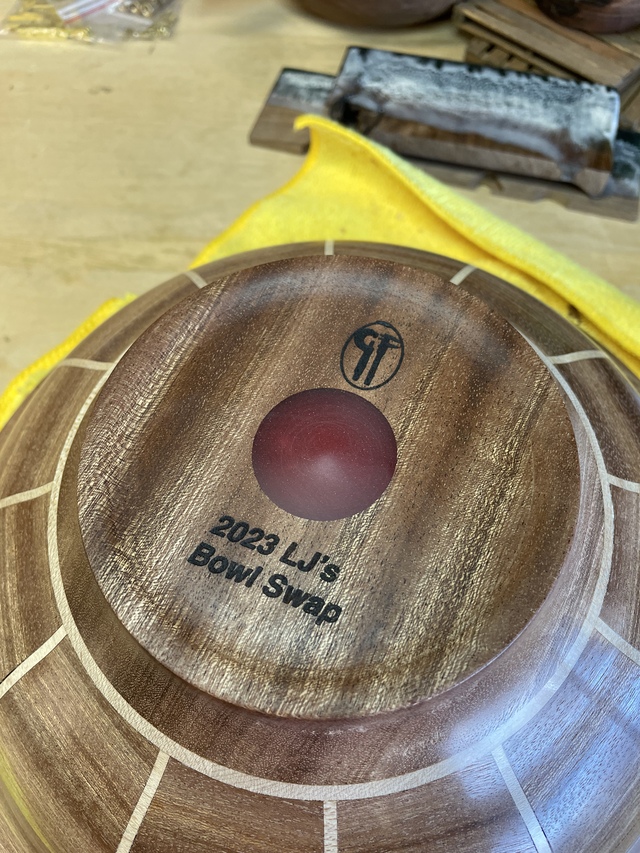
I really liked the natural look of the wood, so I just sanded to 3200g and then used Dr. Kirk’s. Finished simply with Renaissance Wax. Makers mark and swap info laser’d on the bottom for posterity!
There are certainly things I’d like to clean up if I did this project again, and I learned a ton, but overall I’m pretty happy with it!

Ryan/// ~sigh~ I blew up another bowl. Moke told me "I made the inside bigger than the outside".
28 Comments

Nice design and good execution. I like the epoxy accent!
No name noobie here

Really nice bowl Ryan, cool design & I like the grain in that sapele.

Very nice looking bowl.
Nice work Ryan
Petey

Very nice bowl look great.
-- Soli Deo gloria! ( To God alone be the Glory)

wow looks awesome with epoxy GR8 JOB 😍😎👍
*TONY ** Denver * ALWAYS REMEMBER TO HAVE FUN

Ryan, the accents look great, never would have thought of that. Of course, I haven't used epoxy much just to glue pieces together. Well done.
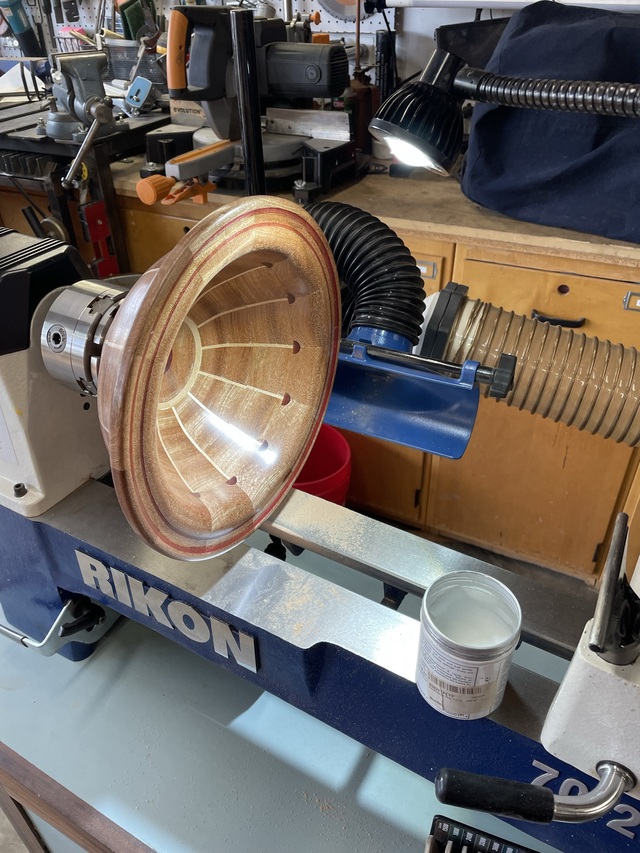
Noticed the DC attachment in the photo. How well does that work for you.
Noticed the DC attachment in the photo. How well does that work for you.
Main Street to the Mountains

That came out really nice Ryan! I like how you used the ball-nose router bit to create the thumbnail epoxy features.

I really like that one, Ryan.
No Bees. No Honey. Bees Lives Matter

The epoxy features are a neat touch, Ryan. I’ll probably be stealing that idea at some point.
May you have the day you deserve!
Thanks fellas. I’ve become a fan of epoxy as an accent. Not all the time, but I feel like it’s got its place. I also think the thumbnail profile could bring interesting contrast if it was inserted at different layers. Kind of an oscillating pattern up and down. I might try it at some point!
Noticed the DC attachment in the photo. How well does that work for you.
Eric, it works well for sanding, especially with if you pay attention to where you place the sanding discs on the piece. As you move the disc higher or lower it changes where the sanding dust is directed. Works best, obviously, when the dust is directed at the collector.
Ryan/// ~sigh~ I blew up another bowl. Moke told me "I made the inside bigger than the outside".
Ryan, might give something like that a try.
Next up to try is incorporating patterns in a turning.
Next up to try is incorporating patterns in a turning.
Main Street to the Mountains
The epoxy needs to be fully fully cured and then does much better with carbide….I chipped the hell out of it initially, but I’ve learned my turning skills are near crap, so I give myself a lot of fat to trim down and fine tune.
Ryan/// ~sigh~ I blew up another bowl. Moke told me "I made the inside bigger than the outside".

i just saw that over "there". wow you did a beautiful job on that, love your design.
working with my hands is a joy,it gives me a sense of fulfillment,somthing so many seek and so few find.-SAM MALOOF.

Beautiful bowl!!!!!!!!!!!!
Cheers, Jim ........................ Variety is the spice of life...............Learn something new every day
Outstanding!!! One of the nicest bowls I've seen!
Mike

Some really nice patterns incorporated into that!
Thanks guys!
Ryan/// ~sigh~ I blew up another bowl. Moke told me "I made the inside bigger than the outside".


Not being a bowler, nevertheless many extra thumbs for the great presentation... sure to give both novices and veterans a few ideas.
Interesting clamping,
Hell, if mum had this bowl all those years ago, I wouldn't have been so embarrassed about my haircuts in primary school.
If your first cut is too short... Take the second cut from the longer end... LBD
Thanks ducky.
Ryan/// ~sigh~ I blew up another bowl. Moke told me "I made the inside bigger than the outside".
More from RyanGi