Another Japanese project. This is part of a suite of items that goes with the Japanese Incense chest, that I posted earlier - check it here and the associated writing table . Having made the chest I decided to make a full suite of Incense - Kodo related wooden items to go with it. The two main pieces were a writing table - Bundai, check it out here, and this document box - Ryoshibako. Similar antique sets of these made from the late 11700's to the late 1800's are seen for sale by Christies, and Bonhams at fabulous prices. While just an antique Ryoshibako can fetch US$1000's
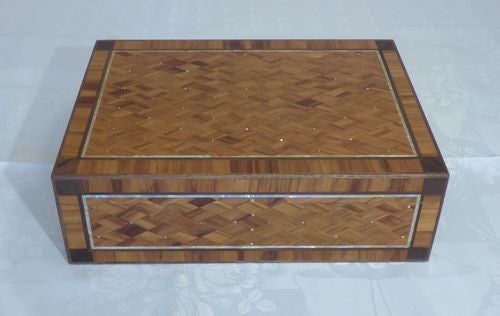
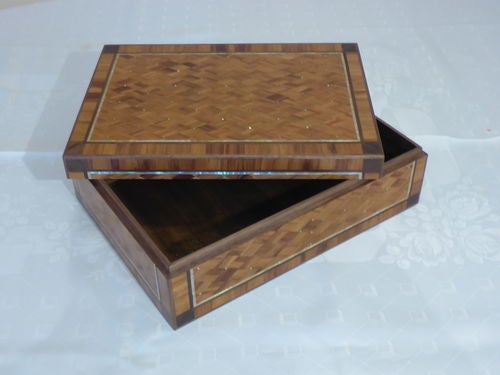
To ensure these additional pieces were an obvious set I used the same teak parquetry pattern, with walnut and shell stringing, shell dots, a teak crossbanding boarder, and walnut edging. The box is big enough to hold A4 sized paper. It is made from veneered plywood - with the teak parquetry on the outside and walnut veneer on the inside. The inside is also enhanced with sprinkled gold dust.
A problem I could foresee was how to ensure the parquetry pattern on the sides would be continuous when the lid was cut off and the rebate for the push fit lid fitted.
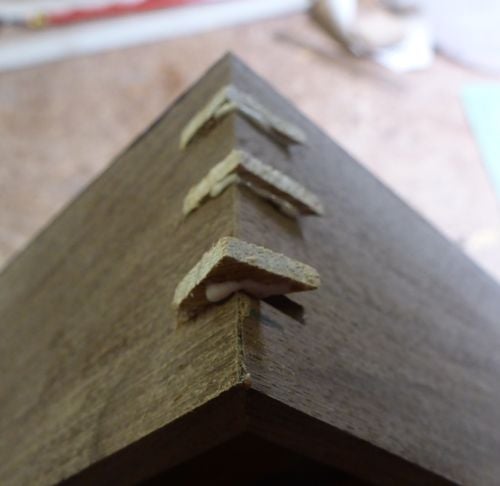
So …………………………… the plywood box was made with a walnut strip glued to the bottom edge, and another wider strip where the lid would be cut off. The inside was then veneered and finished, and a groove cut on the insides (where the solid walnut strip was) that would form the inside rebate for one half of the push fit lid. A usual rebate on the top edges would take the lid. The box was then glued together using simple splines similar to the ones below.
These were levelled and then the parquetry panels were glued on which covered the splines. However to ensure the parquetry matched once the lid was cut and the lower rebate for the push fit lid machined, I had to adapt them. I did this by cutting the parquetry side panels along where the lid cut line would be, and taped a 12 mm /1/2inch wide strip of veneer between the two halves, making sure the parquetry lined up on each side of the cut strip. I could now glue the parquetry veneer each side of the box in turn.
I then put the shell stringing in and the walnut edging. and finished the sides. I now had a sealed box with a walnut strip all the way round where the lid would be cut off. Once the lid was cut off and the top and bottom edges finished, I used the router to put a rebate around the bottom half of the box the same height as the walnut strip. This removed the walnut strip which now enabled the parquetry on the top and bottom halves to match. I should have taken pictures which would have explained it better.
Usually I would have veneer both the inside and outside before gluing the box together. Had I done this I would have lost some of the parquetry when I cut the box in two and then cut the rebate for the push fit lid.
Anyhow enough of that. Hope you like the box - quite simple really apart from the time consuming parquetry.
The whole box is finished with 8 or 9 coats of polyurethane varnish, sanded down with mirco mesh through to 4000 grit, and then wax polished.
Thanks Steve - I see you've been checking out my last posts! Yes the alignment of the parquetry was a challenge. I have a Japanese writing box that had a similar alignment challenge. I'll have to post it as well.