The cabinet top and drawer faces are maple ply. All of the drawer faces are continuous grain from one piece of maple ply. All the hardwood is soft maple except for the cherry accent in the center. The sides and back are birch ply. The finish is 5 coats of Waterlox. For shop furniture I use maple for the show faces and cheap out with birch on sides and back. With the Waterlox finish the color match is nearly spot on between the two different species of the ply.
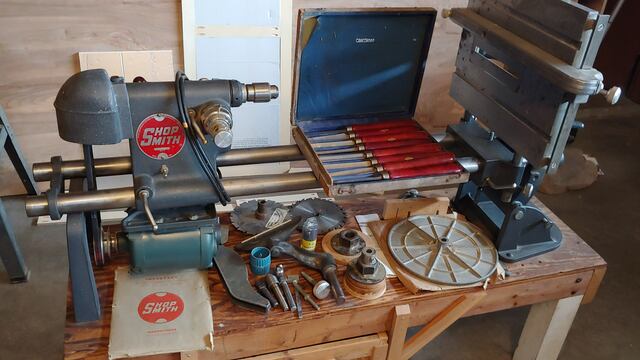
The goal of this project was to build a new cabinet for my ShopSmith Model 10ER to live on. The cabinet needed plenty of storage to fit any accessories, be very stable, and mobile when required. The drawer measurements and layout were based off the center bottom drawer stowing the table and all its parts. After that it was just math to figure out the rest of the drawer sizes. The photos show that I have done most of my organization already. I still need to finish the drawer for the lathe rest and chuck but I haven't picked a chuck yet so will wait until I have that in hand. That leaves 4 drawers unused at this time to "grow" in to as I use the ShopSmith more.
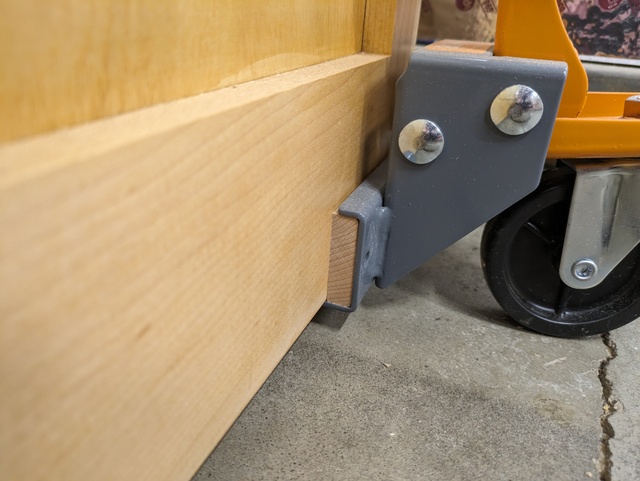
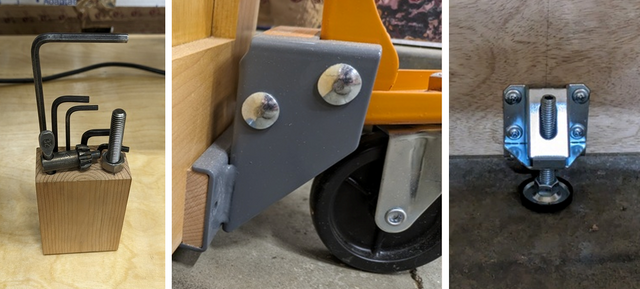
For mobility I chose the Bora PM-1050 and just used the metal corner plates with the wheels. The only thing necessary to get a good fit is fitting some shims between the cabinet base the wheels plates.
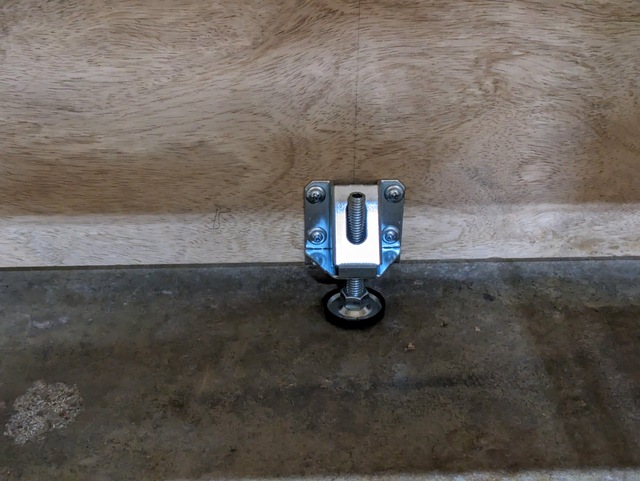
To achieve stability and ensure the center of the cabinet never sags I chose to go with some medium duty leveling feet that have an L-shaped mounting bracket that slips under the bottom lip of the cabinet. I have 2 of them centrally located on the cabinet under the big drawer.
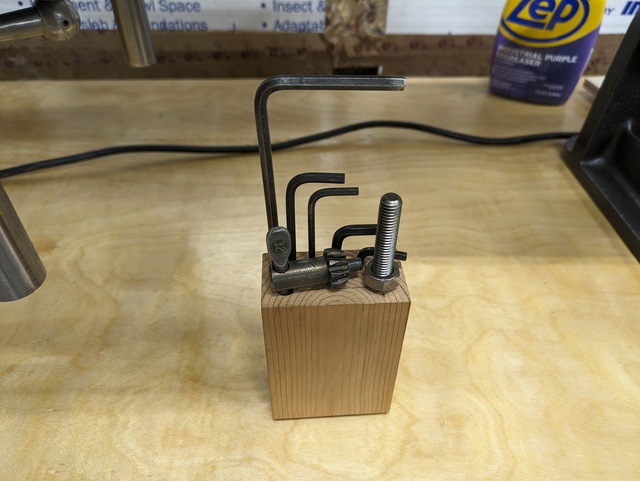
One of the simplest things I made for this that I get the most use out of is the little tool holder with a magnetic base. I set that down on the big cast iron base when making adjustments or swapping tooling. Its made from a 2x4 scrap but damn if it isn't handy.
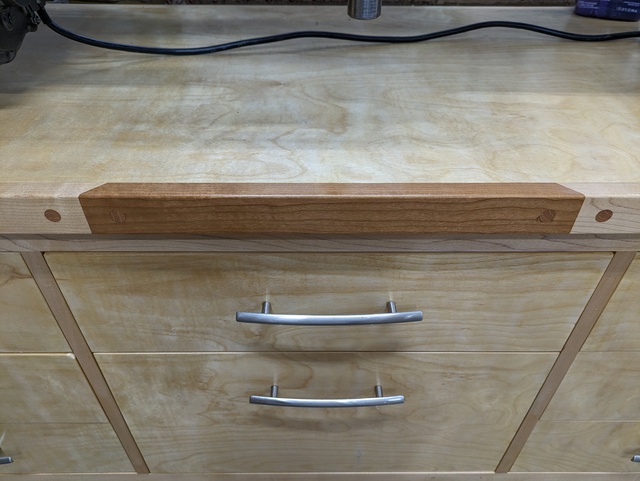
My proudest moment of the entire cabinet is the cherry accent in front. I only had EXACTLY enough maple on hand to do the edge banding assuming I didn't screw up. Well I let Murphy do some math and of course the front section of banding came up short. I was already over budget and over time so I had to improvise. Here is a close up of how the accent came out. I'm quite pleased with it.
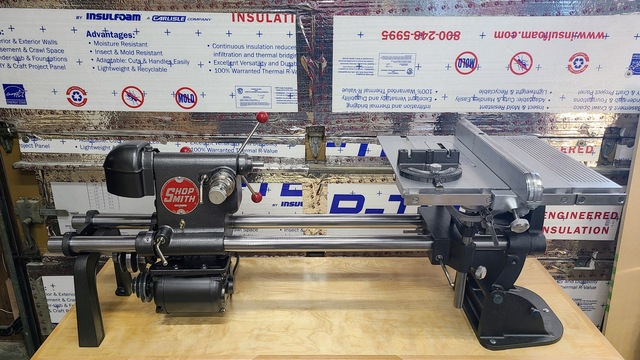
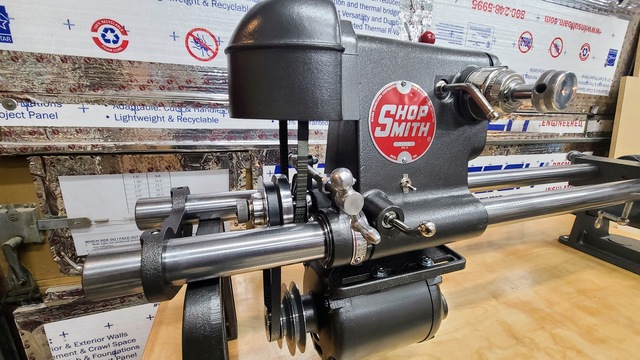
This project had to be finished in time to house the ShopSmith as I was deep in the restore process when I started building the cabinet. Here are some bonus images of the ShopSmith before and after restoration.
And I want to give a special thank you to HookieKen for helping me with a repair to the speed changer. I broke a very important part and HookieKen was kind enough me lots of time and money by crafting a solution for me. Thanks Kenny!
Lots of good features, and well done. I have an old 500 dating back to 1973, still in use. The lathe tools look like the ones I use, an old Craftsman Set.
Neat cabinet sansoo22... and looks like a great restoration...
That ShopSmith was the first to start my tool envy... currently a Shaper... neither available in Aussieland.
It's little asides (hints/tips/gadgets) like this, that makes me appreciate even further when authors put a little extra effort into their presentation.
Cheap and woodwortking in the same sentenc is an oxymoron!
wow what a great restoration and cabinet build. looks good to go another 50 years of use. i love to see people that put that much appreciation into their tools.
working with my hands is a joy,it gives me a sense of fulfillment,somthing so many seek and so few find.-SAM MALOOF.
Neat cabinet sansoo22... and looks like a great restoration...
Thank you. I like to include the little details in my project write up because I assume I'm not the only person that spends more time than they should thinking about those things. If I can help save someone time or inspire a solution for them I think its worth the time to add them to the write up.
i love to see people that put that much appreciation into their tools.
Thanks Pottz. I really appreciate that. I don't get as much time in the shop as I would like so I tend to go "all out" when I do. I also REALLY like old tools that look shiny and new again. Its funny that I did my first fancy shop cabinet as a practice piece to get better at cabinets. But I liked it so much I've done nearly every other shop furniture piece in the same style. Now I'm kind of stuck doing everything in the shop the same way...but its going to look AWESOME when Im done.
i hear ya about the shop cabinets. the first one i made was with left over melamine and clear doug fir for the trim and drawer fronts. i loved how it looked so everyone since has been done the same way.
working with my hands is a joy,it gives me a sense of fulfillment,somthing so many seek and so few find.-SAM MALOOF.
Very nice man. A damn near perfect cabinet for that tool. I had forgotten about the speed changer piece and honestly don't even remember what I made but it appears to be functional so I'm glad it worked out 😎