Fotodog
in almost 2 years
More from Fotodog
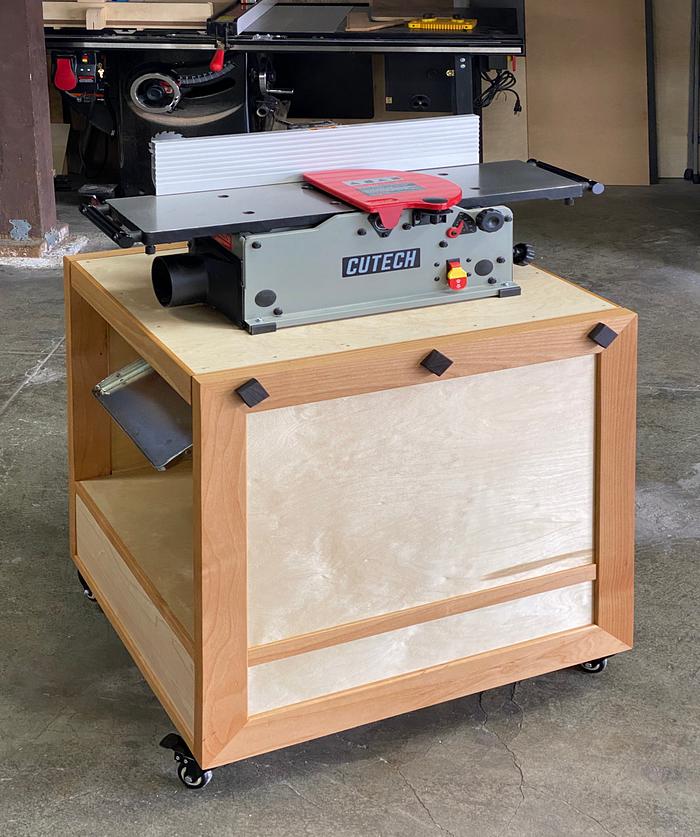
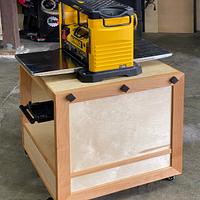
Flip Top Shop Cart
The top is a torsion box design. The interior frame of the box is made from 1x3 Alder spaced to receive the bolts that hold the tools, and the skins are 1/2” Maple plywood. I wrapped it with 1/4” Alder to hide the plywood edges. The sides are frame and panel construction with the same materials. The bottom and interior shelf are made from two 1/2” sheets of plywood glued together for added strength. All joints are assembled using my Dowelmax jig.
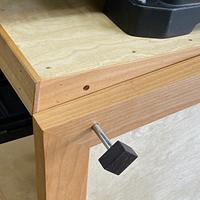
I didn’t really like the way most people secure the flip top in place, so my design uses removable 3/8” steel pins that slide through the side panel and into the top at each corner. The challenge is getting the holes for the pins in perfect alignment when the top is flipped in each orientation. They must be exactly the same distance from the center pin, and exactly the same distance from the top. My solution was to dry fit the top in place, drill a 3/8” hole dead center on both sides through the side and top, and then use my dowel jig with 3/8” drill guides and a spacer rod (supplied by Dowelmax) to drill holes for the pins at exactly the same distance from the center. The center pivot hole was then enlarged to 1/2”, and I used 1/2” x 5” bolts as the axle on each side. The top flips nicely and the pins lock it in place very solidly. I added some Wenge “caps” to hide the ends of the hardware, because every shop project should have a little Wenge.
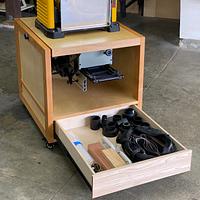
I also designed the cart with a drawer, since I can always use more storage. 2” locking casters allow me to roll the cart into place when needed. Even though this is shop furniture, I still like to add a finish, which was my usual Osmo Polyx Hard wax Oil.
It’s great to have both machines ready to go without having to lug them onto a work table. And if anyone with limited shop space is on the fence about a benchtop jointer, I love this Cutech 8” jointer. I previously used a planer sled and hand planes as a substitute, but this jointer works great for stock up to about 4’ in length. You can get close on longer stock. I chose this one because it has extra supports to hold the fence dead square and not flex, a common complaint with benchtop jointers with aluminum fences.
24 Comments
working with my hands is a joy,it gives me a sense of fulfillment,somthing so many seek and so few find.-SAM MALOOF.
Here’s mine:

Ryan/// ~sigh~ I blew up another bowl. Moke told me "I made the inside bigger than the outside".
I expect I’ll be copying this as my garage shop is space constrained and I have the same jointer.
Ron
Cheers, Jim ........................ Variety is the spice of life...............Learn something new every day

Nice job FD... You guys seem to try to win beauty contests with you shop cabinets.
Just never put you two favourite "fitable" tools on it, otherwise you'll get dizzy continually flipping it.
If your first cut is too short... Take the second cut from the longer end... LBD
Ryan/// ~sigh~ I blew up another bowl. Moke told me "I made the inside bigger than the outside".
It doesn’t feel too tall at all, in fact it’s nice to have it just a tad taller than you think you want so you’re not all hunched over.
That said, I measured everything out and thought I had about an inch to spare during rotation…turns out I didn’t. The very end of the table impacted the top of the drawer. Doh!!
Easy enough to fix, I just moved the whole jointer forward on the table along the long axis about an inch and re-secured it to the flip top table. It’s not perfectly centered, and it will only rotate one way (and then backwards to its original position, obviously), but it works just fine.
If everything is perfectly centered on both sides of the flip top (by center of mass over the axel) the table should rotate around using the strength of only one finger…mine requires a full hand to control it (since it’s not quite centered, as I said above), but it’s still very easy to flip…it’s just not perfect!
Ryan/// ~sigh~ I blew up another bowl. Moke told me "I made the inside bigger than the outside".
Thanks for getting back to me fairly quickly!
I’m still on the fence about running the jointer bed perpendicular vs parallel to the axis of rotation, but your replies reduced my concern regarding the jointer bed height to clear the rotation. I’ve also been chatting with Greg of Greg’s workshop on YouTube, who’s table features the same style jointer and a similar planer but in the aforementioned parallel orientation: https://youtu.be/bQocIZlY9MY?si=dJIVgGOgRnj3ZzBU
He told me his jointer bed sits at 39” high. Would you guys be able to measure what height your jointer bed and wood tabletop sit at to give me an idea?
Also more specifically to RyanGi- looks like your planer is the same model as mine, the Dewalt DW735. I’ve been debating whether to run my planer parallel or perpendicular to the axis I run my jointer- since whereas the 12” Cutech jointer only has a listed width of 23.75”, the DW735 needs like 27” because of the crank handle. Looks like you may have swapped over to a star knob for that very reason? But hard to tell in available photo. Would you mind providing more photos of your flip top cart? Also what is the Length and width of the rotating surface? And do you store the dust collector adapter on the planer at all times?
Also what diameter pipe did you use for your rotating axis?
Rotating table top surface is 24” wide, by 23” along the bed axis (what I’ve been calling the long axis…it’s this length because of how I used to store it under another bench). The table itself is just over 2” thick, and I’m fairly certain I used 3/4” OD black pipe for the axel. It’s hidden with end caps but that’s the nominal thickness of the edge banding that’s sandwiched between the plywood table surfaces in the torsion box build.
Yes, I went to an alternate handle on the 735x to allow it to fir on the table and rotate. It hasn’t caused any problems at all. 👍🏼
Ryan/// ~sigh~ I blew up another bowl. Moke told me "I made the inside bigger than the outside".
Hope these help!

Ryan/// ~sigh~ I blew up another bowl. Moke told me "I made the inside bigger than the outside".
Thanks for the info.
My jointer arrived today and I was so excited to use it to build its own stand- figured that was a good project with it. Unfortunately, like 2 minutes into setting the thing up, I noticed a significant amount of play in the infeed table. Contacted Cutech customer service and they confirmed it was out of spec, and will likely need to be fully exchanged. I’m annoyed that it arrived broken but glad that their customer service is proving helpful- reassuring given that this is my first experience with any Cutech branded tools. But it’s going to end up delaying the projects I bought the jointer for, so bit bummed.
I’d love to know what knob you used to replace the original on the Dewalt. Seems like a good idea for conserving space.
Can you provide a few pictures of the table with the Dewalt planer on the topside? Trying to plan my design and seeing that could really help my brainstorming process.
Also, are you big into wood turning? Saw the bowl thing in your quote line
I built my flip top over 15 years ago with one side being an adjustable outfeed table

and since then it has had many diversified residents which seldom complemented each other in mass. Since I managed to give away my Kreg Foreman to some unfortunate sucker, my disc sander is the lonely squatter.
To facilitate flipping, I installed a "lever arm" consisting of two tubes with one fitting inside the other and both sliding in a pair of eyebolts... pulling out the arm makes the imbalance just that tad easier to tame,
If your first cut is too short... Take the second cut from the longer end... LBD


