

Share your craft projects
Make new craft buddies
Ask craft questions
Blog your craft journey
RyanGi
9110 posts
and
59 followers
in almost 4 years
in almost 4 years
More from RyanGi
Little Library
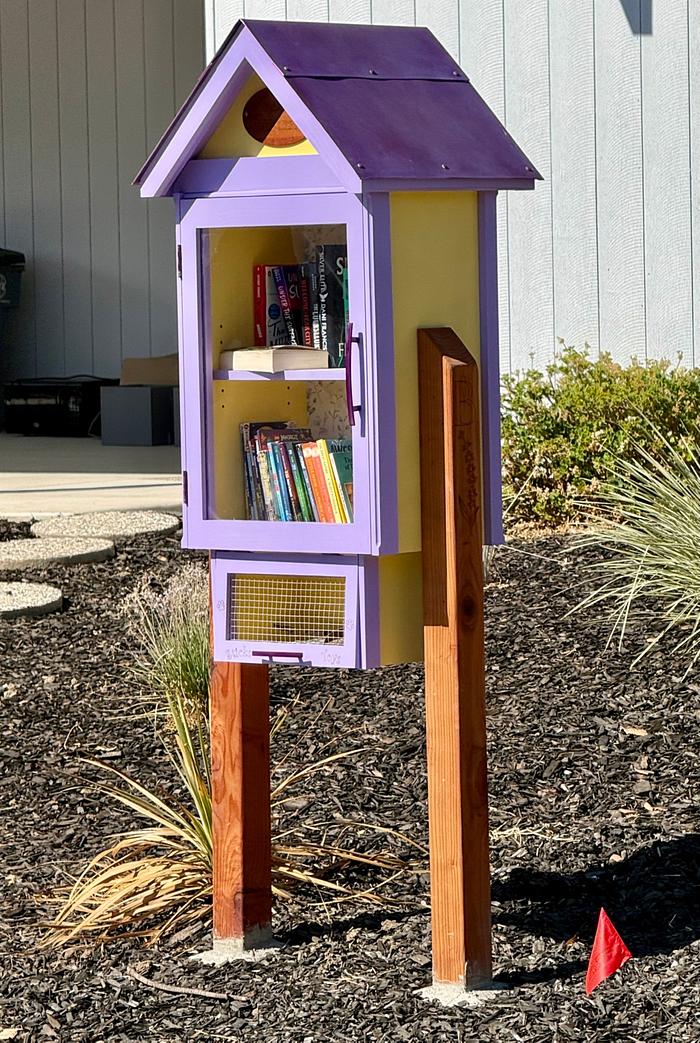
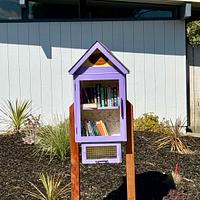
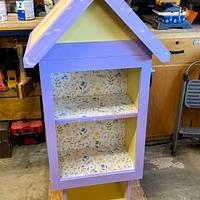
This was a project requested by our neighbor who was moving across town from us. They had a Little Reading Library in front of their house when they were around the corner from us but, since moving, their kids were missing having it out front. She asked me if I’d be willing to build them one. They were pretty open with the ideas, but had a yellow and lavender color pallet they liked. We talked about it a bit and she gave me pretty free rein over design. I knew we were going to blow past their budget, just based on materials costs here in CA, but SWMBO and I figured the rest would be our donation to the kids.
The bulk of the parts are cut from a sheet and a half of 3/4 ply. I don’t do too many painted projects, so priming and pre-painting were something I had to think through. Lots of parts make up this project. This was the basis for design I started with, then just kinda went off on my own with it.
The bulk of the parts are cut from a sheet and a half of 3/4 ply. I don’t do too many painted projects, so priming and pre-painting were something I had to think through. Lots of parts make up this project. This was the basis for design I started with, then just kinda went off on my own with it.


Most of what you see above are the myriad of trim pieces that outfit the carcass. Being an ‘outside’ project, I made sure to overlap all the joints, seal them well, etc. I also built the carcass separate and unintegrated from everything else…figuring that would lend to weather proofing for the books inside. The peaked roof section is totally separate from the carcass, as you can see below.


The face frames and most of the trim were joined with loose tenons and glued tight. Once the carcass was together and the frames built, a bunch of interior deco stuff went on. It’s all kind of a blur of the girls picking backgrounds and colors, the floral print is vinyl wallpaper, installed over primed wood. I designed in a second, smaller storage area below the main book cabinet…this is for ‘Sticks and Toys’ for passing dogs. I faced that one with hardware cloth, figuring a slobbery ball may end up in there or something…the book cabinet frame would eventually be faced in plexiglass.


I jazzed things up a bit with some laser engraving. The kids names start with a B and a G, so that got plastered all over the place. I engraved the large panel on the back, the support legs, and made a medallion for the front.


The roof was a separate challenge. I used aluminum flashing, cut and then felded the edges and seams. It ended up in three parts, based on size. I powder coated all the hinges and pulls, as well as the roof. The large sheets are hard to get consistent powder to flow across because of the way large, flat metal sheets carry current…it actually repels the powder in some areas. I was going for a kind of tie-dye effect, because I knew it wouldn’t come out a consistent color across…and I chose to use a semi-transparent powder, which was probably not the best choice, but it’s what I had that matched best. I’m not thrilled with how it came out, but it looks ok and will wear the weather well. I secured it in place with decorative tacks.


All assembled, it was over 4 feet tall, not counting the legs! The paint is exterior acrylic, and the redwood legs are finished with several coats of a Tung oil finish. We got it cemented in their yard and the kids filled it up. Everyone was happy!


Ryan/// ~sigh~ I blew up another bowl. Moke told me "I made the inside bigger than the outside".
18 Comments

Dang! That is over the top.
--Nathan, TX. Hire the lazy man. He may not do as much work but that's because he will find a better way.

Pretty cool little library!
The Other Steven

Great work and wonderful design. Very good looking!
Ron
Very Cool Ryan! When they asked for a a little Library, I doubt they thought they would end up with this!!!
Extremely well done...love the "Dog Library" the most!!!!
What a Beaut!
Extremely well done...love the "Dog Library" the most!!!!
What a Beaut!
Mike

looks great and should last many years.
working with my hands is a joy,it gives me a sense of fulfillment,somthing so many seek and so few find.-SAM MALOOF.
Wow beautiful and thoughtful.
Nicely done!
Nice to live in a place w/o HOA and Karen's.:)
Nicely done!
Nice to live in a place w/o HOA and Karen's.:)
Petey

You put in a great effort for a worthy project!
Love the detailing and appreciate the work to make it last. The doggie section is cool! At first I thought it was for free hamsters, but being a dog section servers a much higher purpose!
Love the detailing and appreciate the work to make it last. The doggie section is cool! At first I thought it was for free hamsters, but being a dog section servers a much higher purpose!

Real nice project and for a good cause!!!!!!!!!!!!
Cheers, Jim ........................ Variety is the spice of life...............Learn something new every day

That looks great! Nice job.

Beautiful colours!
...woodicted

Nicely done, Ryan. Should survive years of weather.
May you have the day you deserve!
Thanks fellas. It was a fun build!
Ryan/// ~sigh~ I blew up another bowl. Moke told me "I made the inside bigger than the outside".

It is clear that quite a few hours have gone into this. Well done.
Nice build.

Super good looking library Ryan. I'm sure the kids and parents were thrilled with it.
"Duck and Bob would be out doin some farming with funny hats on." chrisstef

Nice job Ryan.
Great looking library, nice decorative addition to their yard. Nice work.
Looks really nice and for a good cause... Regards Cliff.
More from RyanGi
