


Share your craft projects
Make new craft buddies
Ask craft questions
Blog your craft journey
LAddington
7 posts
and
5 followers
in over 11 years
in over 11 years
More from LAddington

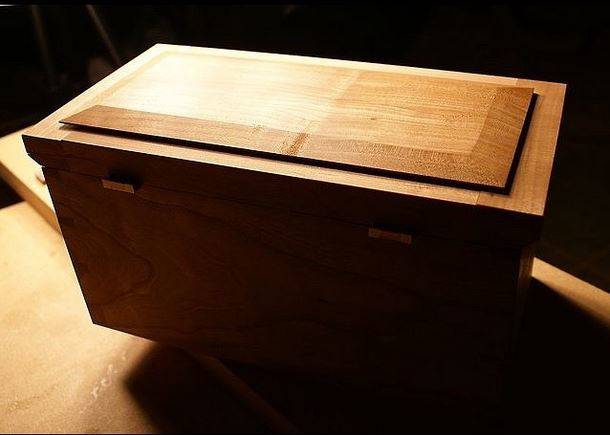
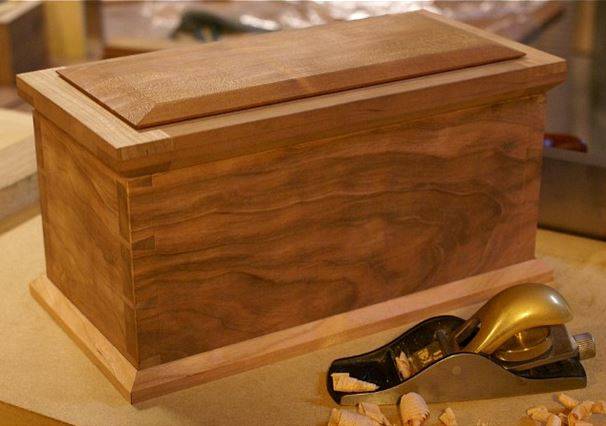
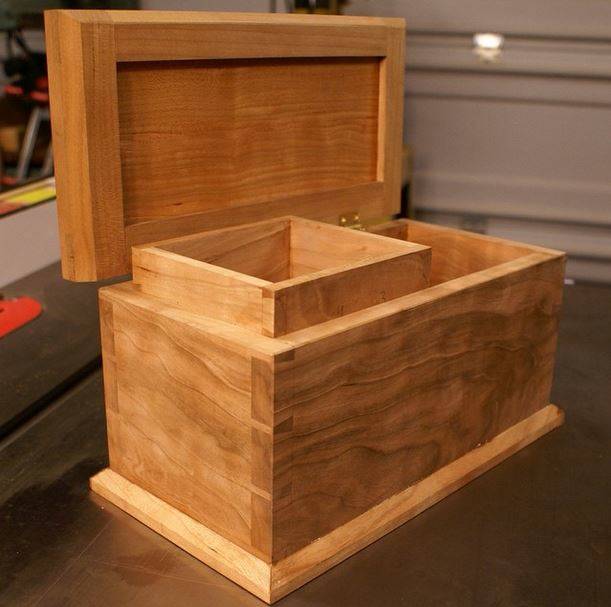
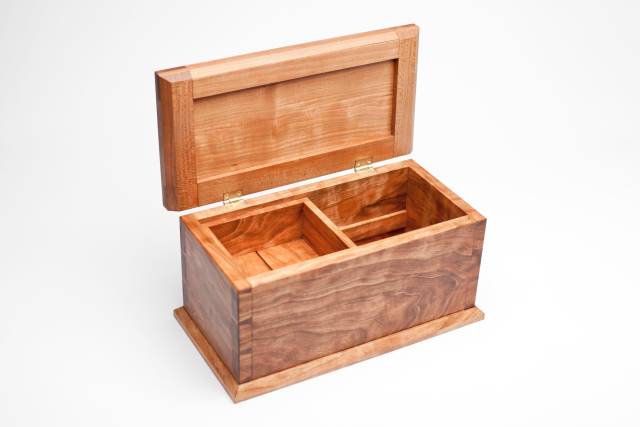
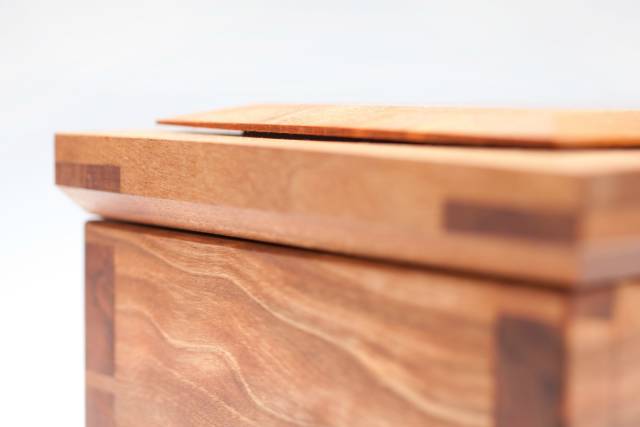
Cherry Jewelry Box


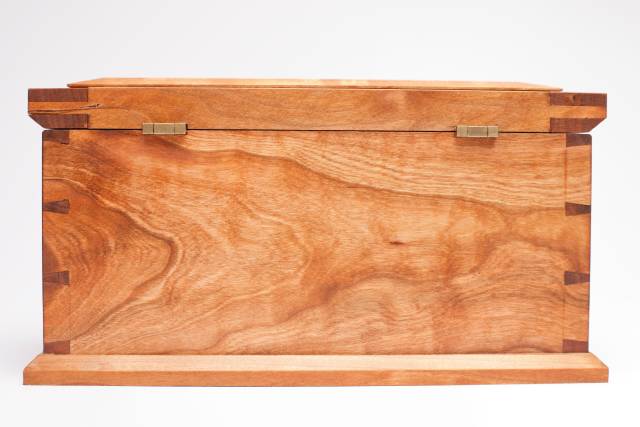
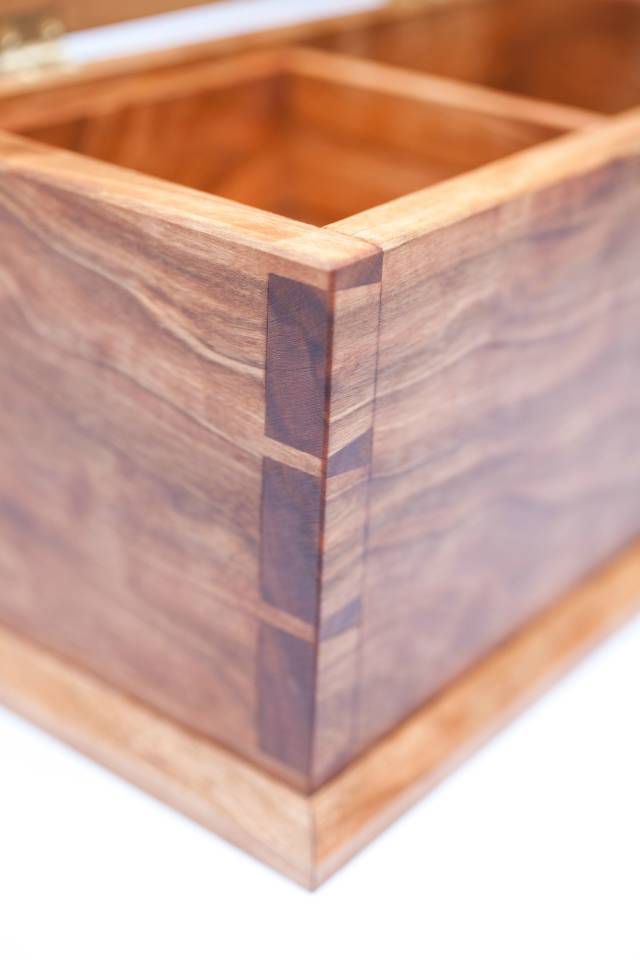
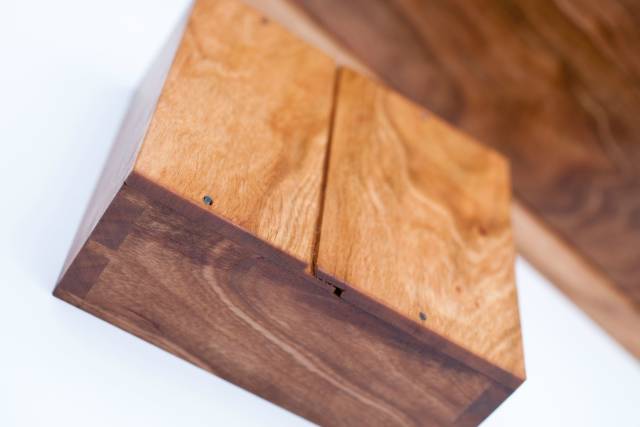
Here is a cherry jewelry box I finished in January. The wood is nice air dried stuff from my Amish friends in Ohio. The joinery consists of dovetails for the carcass, dovetails & shiplaps for the tray, and bridle joints & grooves for the lid. The moldings are simple miters with a nice chamfer. The adhesive for this (and all of my other projects) is hide glue. I like Old Brown Glue from William Patrick Edwards in San Diego. The finish is three coats of Tried & True oil varnish. Each coat is applied then left to dry for a week under a fan. After the first coat is dried it is burnished with 0000 steel wool. Then each additional coat is burnished with a fine linen cloth after drying. I like to heat the oil to 140° before applying nice thin coats with a linen cloth.
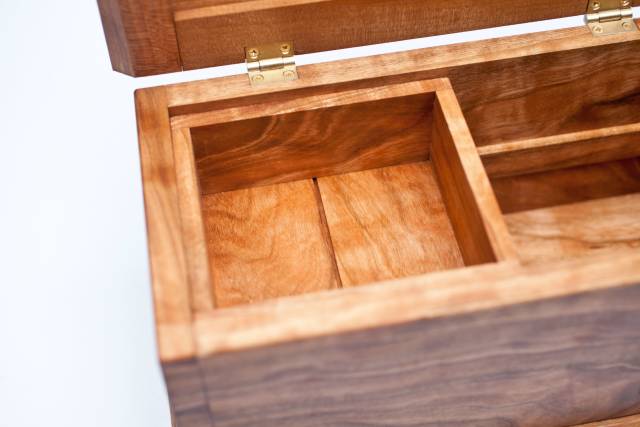
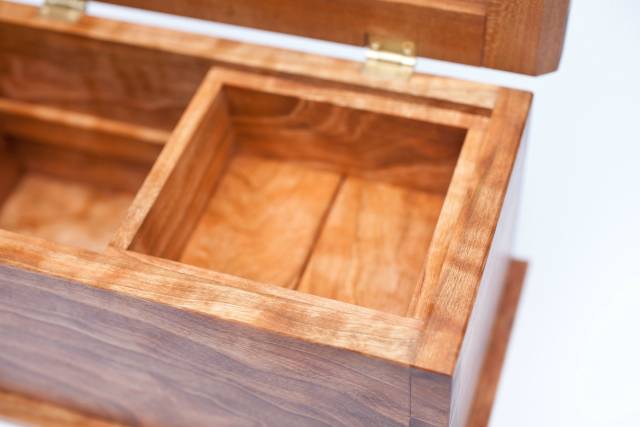
This was a really fun build – the tiny dovetails for the sliding tray (I like to call them Quailtails) are my favorite part. I am really happy with the fit of the hinges. They’re tiny 1/4” 90° stop hinges from Brusso. Here’s a little video of the action of the sliding tray.
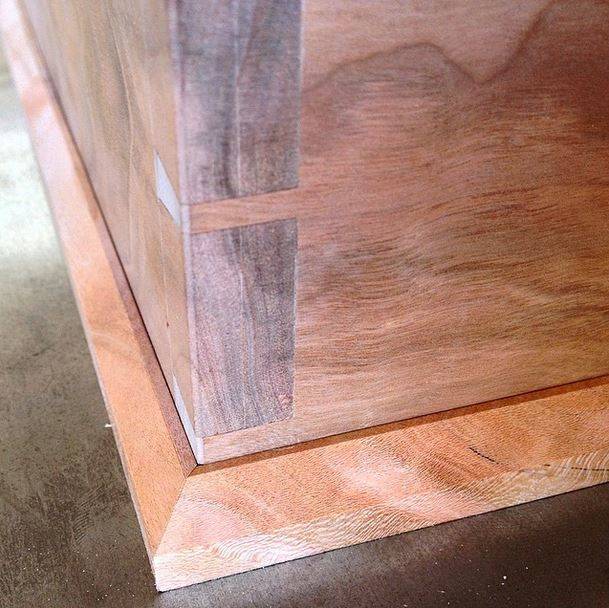
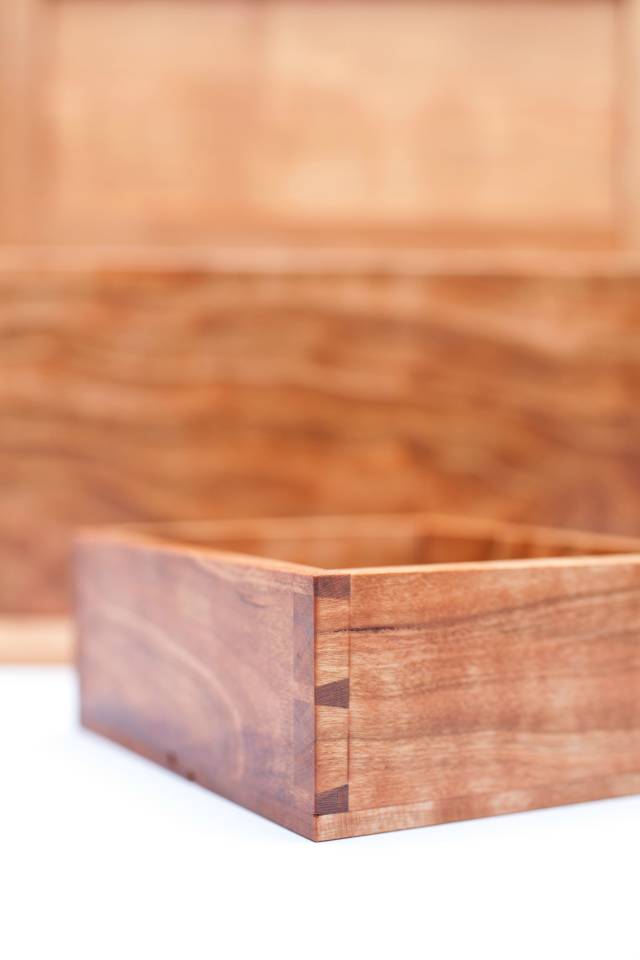
After I saw out the waste between the pins I like to check the fit of the dovetails (before chopping out the baselines). I made the half pins on the bottom much larger so when the molding is applied there is an equal reveal between half pins.
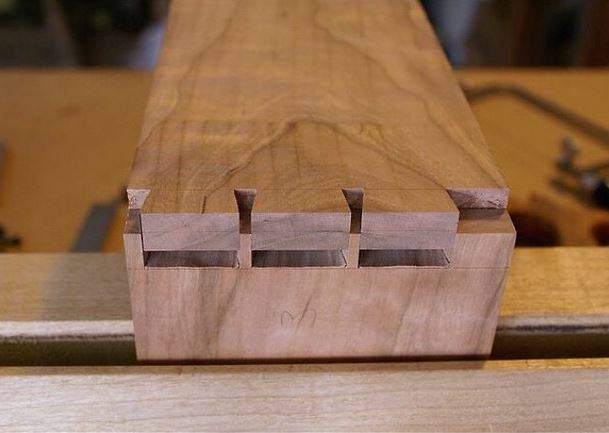
Dovetails and pins all cut & fit.
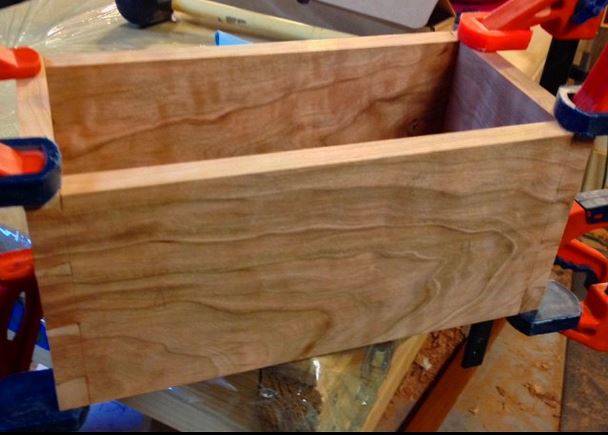
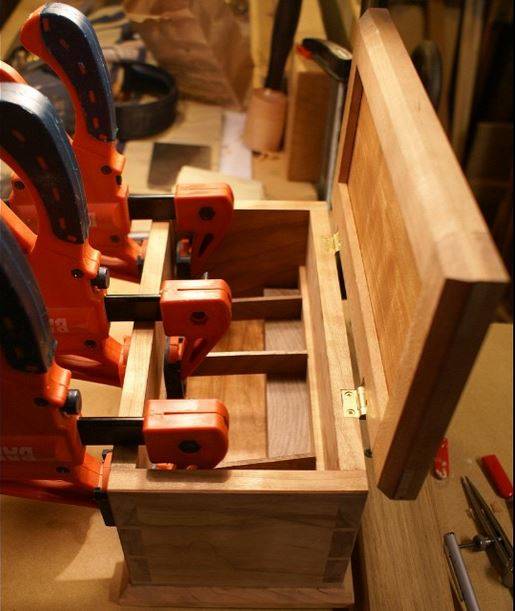
Glue up! I always use hide glue (Old Brown Glue or hot hide glue) for joinery. There’s a stopped groove in the bottom of the box for a floating panel.
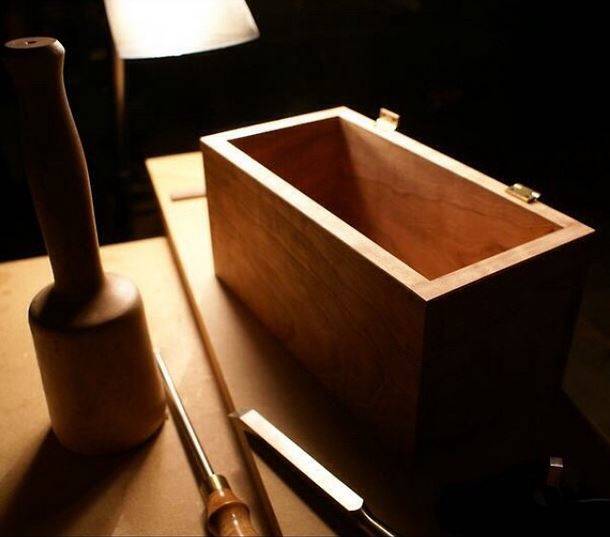
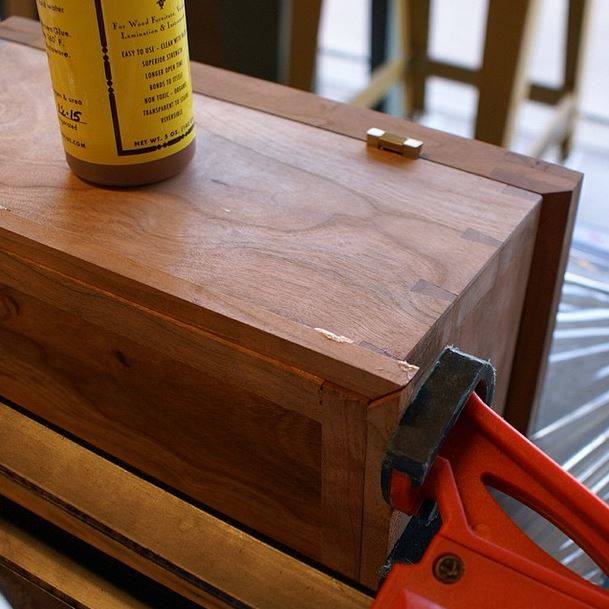
Installing the hinges. These are some nice 1/4" 90° stop Brusso brass hinges.
I didn’t take any photos of the lid build since it’s pretty straight forward (and I forgot to). The frame consists of bridle joints and a groove that houses the panel, which has a groove cut into the sides to slip into the frame. The panel is loose (but snug) to account for seasonal movement.
Rough check of the miters. Just a simple chamfered molding.
Not bad!
After taking all of that time to make the moldings perfect they crept during glue up. Luckily I used hide glue! I sprayed water along the seems, covered the molding with aluminum foil, and applied an iron to steam the molding and release the glue’s hold. I then reapplied glue and re-clamped. All in all a few minutes of work. In this photo you can see how bad the miter crept up.
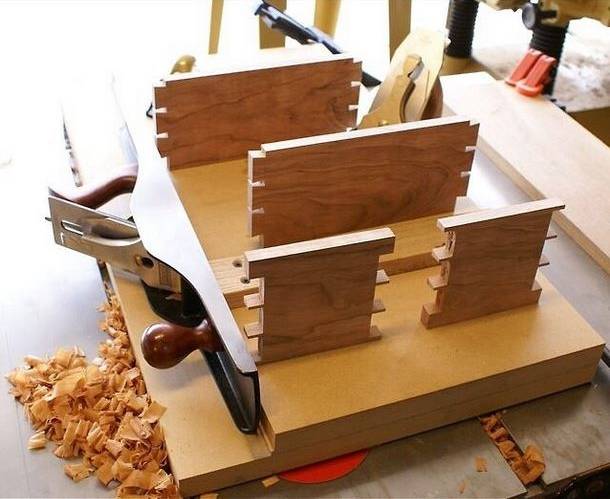
Sawing out the tiny dovetails for the sliding tray.
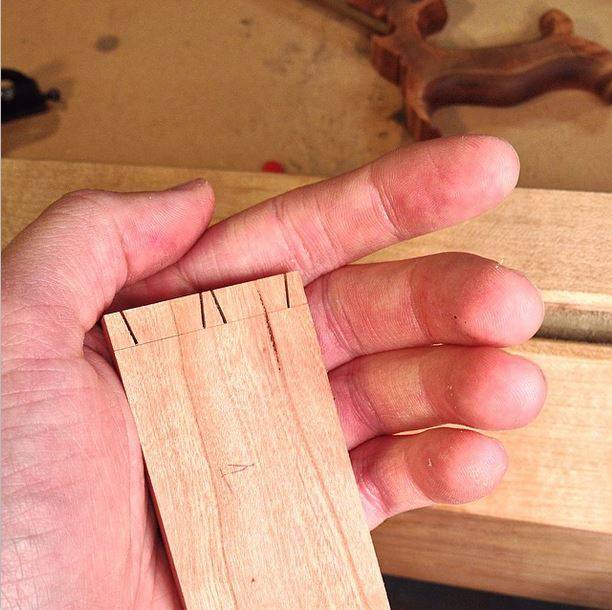
Fitting the tiny tray to the box. I like to check the fit after every plane pass on stuff this small.
Bookmatched panels for the bottom of the tray. They are shiplapped and nailed in the centers with some Tremont cut nails that I trimmed and sharpened with a file.
Here’s the little guy all cleaned up and ready for finish.
I made a walnut spacer block to keep the height of the rails that the box rides on parallel and consistent. Used some little walnut strips as spring clamps. I used hot hide glue on the rails, so I rubbed the joint in place then set the clamps for insurance.
Here are some bonus photos:
Thanks for taking a look!
6 Comments

Very Nice box Luke.
The Cherry grain is rich and has a nice flow to it.
Very fine “quailtails” :)
Abbas, Castro Valley, CA
Great job, thanks for all the pics & detailed script
Jaybird

Beautiful Jewelry box…the details are amazing!
-- Michal, http://WoodworkingWeb.com

Beautiful! Awesome detail. What hinges did you use?
Keith "Shin" Schindler
I used the Brusso 90 degree stop hinges. Thank you everyone!

Beautiful box ,very nice work.
woodworking classes, custom furniture maker
More from LAddington