


Share your craft projects
Make new craft buddies
Ask craft questions
Blog your craft journey
MJCD
171 posts
and
9 followers
in over 12 years
in over 12 years
More from MJCD


DVD Holder


This is a request from my daughter: her approach to life is to keep it simple and uncluttered; elegant, if possible, and not stuffy. If you were to look at her unattended professional office, you would wonder if anyone worked there.
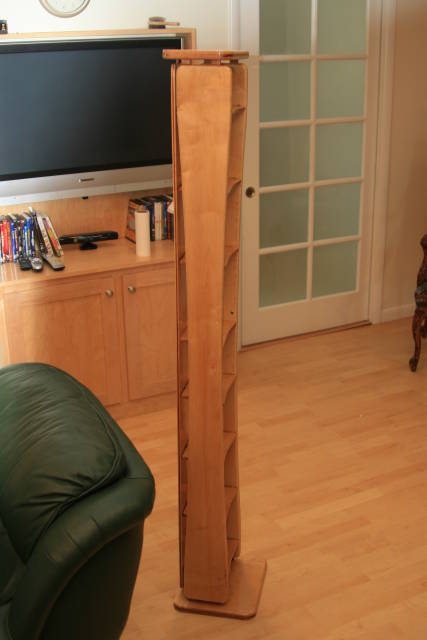
My approach to her request is to get away from the straight lines, and create a storage unit which seems to float between its top and bottom: the exposed tenons, which isolate the sides and shelves from both the top and bottom are my attempt to achieve this.
FIrst, this is not a commercial-grade result; though, I did try hard to get there: I messed-up a few places along the way, and I’ll point-out these as I go through the narrative. The specifications for this are available to anyone who desires them.
Construction Details
The unit is approximately 67" tall, 12.5" wide, 7" deep; the bottom extends forward of the top by 3.5". Primary woods are hard maple, with Sapele accents.
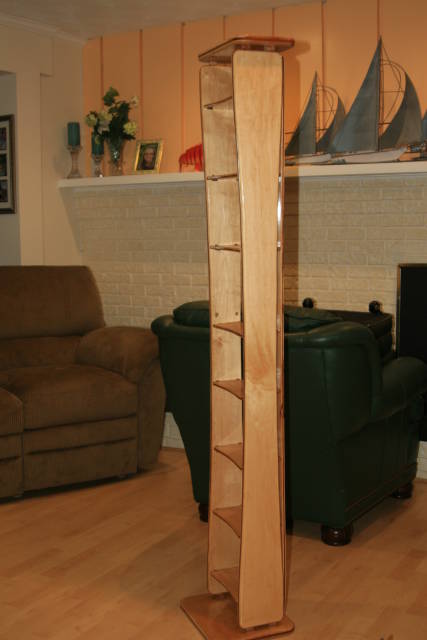
All sides (right, left, back) are curved 3/4" across 65" (+/-); all shelves are curved 1/2" across approximately 9" across the face – also, shelves’ back corners are deep radius’d so that no bare corners are visible from the side. The sides are 3/4" hard maple, with a 1" deep by 1/4" centered accent strip; the back panel is 3/8" hard maple, with a 1/8" centered accent strip. The top and bottom are 0.875" hard maple with a 1/4" accent strip.
Sides and back were cut from a master template: first roughed-out on the bandsaw, then finished on the router table. Dados/slots for the accent strips were cut with a TS dado blade, then finish grooved with a 1/4" router slot cutter. All edges are rounded over.
The project was finished with Waterlox Original finish – 3 coats, with Arbranet 600 grit used in-between coats to knock-down any high spots (be very gentle in this).
Mistakes and Lessons Learned – from Love Story “Where do I begin to tell the story….”
#1. Only the top and bottom have 90 degree reference edges: all side edges are a continuous curve of some manner – cutting parallel dados for shelves was a first mistake – requiring me to remake the side panels, and using shelf pins;
#2. Asking the router to machine too much of the arc – tear-out resulted – moral of the story is to use your bandsaw skills to stay close to the template line, then ask the router to fine-tune the line, only.
#3. Waterlox is an excellent finish – I’ve used it on many projects. However, the drying time (12 to 24 hours) had me trying to apply heavy coats, so that I could get the ‘build’ that I wanted in fewer layers – bad idea: the finish has created drip-spots: I sanded through most of these, and re-finished the areas. Next project I’ll try a brushing lacquer (Deft, probably).
Final Takes
An excellent project; requiring me to up my game from casework (blanket chests and book cases).
Again, if anyone is interested in the design or the project specifications please contact me.
Do Take Care.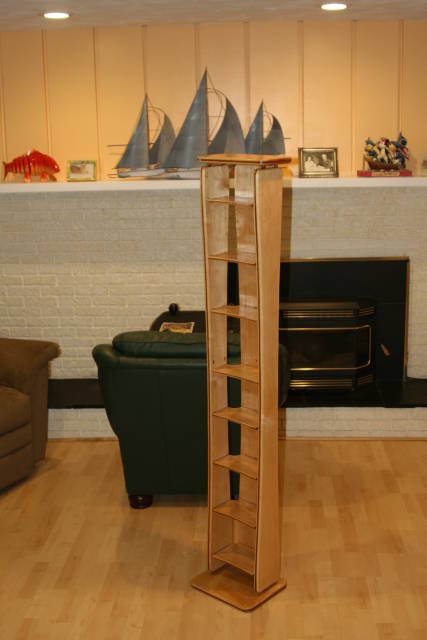
:
6 Comments

You did a good job – I like the final Holder!
-- Michal, http://WoodworkingWeb.com

Very cool project. The curves on the sides and shelves gives it a graceful look.
-nicky
Very nice….I’m with you simple but elegant.
Mike
Mike

A good way to deal with runs in finish is to take a a sharp chisel, lay it flat against the piece and slice the drip off flush to the surface, then a light sand with fine abrasive. That way you won’t create a halo around any high spots when you are sanding. I believe auto finishing shops have a special tool for doing the same thing.
Nice job, I’m sure your daughter will be delighted.
Rennner:
Thanks – I went half-way through your recommended procedure – and would have been much better served if I had your experience during-the-build. I’ll follow your advice in subsequent builds.
MJCD

I like this design.
woodworking classes, custom furniture maker
More from MJCD