


Share your craft projects
Make new craft buddies
Ask craft questions
Blog your craft journey
Kelly
1012 posts
and
19 followers
in over 12 years
in over 12 years
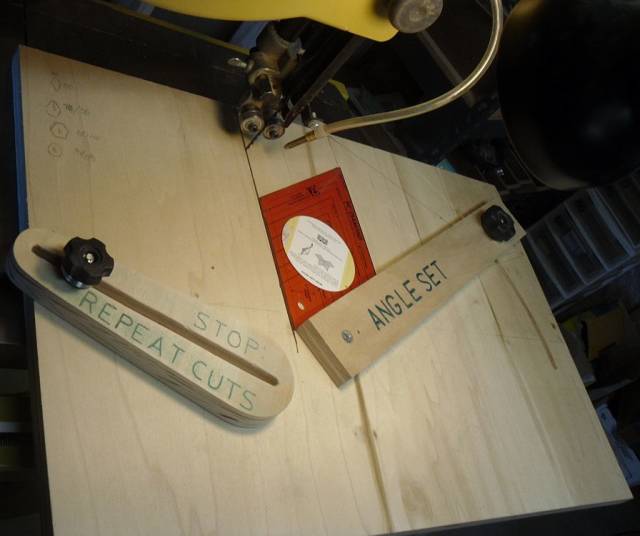
Band Saw Angle Cutting Jig
After seeing what others had done using three different colors of wood to make 3-D patterns out of wood, I thought I’d try my hand at it. To aid in the process, I made this jig for my band saw. Of course, one could vary it a bit for the table saw.
I extended the miter slot guide about six inches out the back, to make it easier to align and operate the jig.
I pick up 3/8” aluminum stock from a metal supply and run it through my saw using a fine tooth, carbide blade with no real set. Feather boards are a must for getting accurate cuts. I can, economically, keep several pieces of guide material around for just these purposes.
You need to lightly sand the edges after cutting, because they will be sharp.
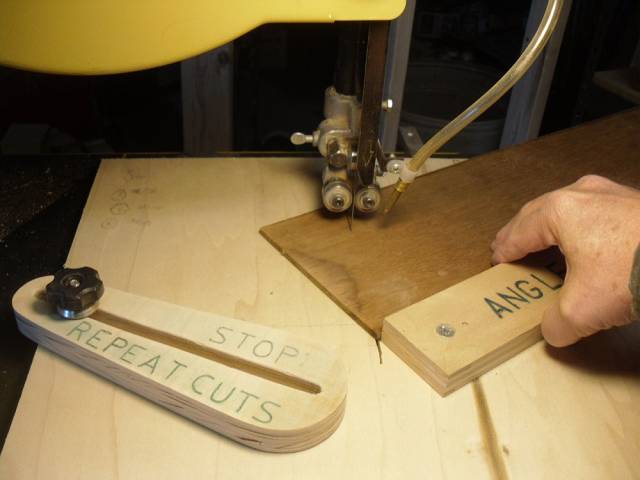
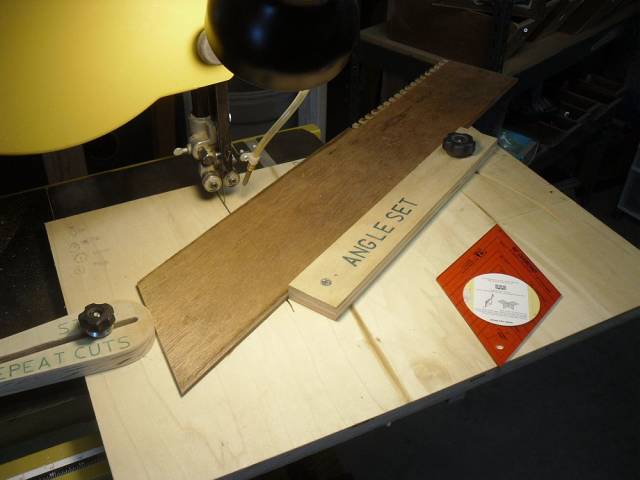
The adjustable fence on the right side, labeled “ANGLE SET,” is for setting the angle you need. As the photos show, the slot for this lock curve so the fence can pivot near the cut line.
The left, labeled “STOP” and “REPEAT CUTS” is to repeat the cuts, once you get going. The only slot for the stop is in the stop itself.
To use the jig:
1) Choose the dimensions you want and cut the wood you’ll be working with to that width.
2) Set your angle off the cut line. For these photos, I used a template from a fabric store. It can be seen in the photos.
3) Make your first cut.
4) Set your template on the wood you just cut, lining the left side of it with that cut, then, using the template as your guide, mark the right side for your next cut.
5) Move you wood so your next cut will give you the line you just marked, move the stop against it and lock it in place.
6) Make your next cut.
7) Remove the piece you just cut, slide the wood against the stop and cut. Repeat this until you have all the pieces you need for your project.
1 Reply

Necessity is the mother of invention. Pretty slick
Ferdinand and Son Construction