


Share your craft projects
Make new craft buddies
Ask craft questions
Blog your craft journey
Kelly
1012 posts
and
19 followers
in over 12 years
in over 12 years
L-square Stop - Depth Gauge - Table Saw Setup Tool
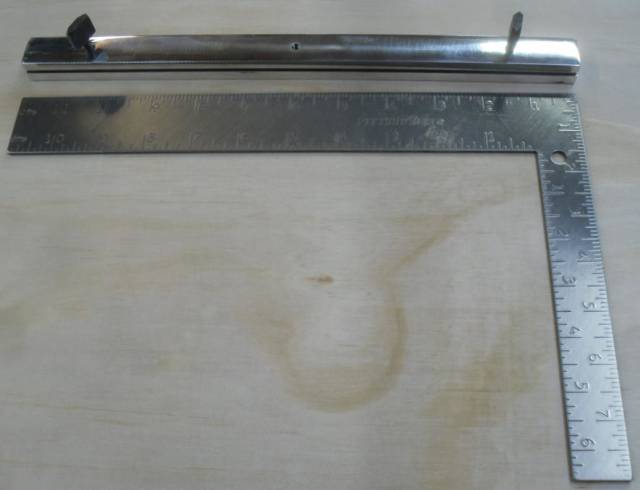
This tool serves several functions. It can be used as:
- an edge stop for L-squares;
- a wide gap depth gauge; and,
- as a set up tool for table saws.
This tool allows the user to, easily, lay out lines at ninety degrees off a straight edge using a standard L-square. Using it is far quicker and more accurate than the usual practice of trying to hold the square to the edge of the material.
In the depth gauge mode, this tool also allows the user to establish depths of items with large openings up to a diameter equal to just a little less than the length of the tool.
Again, in the depth gauge mode, this tool enables users to set table saw tops to their blades, and to set table saw fences to the miter slots.
This tool can be built using these common woodworking tools:
1) A table saw [with a non-ferrous metal blade to cut the aluminum to width, then to cut the slot into which the L-square fits].
2) A jig saw, hack saw or miter box [to cut the aluminum to length].
3) A drill or drill press [(preferably the latter) to drill the holes for the thumb screws and the hole for the stop gauge].
4) A 5/32" drill bit [to drill the taped 10-24 thumb screw holes].
5) A 10-24 thread tap [to thread the three holes for the thumb screws].
6) A 3/16" drill bit [to drill the depth gauge rod hole].
[MATERIALS & PARTS FOR THE L-SQUARE STOP-DEPTH GAUGE]
To build this, you will need:
1) One piece of aluminum stock 3/4" square and as long as the long leg of a short square, or the short end of a large square, depending on the square for which you plan to build this.
2) Two male 10-24 thumb screws.
3) A 1/8" rod the length of the stop.
4) Three earth magnets 1/8" to 1/4" in diameter
I designed and built my L-square edge stop around 1984, when I became frustrated with using stops for setting up stair steps for the process. I wanted one which was quick to install and easy to use (e.g., moved smoothly along the edge).
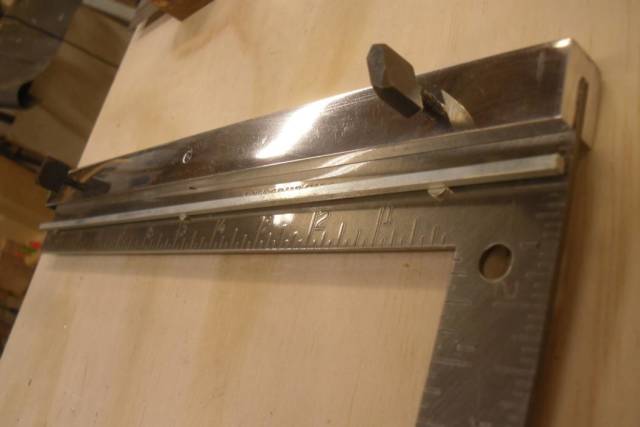
The tool in the picture was made for the Lumberjocks forum 2017, Winter Tool Swap. The ability to use it as a depth gauge and the extra locking hole to allow it to be used on the short and long legs of the L-square were improvements I added for the swap.
The current version has the previously mentioned improvements, plus the capability of being used as a table saw set up tool, and the magnets are, now, imbedded in the body of the tool.
The improvements required me to:
1) add a threaded hole at the center and extending down into the groove, to allow the tool to be used on the short leg of squares;
2) drill a through hole behind the center threaded hole to allow a depth rod to be inserted through the body, just under the thumb screw;
3) drill three shallow holes into the body and into which magnets can be inserted for holding the depth gauge rod; and,
4) to use 3/4" square aluminum stock, so the stop will fit snugly in a standard 3/8" deep by 3/4" inch wide miter slot of a table saw.
[USING THE L-SQUARE STOP – DEPTH & SAW SET UP GAUGE]
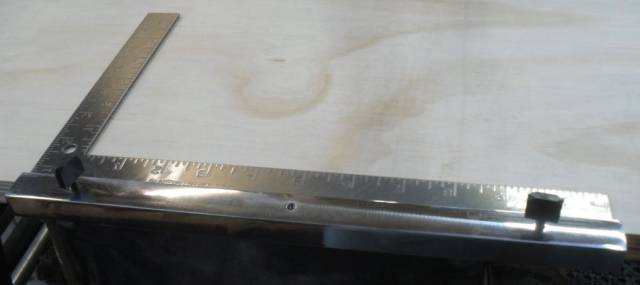
USING THE L-SQUARE FUNCTION:
1) Back the two thumb screws off until they do not protrude into the groove of the tool.
2) Press a leg of an L-square into the groove of the tool, until the leg bottoms on in tool groove, then turn the thumb screws clockwise to lock the tool onto the square.
3) Check the square by laying it along a straight edge and running a line, flipping it in the opposite direction, then drawing over the first line. If they are the same, the square is ready to use. If not, check your installation.
4) Press the square against the straight edge of the material you are laying out lines on until the stop is resting against the material.
5) Slide the square and stop along the edge until positioned where you want your lines drawn.
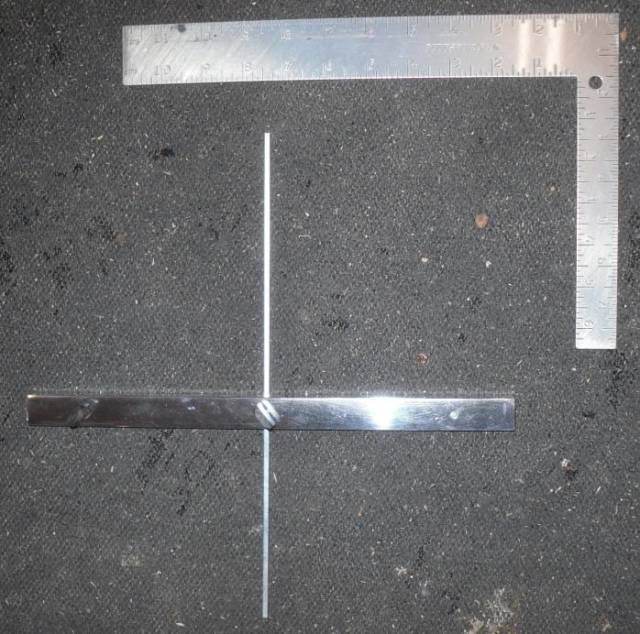
USING THE DEPTH GAUGE:
1) Remove the stop from the L-square.
2) Retrieve the rod (secured to the tool body by three rare earth magnets) and insert it through the hole just behind the center threaded thumb screw hole in the body of the tool.
3) If not already in the center threaded hole, move one of the thumb screws to it to allow the rod to be locked in position.
4.1) Lay the body of the tool over the hole for which you’re determining depth.
4.2) Push the rod down until it bottoms, then lock it in position with the thumb screw.
4.3 Use the setting you established to obtain a measurement of the depth of the hole, or to transfer the established depth to establish it on another item.
or
4.1 Lay the tool on the lip of a bowl with the rod extending down and along the outside of the bowl.
4.2) Set the rod just above the bottom of the bowl.
4.3) Use the setting established on the exterior of the bowl to establish a tape line on drill bit you will use to drill the center of the bowl or to otherwise determine how deep you can turn the interior of the bowl.
5) When done using the tool as a depth gauge, return the rod on the rare earth magnets so it can be found for future use and to prevent it from becoming bent.
USING THE TABLE SAW SET UP TOOL:
[USING TABLE SAW TABLE TOP TO BLADE ALIGNMENT FUNCTION]
1) Set up the tool in depth gauge mode by placing the rod in the through center hole behind the center threaded thumb screw hole.
2) If a thumb screw is not already in the center threaded hole, move one to it.
3) Disconnect power to the table saw.
4) Set the tool in the miter slot of your table saw.
5) Raise the blade to its maximum cutting height.
6) Mark the first tooth just above the table saw surface at either the front or the back of the blade.
7) Slide the tool along the miter slot until the rod aligns with the marked tooth, then press the rod against the marked tooth.
8) Roll the blade, either forward or back, until the mark is just above the table saw opposite where it was.
9) Slide the tool until the rod, again, lines up on the tooth. If the rod either drags on the tooth or a gap appears between the rod and the tooth, the table saw table needs to be loosed and turned, until the two readings are the same, then the top tightened down to the base again.
10) Reconnect power to the table saw.
[USING THE FENCE ALIGNMENT FUNCTION]
1) Before performing this operation, make sure the table saw top is aligned to the blade.
2) Set up the tool in depth gauge mode by placing the rod in the through center hole behind the center threaded thumb screw hole.
3) If a thumb screw is not already in the center threaded hole, move one to it.
4) Disconnect power to the table saw.
5) Set the tool in the miter slot of your table saw.
6) Move the fence to within a few inches of the blade,
7) Slide the tool to either the front of the back of the fence.
8) Slide the rod through the gauge until it rests against the fence, then lock it in that position.
9) Slide the gauge toward the opposite end of the fence. If the gauge rod begins to drag, loosen the thumb screw and begin again at the opposite end. If a gap develops, adjust the fence in whichever direction and an amount is needed to close the gap. When done positioning the fence, tighten the screws/bolts.
10) After setting the fence, check the alignment again. If still not correct, repeat the above steps.
[CONSTRUCTING THE L-SQUARE STOP-DEPTH GAUGE]
1) Either purchase a piece of 3/4″ × 3/4" aluminum stock or buy a wider piece of 3/4" stock and cut it down to 3/4" using a blade for cutting non-ferrous material and your table saw.
NOTE: Some saws use a different width for the miter slot, so check yours and adjust these figures accordingly.
Cutting aluminum will throw a lot of metal and it will be far noisier than cutting wood, so WEAR GOOD EYE AND EAR PROTECTION.
2) Cut the 3/4" by 3/4" piece to length. For example, if the tool is for a 12" square, cut it for the long leg (12"). If cutting it for a 24" square, cut it for the shorter leg (16").
3) Using the non-ferrous metal blade, cut a 1/2" deep groove in the aluminum. The groove should be wide enough to allow the L-square to be inserted in it.
If, after the first cut, the square will not slip into the groove, move the fence slightly and run the stock through twice, taking care not to turn the piece around, which might make the fit of the square in the groove sloppy. Usually, one cut will be sufficient.
When cutting the groove, take extra care to hold the aluminum tight against the table and fence. You want the bottom of the groove to be flat so, when mounted on an L-square, it will produce accurate ninety degree layout lines.
Consider using use a push shoe, rather than just a push stick. In addition to keeping your hands safe, it will allow you to put even pressure along the length of the aluminum stock, as you push it past the blade.
4) When finished with all cutting, lightly sand each edge of the aluminum to remove sharpness. A light sanding with 320 grit should make quick work of this.
If desired, you can, of course, sand out machining marks and bring the surfaces of the aluminum to whatever level of shine. Merely work your way through the grits as you would sanding wood. You may have to work through 800 grit or higher to get to a level of shine your prefer.
If you have a buffer, sand the aluminum to about 320 grit or just a little better, then buff it using red oxide and it will polish nicely.
5) Use a pencil to mark three spots for the thumb screw holes. Mark in froom each end approximately 1-1/2". Also make a mark at the center. The marks should be 3/8" from the edge (halfway across the 3/4" stock). Use an awl or punch to strike the penciled marks.
6) Use a square and pencil to mark a line from the punched mark at the center of the tool to and across the surface opposite the groove.
7) Using the line just made, make another mark 5/16" from the edge common to the previous marks. This is for the depth gauge.
Keep in mind, when the tool is resting in the miter slot, 3/8" of it will be buried in the slot, so the hole for the depth rod must be above that point.
As before, use a punch or awl to establish a drilling point for the mark you just made.
8) Use a 5/32nds bit to drill three holes marked on the one face. The holes should go into and stop at the groove.
9) Tap the three holes using a 10-24 tap.
10) Drill the hole opposite the groove using a 3/16" to 7/32" bit .
[DEPTH GAUGE ROD MOUNT]
11) Mark three points on the same face where three holes were drilled and taped. Mark the three points 1/4" (/- 1/8") in from the opposite edge opposite the edge above the groove. Make the marks 3/4" (/- 1/8")from each end and one in the middle, next to the center threaded thumb hole screw.
12) Drill holes using a bit of the same diameter as the rare earth magnets you chose. Drill only deep enough to flush mount the magnets.
The magnets should fit into the holes easily, but not be sloppy. To remove them, after test fitting, place something metallic over them and lift them out.
Lightly sand the bottoms and sides of the magnets [or glue will not adhere well.
Using silicone or epoxy, coat the sanded portion of the magnets, then insert the magnets in the just drilled holes.
Once the adhesive is hardened, mount the depth gauge rod on the magnets.
13) Install two thumb screws, but only turn them enough to start them. Insert either leg of the L-square and secure it, or insert the depth gauge rod and secure it.
5 Replies

Looks like a great idea kelly.
woodworking classes, custom furniture maker
I like It! Thanks for sharing.
I changed the wording and, hopefully, improved it.
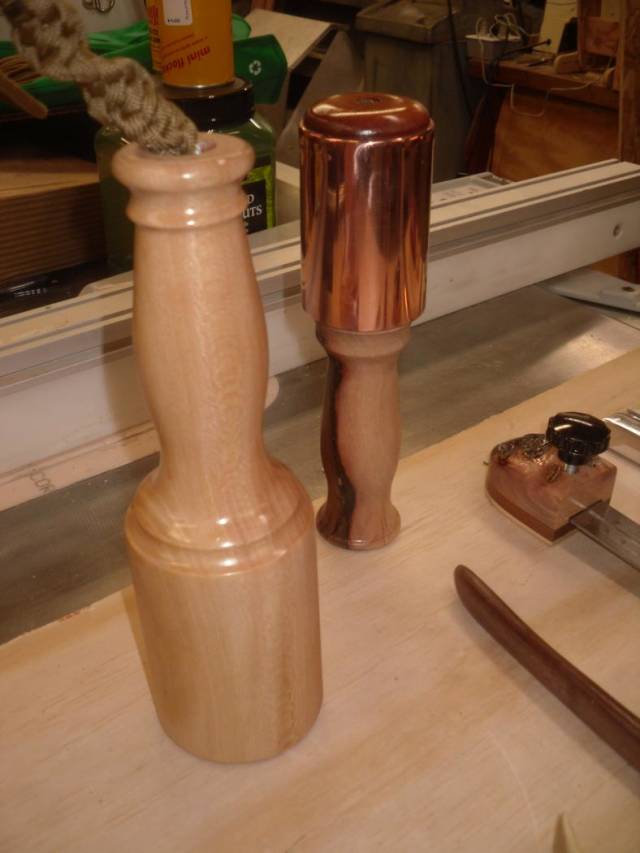
This is one of several tools I made and sent out for a tool swap on another site. Interestingly, this is my primary tool, but everyone seemed drawn to the copper clad mallet I made instead. Go figure.!

Nice looking carver’s mallets Kelly.
woodworking classes, custom furniture maker