


Share your craft projects
Make new craft buddies
Ask craft questions
Blog your craft journey
Kelly
950 posts
and
20 followers
in almost 12 years
in almost 12 years
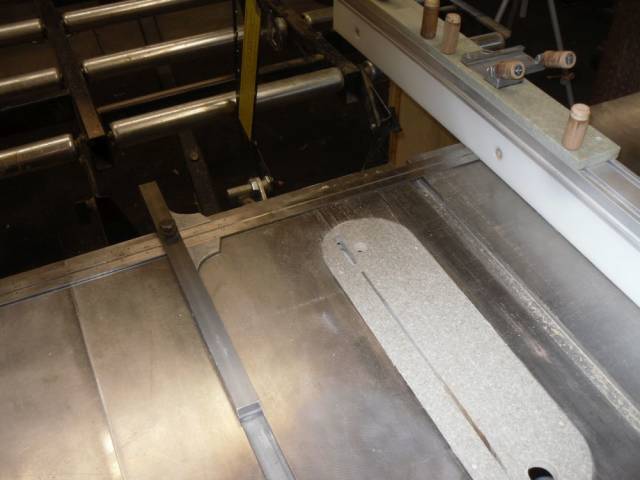
Table Saw Set-up Gauge
I designed this guide back in the eighties, to allow me to be sure my table saw top was positioned exactly ninety degrees to the blade, and for setting up cuts on my, then, less than reliable fence.
A table saw blade must be perfectly ninety degrees to the miter slots of your table saw top, or it will go through wood at an angle, essentially widening the blade and making even good blades seem dull.
Just as an out of align table saw top will cause poor and difficult cuts, so will an out of align fence. Add an out of align fence to an out of align table top and it can be like trying to cut wood using a dado blade.
Because this guide fits snugly in the miter slot of the table top, while still being able to slide in the slot, it is excellent for both setting the table top to the blade and setting the position of the fence for cuts.
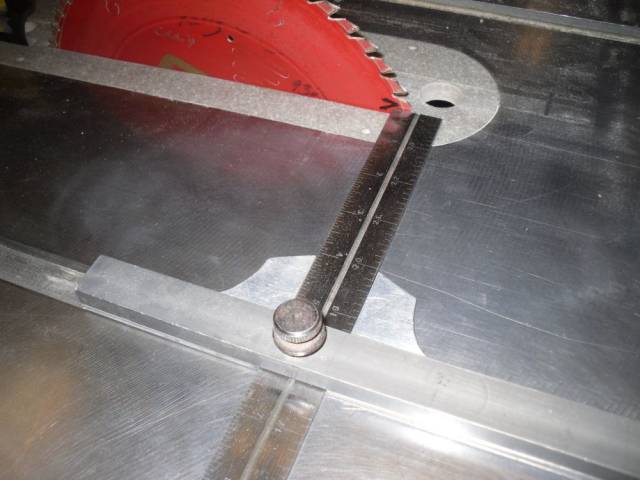
[ALIGN TABLE SAW TOP TO BLADE]
To check the positioning of the table saw top to the blade:
1) Raise the blade to its full height;
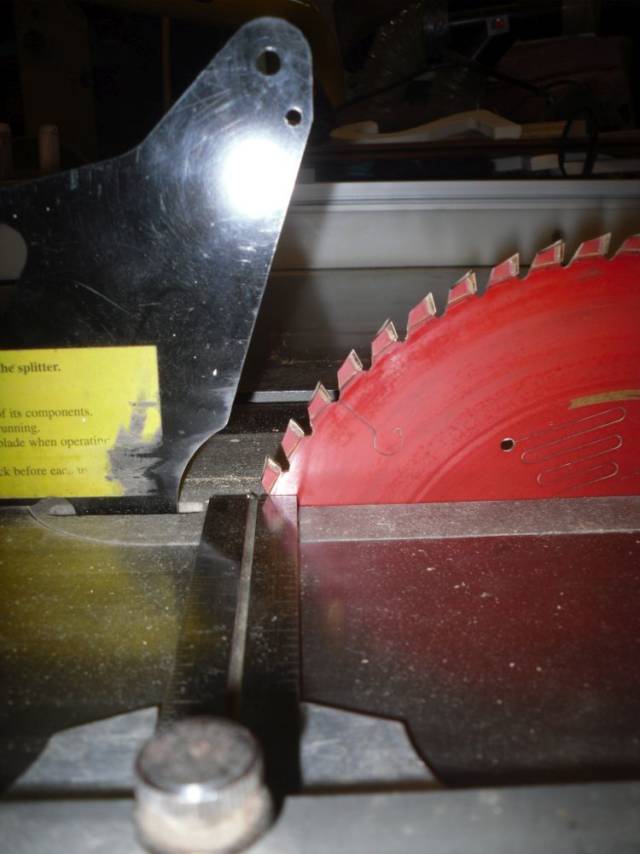
2) Mark the tooth on the blade nearest you (at the front of the table saw) and lowest to the table top (just above the throat plate slot);
3) Set the gauge in the miter slot and position it and the ruler so the ruler just touches the blade tooth you marked, then lock the ruler in that position;
4) Spin the blade so the tooth you marked is now at the back of the saw and nearly dropping into the throat slot;
5) Slide the gauge to the marked tooth. At the same time, note if the gauge presses harder against the blade, or if a gap develops. In either even, you should loosen the table top and move it the slight amount needed to open or close the gap.
6) After locking the table saw top down again, check your blade to table top measurements again.
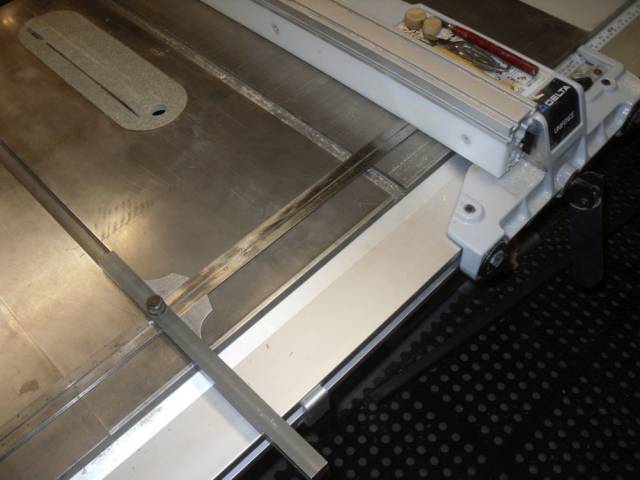
[ALIGN FENCE]
Once the table is aligned to the blade, you can use the gauge to set front and back positioning of the fence.
Kept in a convenient location, and if the existing fence cannot be relied on for accuracy, this gauge works far better than, and even faster than a tape measure. It’s use is limited only by the length of the ruler you use.
About thirty years ago, before I had a good fence, a friend would come over and use my saw. He insisted on using a tape to set up cuts, as he’d done in shops he’d worked in and as was commonly to the day.
Using the fact it was my shop, I blackmailed him into trying my gauge. Grudgingly, did, but went back to a tape. However, after only a few set ups, he tried the gauge again, admitted it was easier and more accurate, and never went back to a tape.
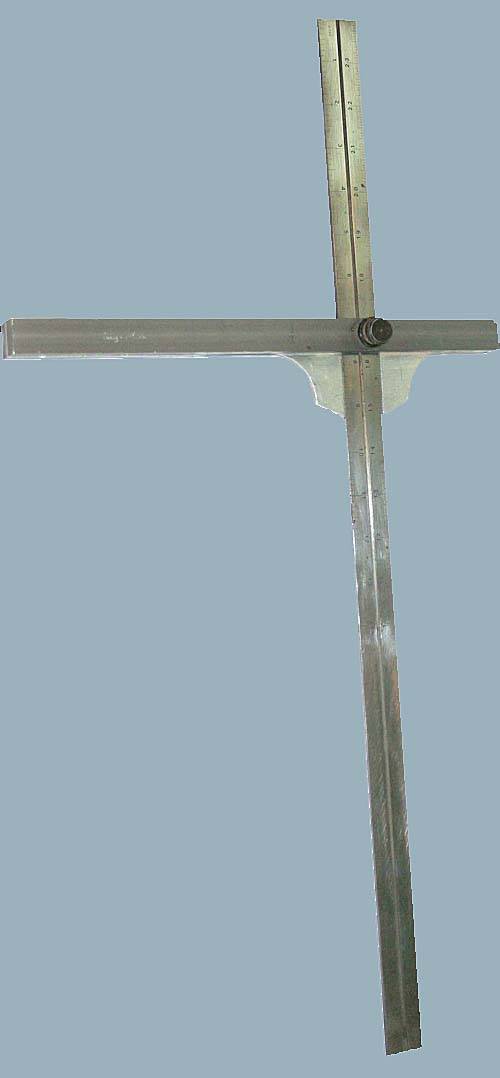
[CHARACTERISTICS OF THE GAUGE / BUILDING THE GAUGE]
This, as can be seen by the photographs, is, somewhat, like a Try-square, so can be used for purposes other than stated here. It’s designed to fit a standard 3/8" by 3/4" miter slot.
NOTE: Shop Smith and some other saw manufacturers use a different dimension for their miter slots.
The gauge body and two spacers are cut from aluminum stock.
Since both sides of the body of the gauge are the same dimension, the gauge can be flipped over and still ride well in the track for which it was cut.
The two spacers are 1/8" by 3", just thick enough to allow a metal ruler to be fit in the gauge. The spacers can be left as two strips, or they can be cut to a desired shape, as I did mine.
NOTE: For my aluminum, I buy 3/8" thick strips of aluminum I can cut down to 3/4" wide strips. 3/8" is the depth of the miter slots on my table saw, band saw and router table.
Because the two parts of the body of the guide that sandwich the spacers are the same depth as the miter slot, the portion of the spacer extending beyond them will always ride on the table saw surface, when the gauge is place in the miter slot.
The two [polished portions] keep the ruler at ninety degrees to the miter slot. They are just a smidgen thicker than the ruler used, to allow the ruler to slide between the two spacer sections.
A thumb screw allows you to lock the ruler in place.
I used a twenty-four inch ruler, which allows the guide to be used for up to about a twenty inch cut set up. For just setting up a table top and for checking fence position accuracy, a twelve inch ruler would work fine.
[CONSTRUCTION]
For those, like me, who are not “machinisticly” inclined, please be aware this was built using tools common to woodworking:
I used my ten inch table saw and a fine tooth, 7-1/4" carbide blade to cut the guides (made a wood test run for dimensions, then went to the aluminum stock).
I used my jig/saber saw to cut the two spacers that support the blade.
I sanded my blade spacers, then polished them on my drill press.
The screw holes and the thumb screw hole were done with the drill press, set to a slow speed (aluminum melts and the hole flows two inches right/left/up/down at high speeds), but could also have been done with a hand drill.
The screw holes were countersunk, which would only be necessary if you wanted to make the guide reversible.
The only tool used not common to woodworking was a tap and handle.
After the holes were tapped [and counter sunk] it was a matter of throwing it together.
2 Replies

That’s a nice tool. Thanks for sharing.
Losing fingers since 1969

Great solution.
CHRIS, Charlottetown PEI Canada. Anytime you can repurpose, reuse, or recycle, everyone wins!