Share your craft projects
Make new craft buddies
Ask craft questions
Blog your craft journey

Ron Stewart
953 posts
and
24 followers
in over 3 years
in over 3 years
Sewing Supplies Cabinet with Inlaid Metal Tile Accents #3: Case Construction
This is
part 3
in a
6 part
series:
Sewing Supplies Cabinet with Inlaid Metal Tile Accents
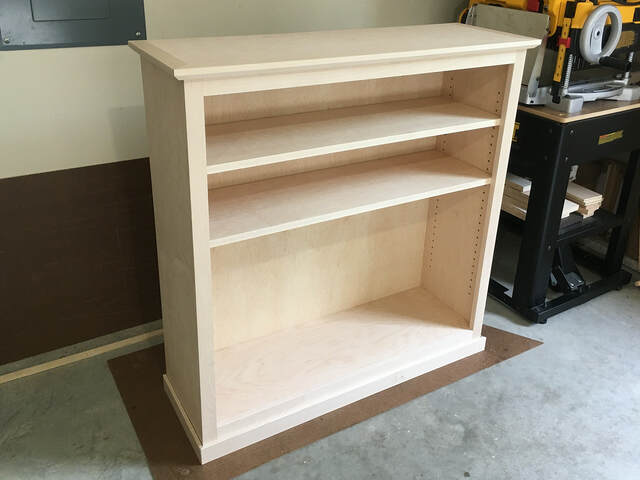
The case is a basic face frame cabinet.
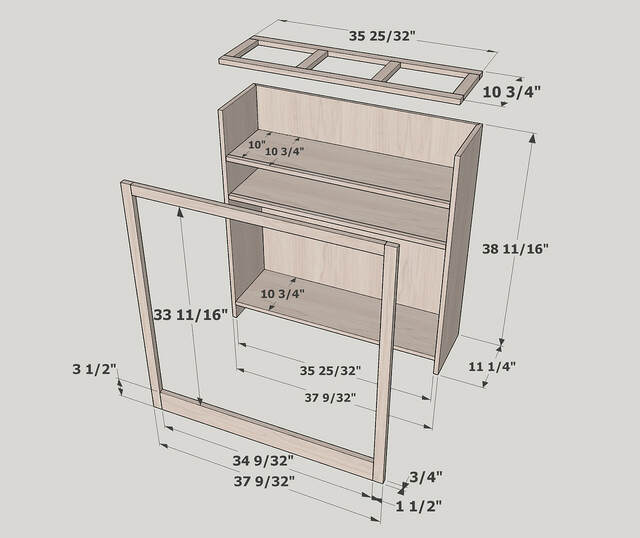
I used pocket screws to build the face frame and dowels to attach the frame to the case.
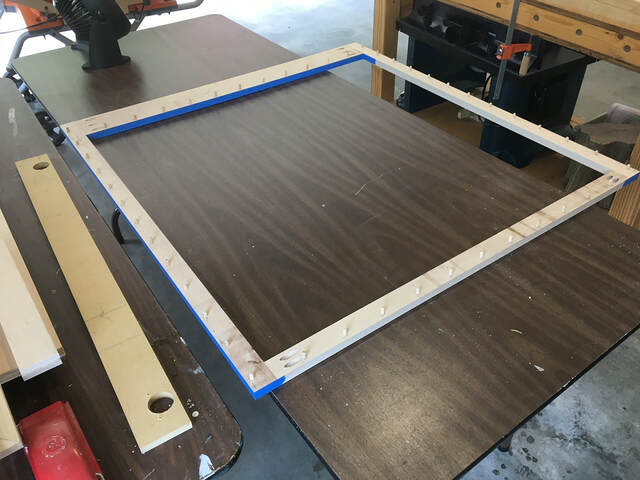
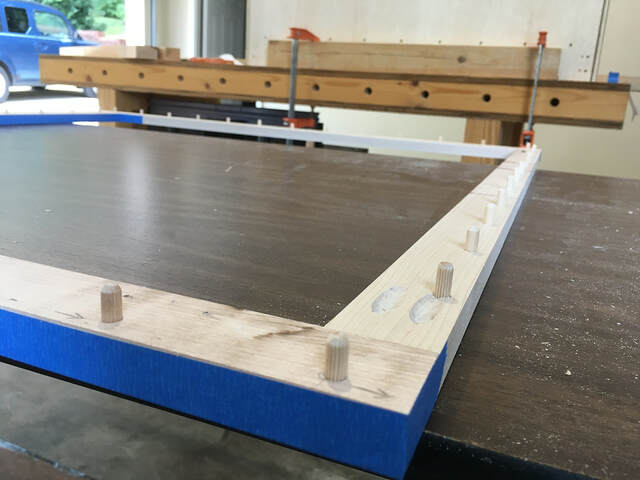
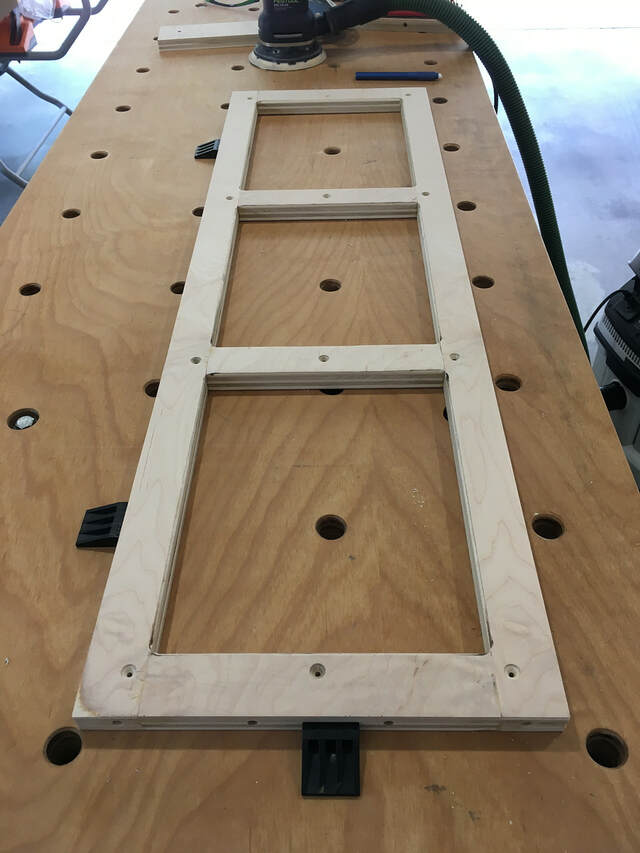
To conserve material, I built a ladder brace to serve as the case's inner top from plywood.
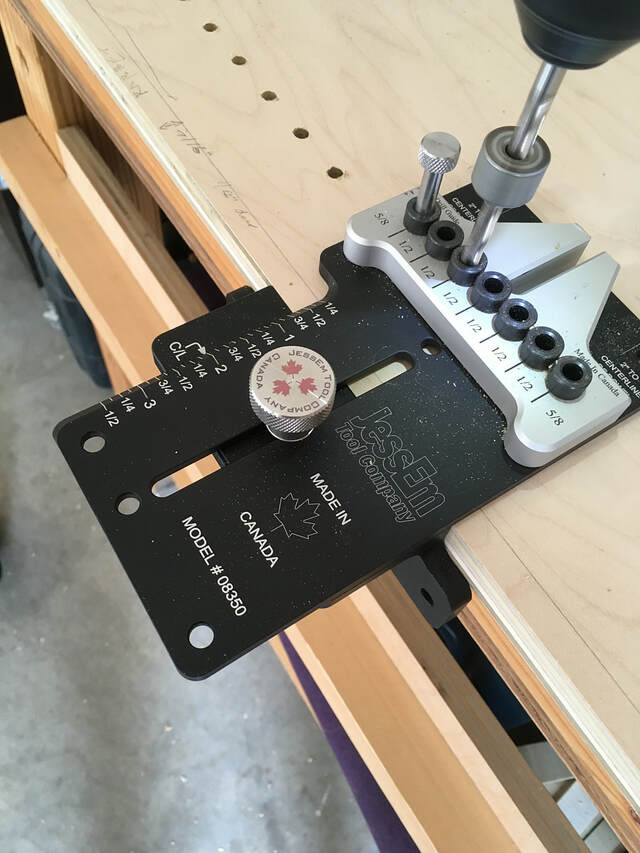
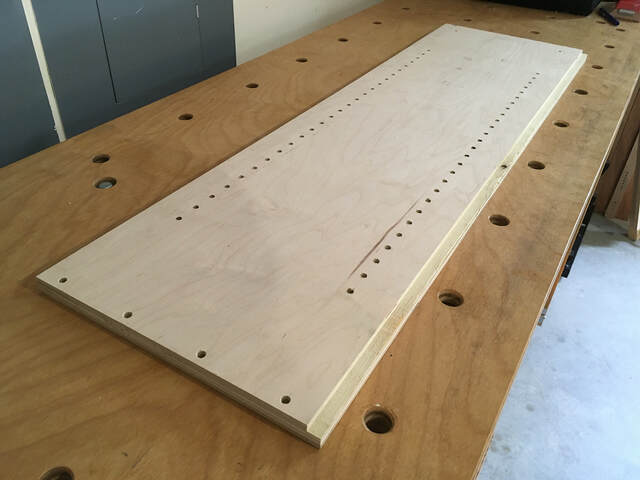
I used my JessEm doweling jig a lot on this project. I used dowels to attach the case sides to the ladder brace and fixed bottom shelf. I also used it to drill the shelf pin holes in the sides. The jig's indexing pin makes it easy to drill evenly-spaced holes (1" apart in this case).
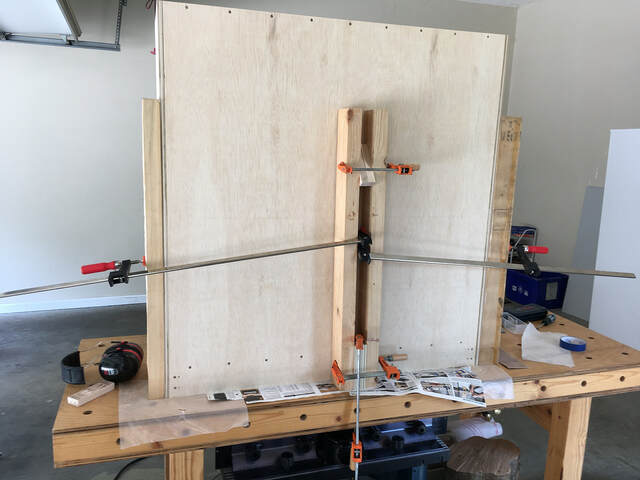
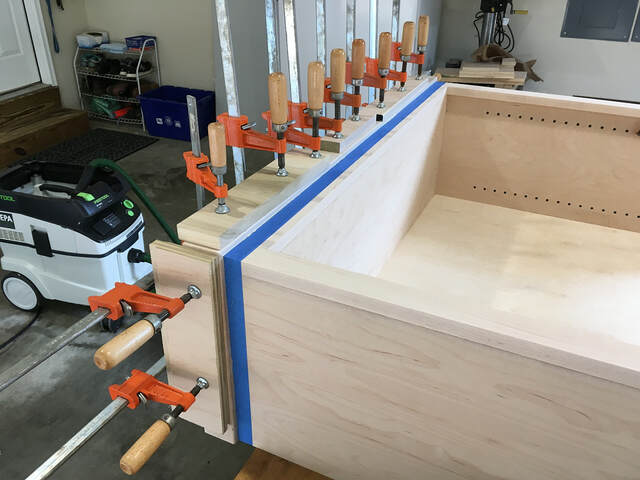
I used non-dowel joinery only for the back. I used rabbets to inset the back panel into the sides, and I used screws to attach the top and bottom edges of the back to the case.
I glued the side edges of the back to the case sides, but my clamps weren't long enough, so I had to improvise.
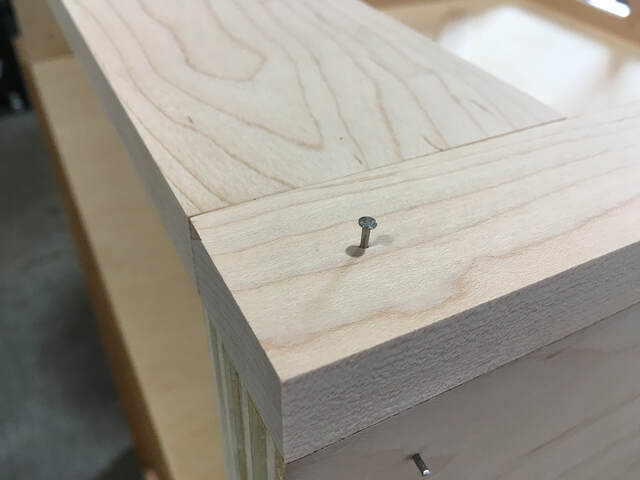
For the base trim, I planed 2" strips of maple down to 1/2" thickness and mitered the corners. To prevent the trim from sliding when I glued and clamped it, I hammered small nails into the case, cut off the nail heads, and pressed the trim onto the nails before applying the glue.
I didn't take any construction photos of the top panel. The top is composed of four pieces: an inner maple plywood panel, solid maple trim (approximately 1" thick) on the front and sides, and a Sande Plywood filler panel under the maple plywood to increase its thickness. I used a 1/2" chamfer bit to bevel the underside of the trim. I predrilled screw holes through the ladder brace into the underside of the top so I could easily attach it after applying the finish.