


Share your craft projects
Make new craft buddies
Ask craft questions
Blog your craft journey

Ron Stewart
953 posts
and
24 followers
in over 3 years
in over 3 years
Sewing Supplies Cabinet with Inlaid Metal Tile Accents #6: Final Door Assembly and Mounting
This is
part 6
in a
6 part
series:
Sewing Supplies Cabinet with Inlaid Metal Tile Accents
Few parts of this project went smoothly, and the final door assembly was no exception.
It started well enough. Attaching the outer trim wasn't too bad because I had pre-drilled all of the dowel holes and pre-cut the mitered corners. I just tried to use as little glue as possible (to avoid squeeze out on the finished surfaces) and use a light touch on the clamps.
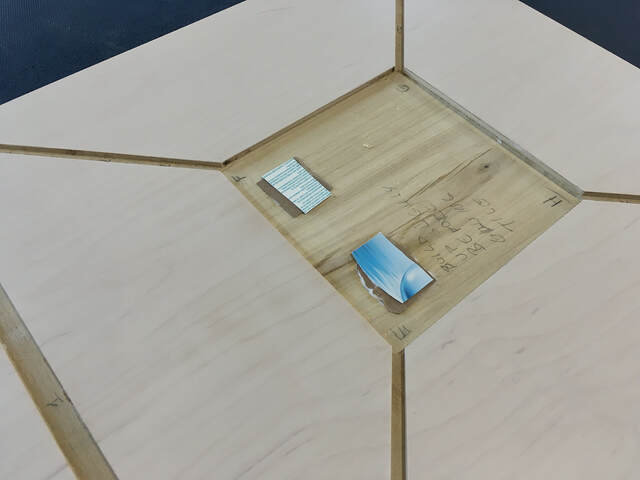
When I started test fitting the final set of tiles into the now almost-completed doors, I discovered that three of the tiles were slightly larger than the test tile I had used to create the template for the recesses. The difference was probably not more than about 1/32", but that was enough to keep them from fitting.
I had to enlarge the holes again by scraping the edges with a chisel and sanding with 150-grit sandpaper wrapped around a scrap block of wood. Eventually, I got all of the tiles to fit (at one specific orientation because none of them were perfectly square).
That was good, but much to my chagrin and disgust, I had managed to scuff parts of both doors when the sanding block slipped out of the shallow recesses. I tried buffing the scuffs out with a Scotch-Brite pad, but that didn't work. I had to sand off the top layer of finish, and apply one last coat of 2.5% toned topcoat to add back any color I had sanded off. That still didn't hide the scuffs, so I had to add a fourth coat.
I let the final coat dry overnight and then glued the tiles and pre-painted border pieces and accent strips (which I also had to shorten to account for the tile size differences). For the first door, I used Titebond wood glue for the tiles. One of the tiles sat slightly low in the recess, so I used high-tech cardboard shims to raise it.
It started well enough. Attaching the outer trim wasn't too bad because I had pre-drilled all of the dowel holes and pre-cut the mitered corners. I just tried to use as little glue as possible (to avoid squeeze out on the finished surfaces) and use a light touch on the clamps.
When I started test fitting the final set of tiles into the now almost-completed doors, I discovered that three of the tiles were slightly larger than the test tile I had used to create the template for the recesses. The difference was probably not more than about 1/32", but that was enough to keep them from fitting.
I had to enlarge the holes again by scraping the edges with a chisel and sanding with 150-grit sandpaper wrapped around a scrap block of wood. Eventually, I got all of the tiles to fit (at one specific orientation because none of them were perfectly square).
That was good, but much to my chagrin and disgust, I had managed to scuff parts of both doors when the sanding block slipped out of the shallow recesses. I tried buffing the scuffs out with a Scotch-Brite pad, but that didn't work. I had to sand off the top layer of finish, and apply one last coat of 2.5% toned topcoat to add back any color I had sanded off. That still didn't hide the scuffs, so I had to add a fourth coat.
I let the final coat dry overnight and then glued the tiles and pre-painted border pieces and accent strips (which I also had to shorten to account for the tile size differences). For the first door, I used Titebond wood glue for the tiles. One of the tiles sat slightly low in the recess, so I used high-tech cardboard shims to raise it.
I had to add a lot of glue to fill in the gap between the tile and the recess, and that was a mistake. I left the door on its back for an hour or two to let the glue set before tilting it upright to clean up the glue squeeze out on the back side. That's when my wife asked me if the glue dried clear. I was confused; I had removed any squeeze out between the door slab and trim, and there wasn't any squeeze out around the tiles. (I didn't use that much glue.) Then she pointed out the glue seeping from the gap at the bottom of one tile. The glue hadn't set, and it was sagging and seeping out. I quickly put the door on its back again and carefully cleaned up the seeping glue.
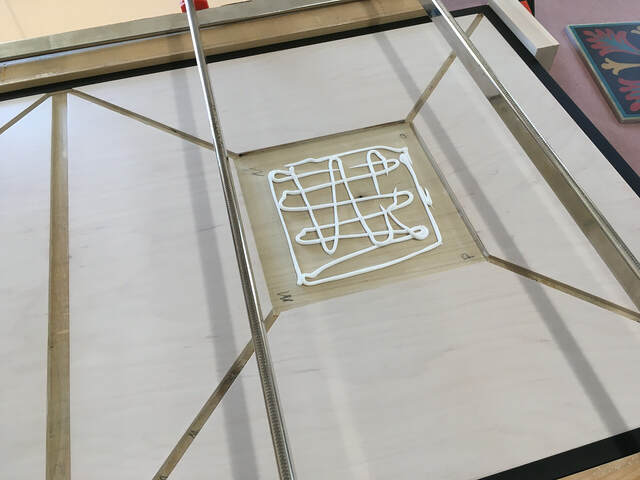
For the other door, I found a tube of adhesive caulk and decided to try it. It was thick enough to avoid the need for shims, and I knew it wouldn't run. The caulk worked much better, and I wished I had used it for the other door too.
I brought both doors inside (on their backs) and had a sleepless night with many fears that the excess Titebond behind that problem tile wasn't ever going to set. I didn't want to have to drill a drain hole on the back of the door.
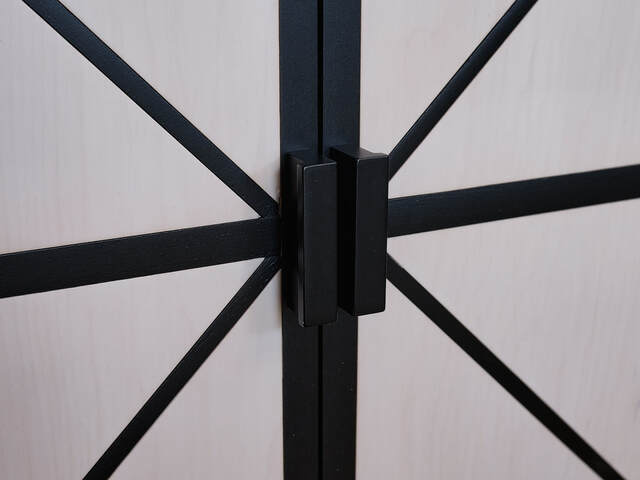
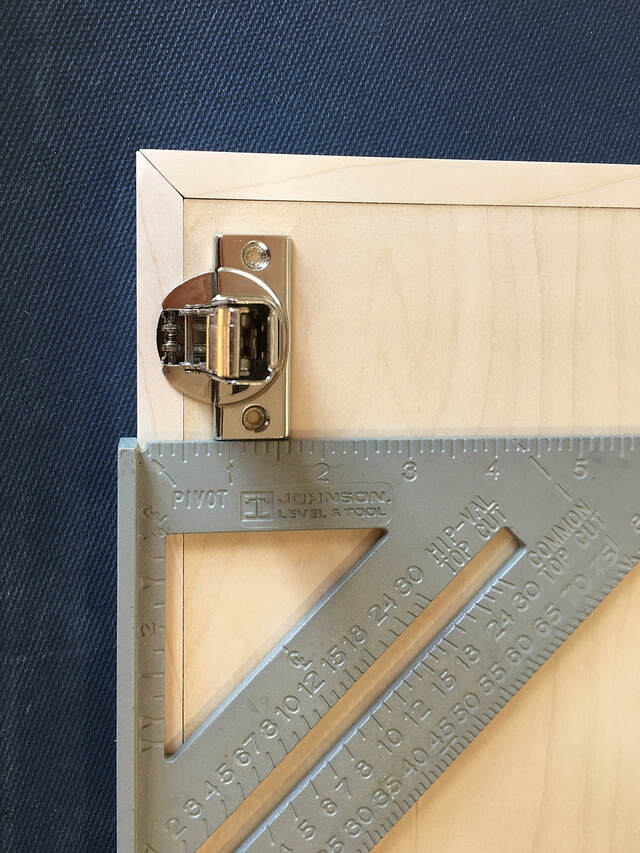
Fortunately, the glue dried overnight. The next day, all I had to do was install the door pulls and hinge cups on the doors (I had drilled them before applying finish to the doors, so I just had to screw them in place) and connect them to the mounting plates inside the cabinet. The Blum inset hinges I used are great, and the doors installed easily.
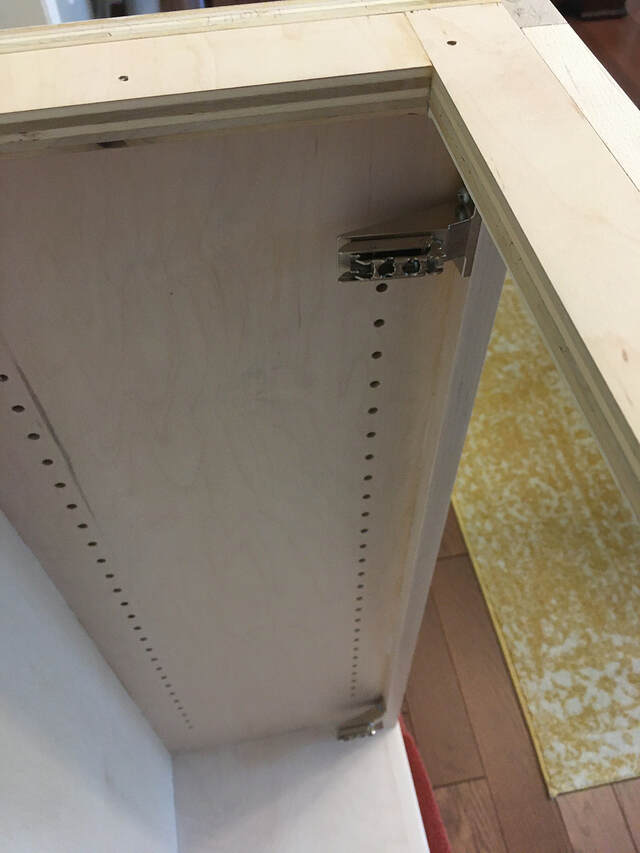
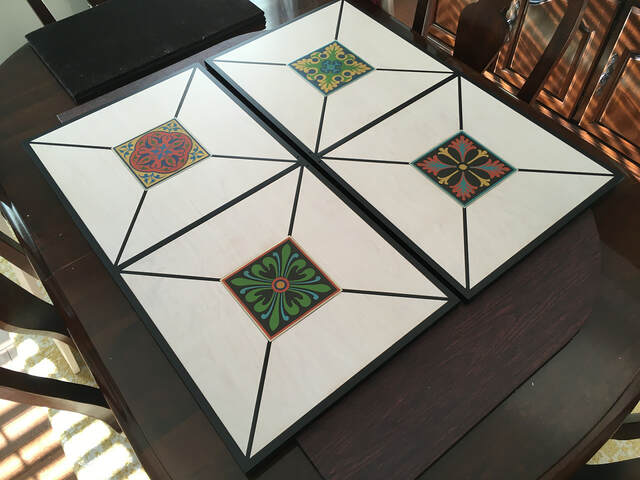
I mentioned before that the doors aren't perfectly flat. They lined up at the tops, but they were misaligned by about 1/16" to 1/32" at the bottom. I was able to adjust the hinges (moving the bottom of one door out, the top of the other door in, etc.) to make everything look respectable. (The black door trim helps with that.)
With that, the project was finally complete. Thanks for reading!