Share your craft projects
Make new craft buddies
Ask craft questions
Blog your craft journey

Ron Stewart
953 posts
and
24 followers
in over 3 years
in over 3 years
Giraffe Bookcase #4: Cutting the Legs
This is
part 4
in a
9 part
series:
Giraffe Bookcase
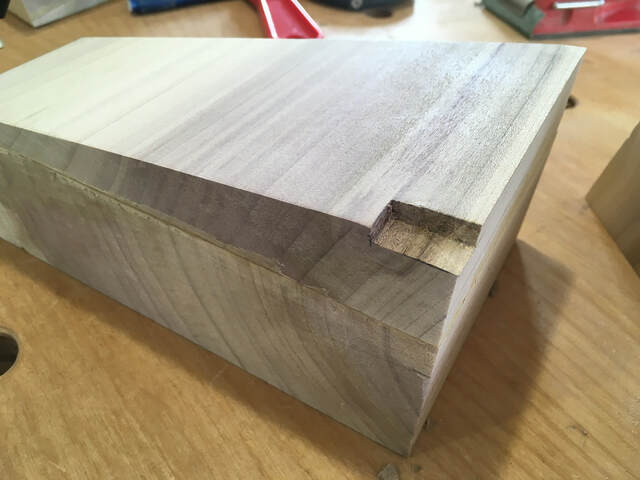
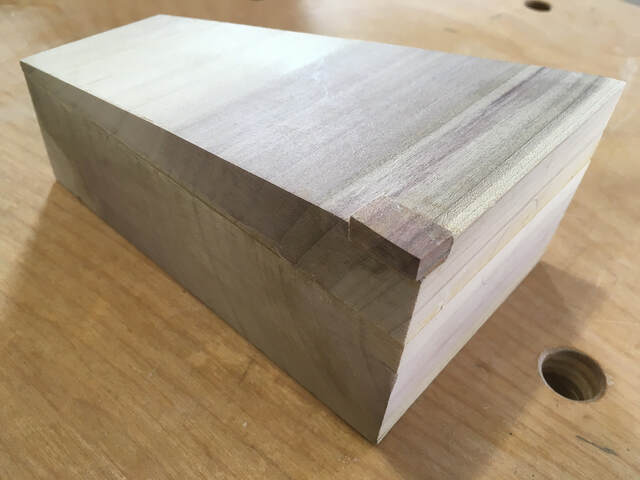
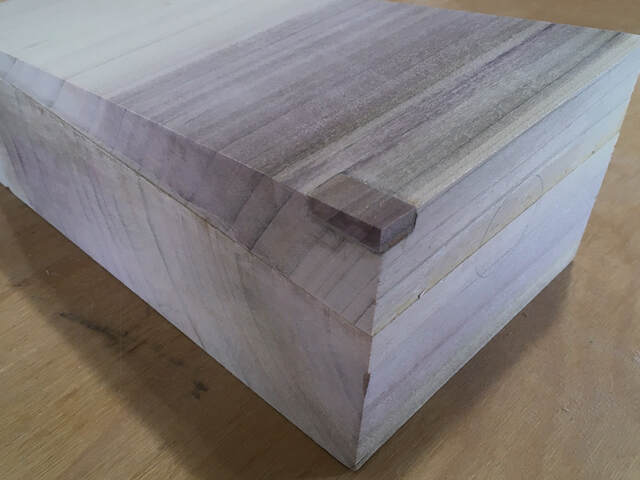
Cutting the legs turned out to be one of the most troublesome parts of the project, and the part where I made the most mistakes.
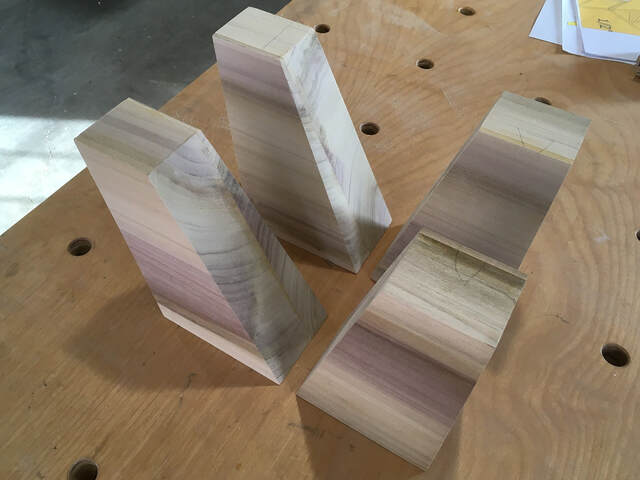
My original plan was for the legs to be 3-1/2" wide at the top, tapering to 2-1/2" at the bottom (as seen from the front of the giraffe). The thickest stock I had was 8/4, so each leg was composed of two halves.
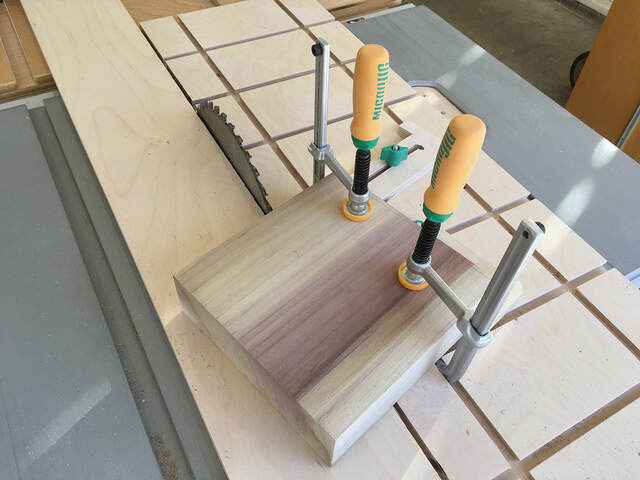
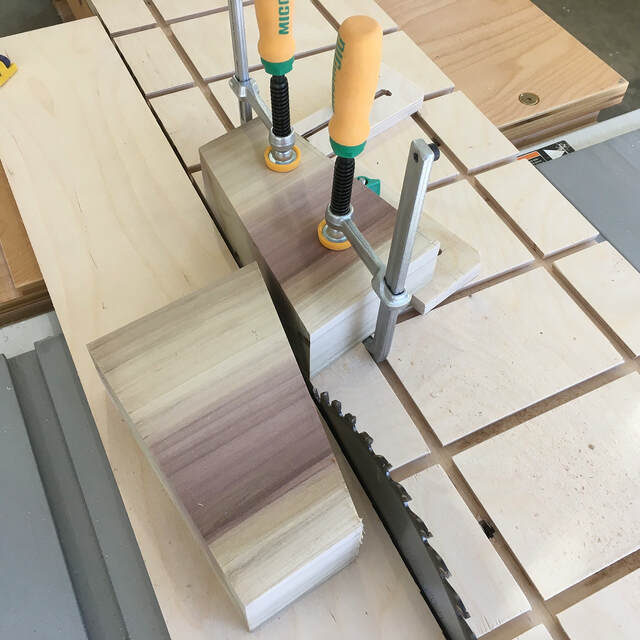
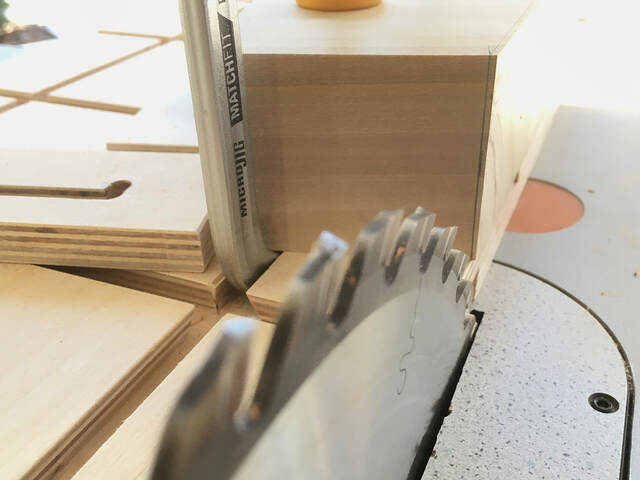
I've needed a tapering jig for a long time, and the angled legs gave me a reason to make the time to build one. After some research, I decided to use MatchFit dovetail clamps from MicroJig and a variant of their 3-in-1 Tall Fence/Jointing Sled/Tapering Jig. I added a walnut runner to the bottom and some extra slots on the back so I could still use it as a tall fence if necessary. It worked great, and I'm very happy with it.
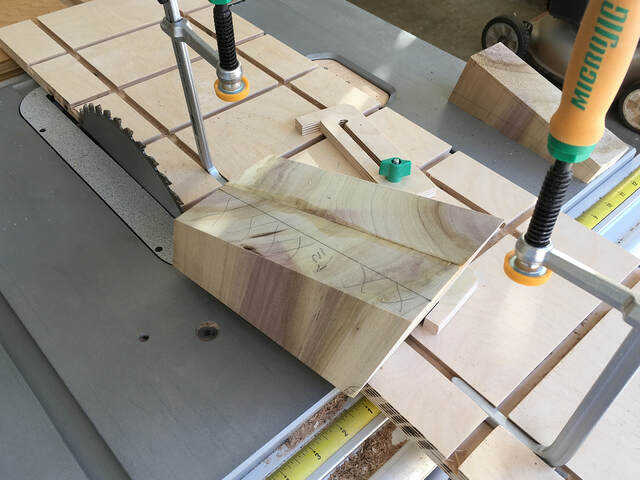
I used it to cut out the four front leg halves. I cut them slightly oversized at first to gain some confidence with the jig. I also clamped a piece of scrap plywood to the table to act as a zero-clearance slot and to catch the cutoff.
My original plan was for the legs to be 3-1/2" wide at the top, tapering to 2-1/2" at the bottom (as seen from the front of the giraffe). The thickest stock I had was 8/4, so each leg was composed of two halves.
I've needed a tapering jig for a long time, and the angled legs gave me a reason to make the time to build one. After some research, I decided to use MatchFit dovetail clamps from MicroJig and a variant of their 3-in-1 Tall Fence/Jointing Sled/Tapering Jig. I added a walnut runner to the bottom and some extra slots on the back so I could still use it as a tall fence if necessary. It worked great, and I'm very happy with it.
I used it to cut out the four front leg halves. I cut them slightly oversized at first to gain some confidence with the jig. I also clamped a piece of scrap plywood to the table to act as a zero-clearance slot and to catch the cutoff.
Then I trimmed the legs to their final size.
I repeated the process for the rear legs, which are angled at both the front and back.
I double checked the match between the tops of the legs and the corresponding parts of the case.
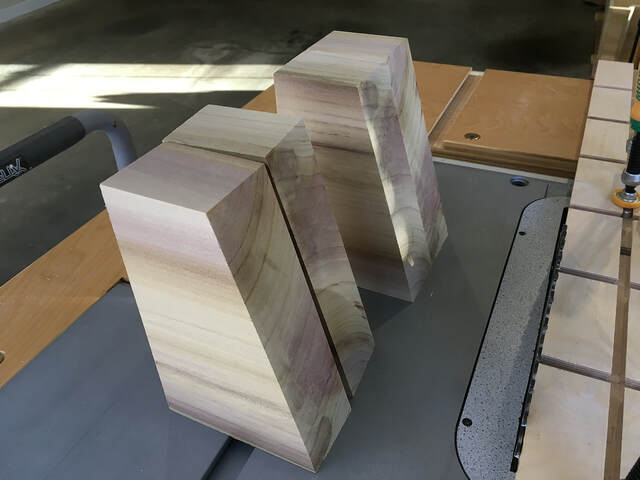
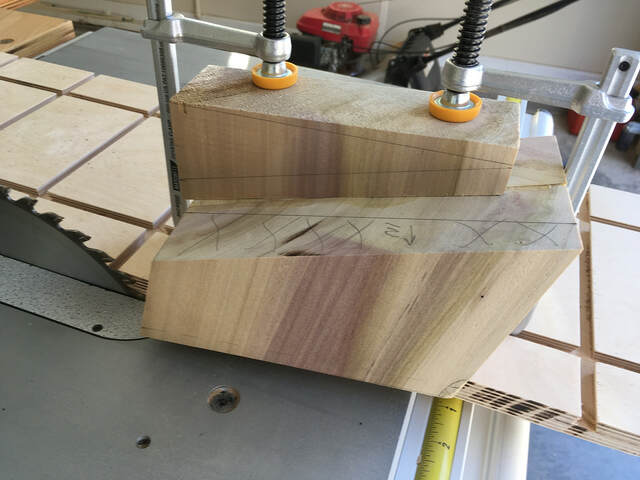
They looked good, so I glued the halves together to form the four legs. Until this point, things had gone smoothly, and I was feeling pretty good. The next step was cutting the inner tapers.
I started with the front legs. I couldn't raise the saw blade high enough to cut the taper in one pass, so I cut the first side (using a cutoff as a clamping caul). That seemed to work pretty well, but I did notice a small ridge that I thought I'd easily sand out. That ridge should have raised more of a warning flag than it did.
I cut the tapers on the rear legs the same way.
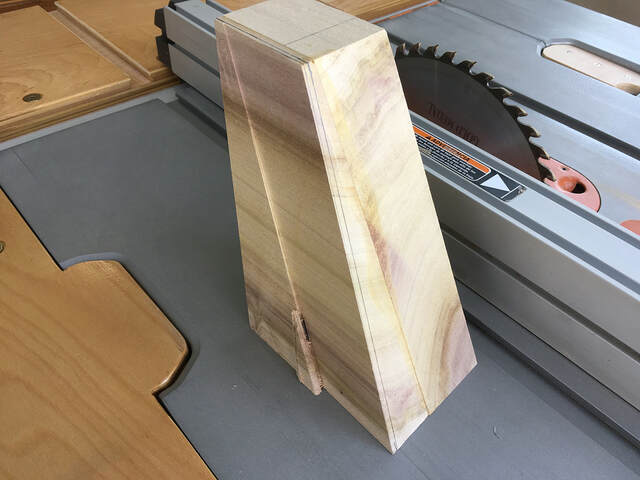
After the first pass, I noticed that the cut was a bit off. After the second, it was blindingly obvious that something had gone wrong. There was a large ridge in the middle of the taper, and the cut was more of a shallow 'Z' than a straight line. There was no way I could sand away that mess.
Somewhat dejected, I quit work for the day and tried to understand what went wrong. In the back of my mind, "compound angles" was nagging me, but I still didn't quite understand. Finally, I thought SketchUp could help me understand, so I modeled what I was doing.
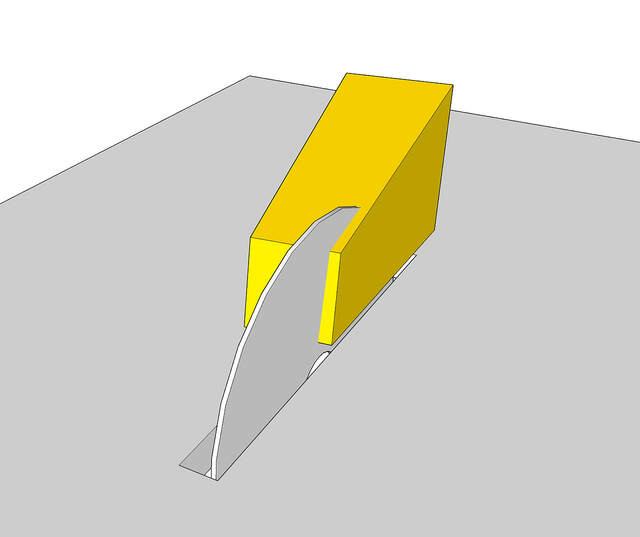
When I looked straight down the blade, it was very apparent. The blade was vertical, but it wasn't parallel to the inner face of the leg. It was also clear that the slightly angled cut would run the other way when I flipped the leg over to finish the cut, producing the Z-shape I saw.
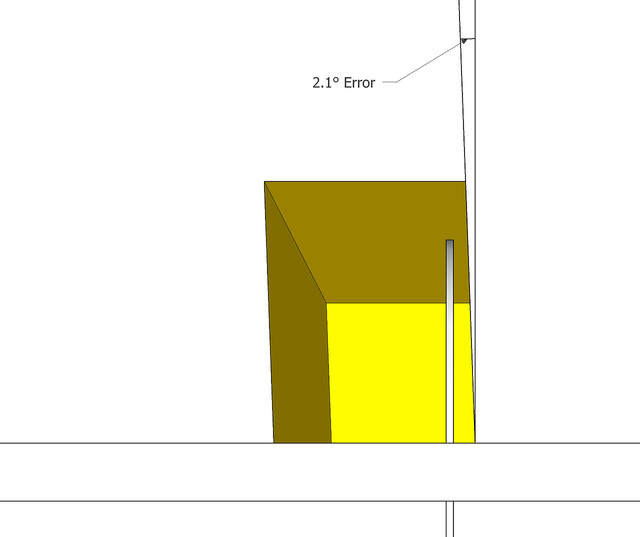
It finally sunk in that I simply couldn't cut these tapers using my taper jig. It had almost worked with the front leg because the front edge was square and the back edge was tilted only 15 degrees.
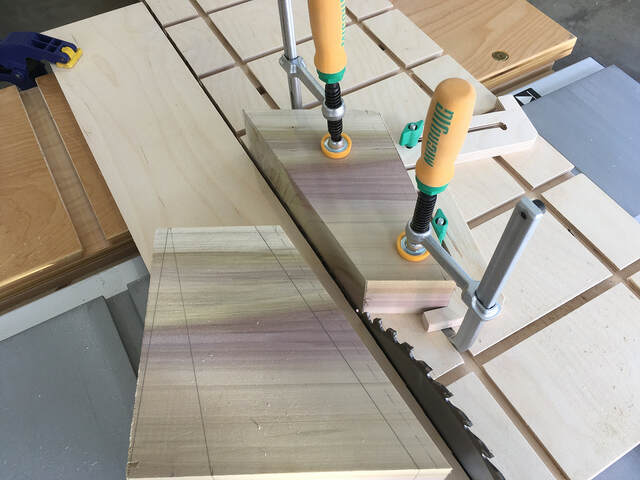
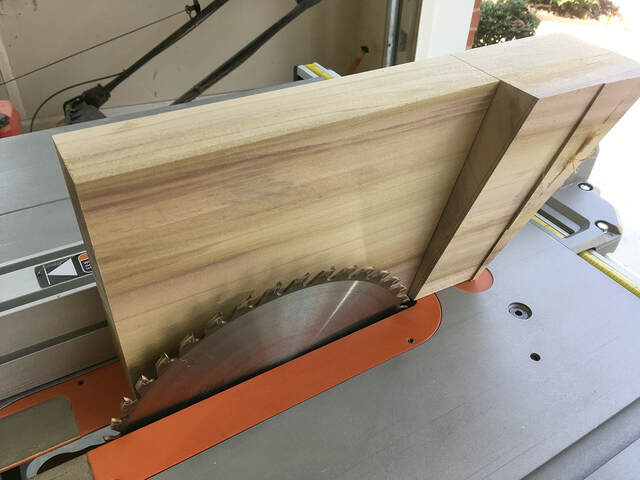
After thinking about it more, I realized the only way to cut the taper properly was to cut it with the blade tilted and the leg standing straight up. A band saw would have worked, but I don't have one. Then I thought of a way to do it with my table saw.
I hot-glued the leg to the leftover 8/4 board (which had a 15-degree angle on one side), raised the blade all the way up and tilted it, and pulled the leg through the saw to trim the lower part of the taper.
Then I flipped the leg over and pushed the leg through the saw to trim off the top part.
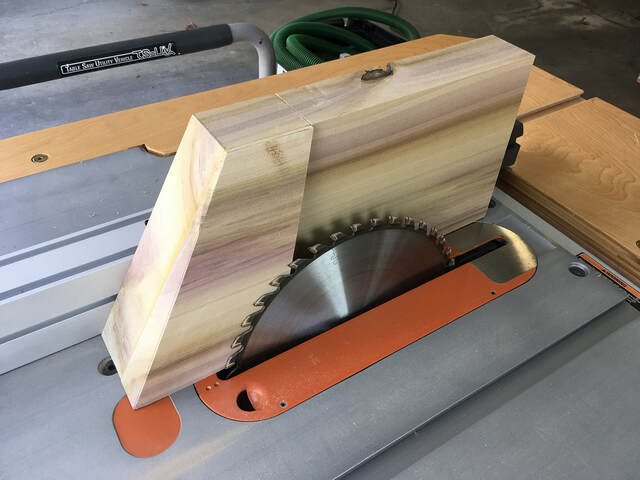
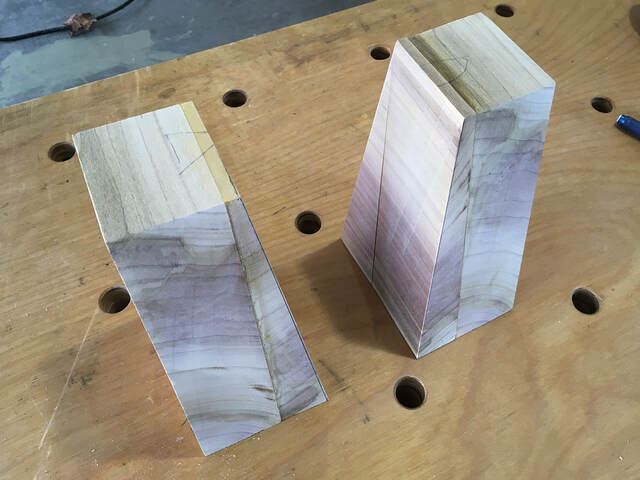
That looked much better, even though the legs ended up 1/4" thinner than planned.

By the way, those cuts may look unsafe, but I felt very secure as I made them. I used enough hot glue to make it difficult to separate the leg from the support board, my hands were well away from the blade, and the entire assembly was wide enough to feel stable.
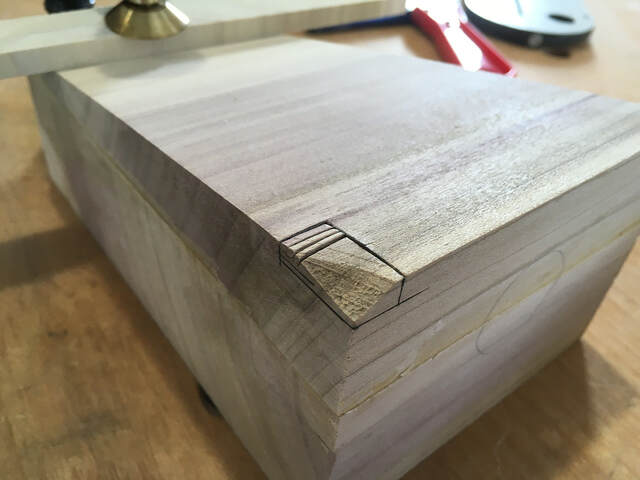
I trimmed the front legs similarly (so their thickness matched that of the rear legs). That went well, but, as luck would have it, I clipped the corner of one leg as I pushed it past the blade. At this point, I was starting to think these legs were cursed, but it didn't take long to repair the corner.
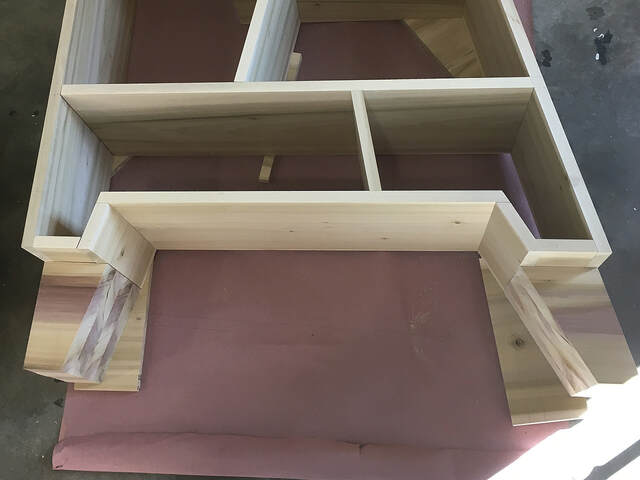
At long last, the four legs were complete (except for some details related to attaching them to the case, which I'll discuss in a later post).