


Share your craft projects
Make new craft buddies
Ask craft questions
Blog your craft journey

SplinterGroup
9118 posts
and
68 followers
in over 3 years
in over 3 years
More from SplinterGroup
Building the Art Deco Box #1: Background on the veneered Panel
This is
part 1
in a
4 part
series:
Building the Art Deco Box
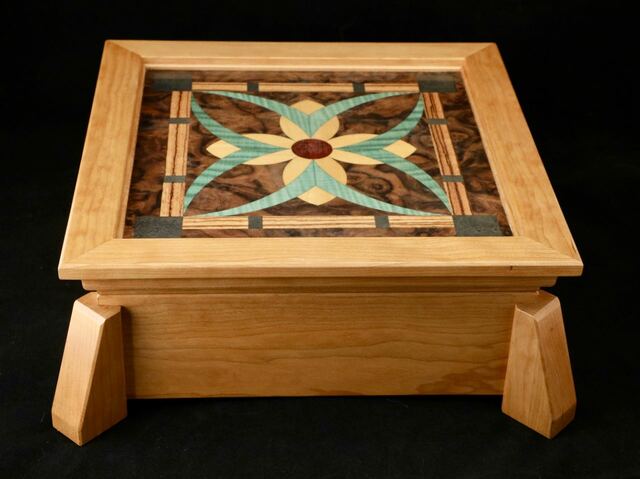
WIth a laser in my tool box, I've begun experimenting with cutting veneers for assembling decorative panels.
The project post for this box can be seen here
I usually would create a panel with a simple single veneer glued to plywood.
Nice look, but could use some "excitement" for various projects.
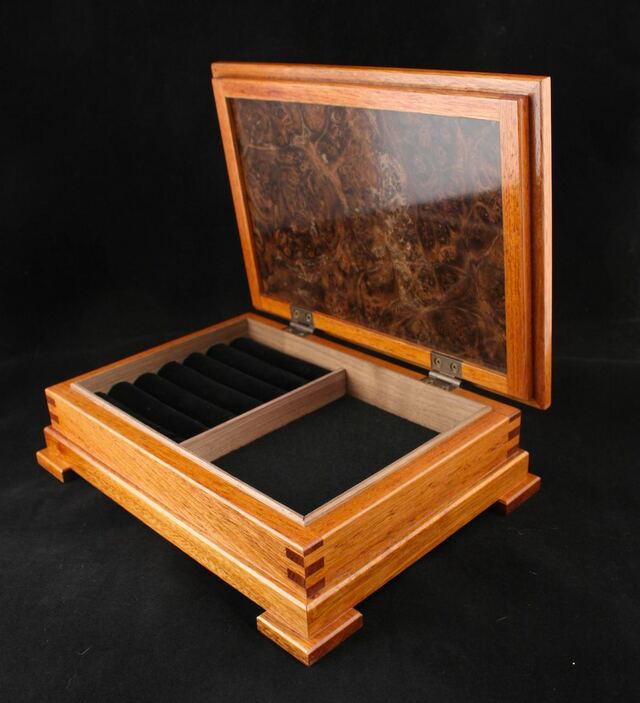
Single walnut burl paneled lid:
I would also try various mixes of veneers, but limited myself to rectangles to create book matched panels or other arrangements since skilled cutting of non-linear shapes takes some time and effort. I'm too lazy 😀
Neat thing is even a low powered laser (i.e. inexpensive) can cut veneer.
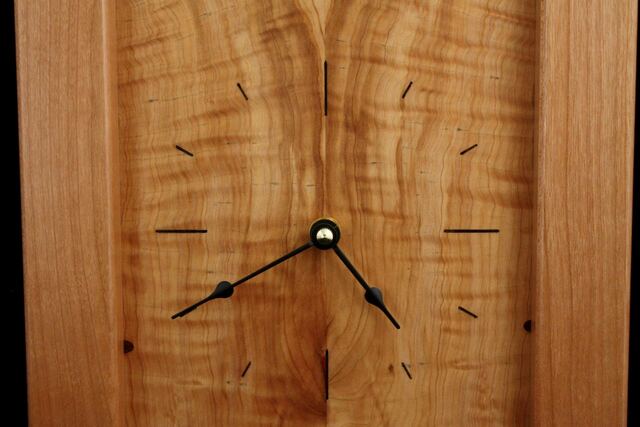
Book matched single berry juniper clock face:
The laser opened me up to creating shapes that either would take forever to cut all the small parts or had curves that would need to fit perfectly to look good
Lots of simple and small pieces with laser:
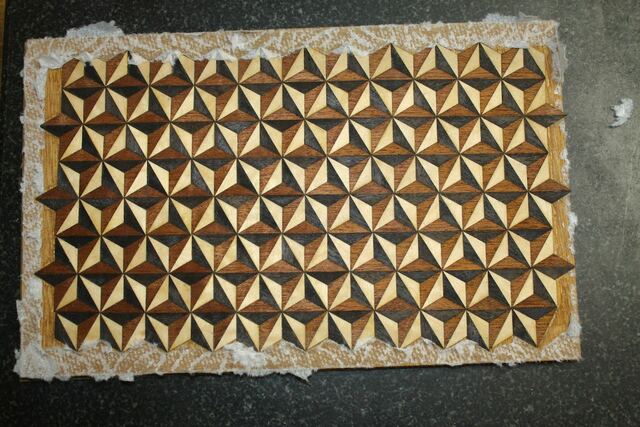
Small and with curves:
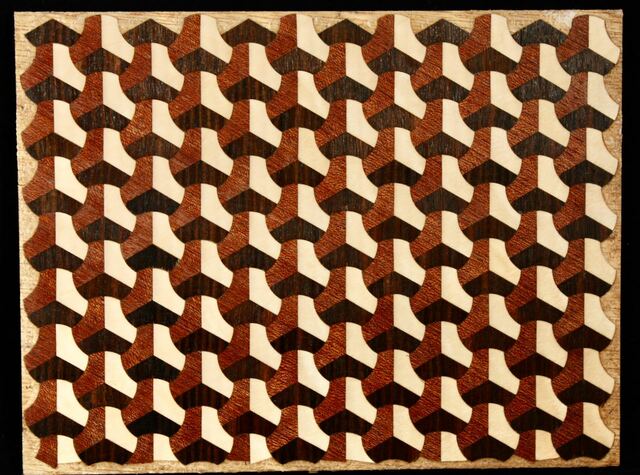
Time to venture into the abstract.
With the laser, the veneer is cut by burning. This leaves a kerf, exactly like a table saw blade. For the parts to fit correctly, compensation for this kerf must be considered. The laser I use produces a kerf well under 1mm, but it takes some experimentation to find the sweet spot and get tight fits.
Eventually these panels need to be put into something useful, so given their size, boxes are a good choice.
With the subject box of this post, I got very close to my desired fit. Still more work to do, but good 'nuff for now.
I'll post another blog on the process in the future, but basically it involves placing the parts onto some contact paper to hold it all in place and allow for tweaking the positions as needed.
Partial assembly on black contact paper (shelf liner):
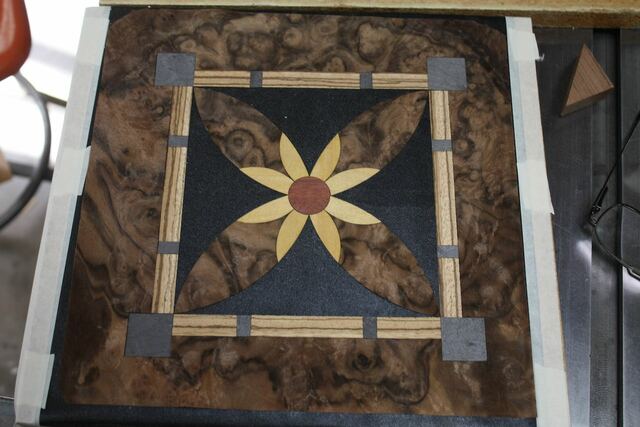
Complete panel ready for lacquer:
I've still got work to do on design, not really down with the grey as it doesn't really "pop"
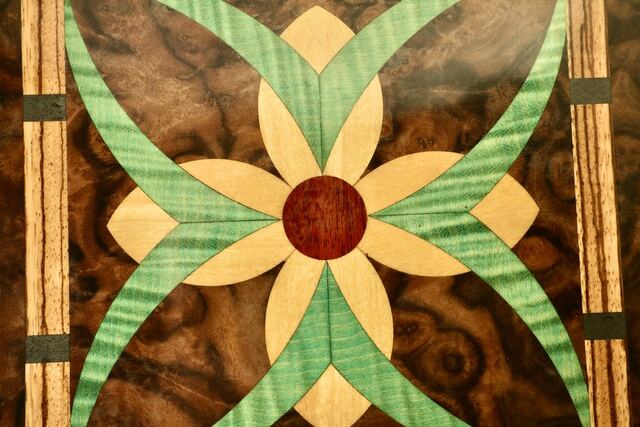
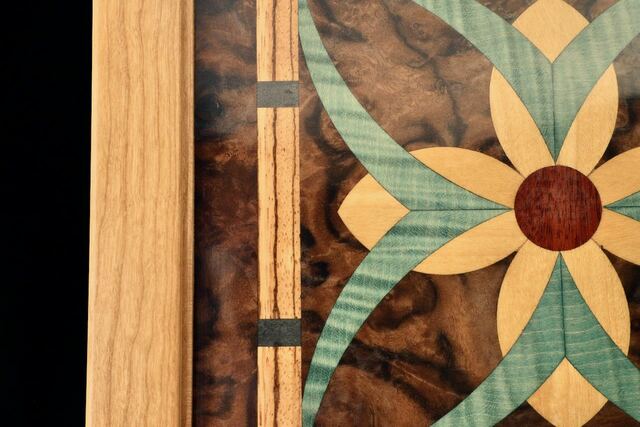
Detail close-ups:
Grey dyed maple, zebrawood, yellow heart, bloodwood, TransTint dyed curly English sycamore.
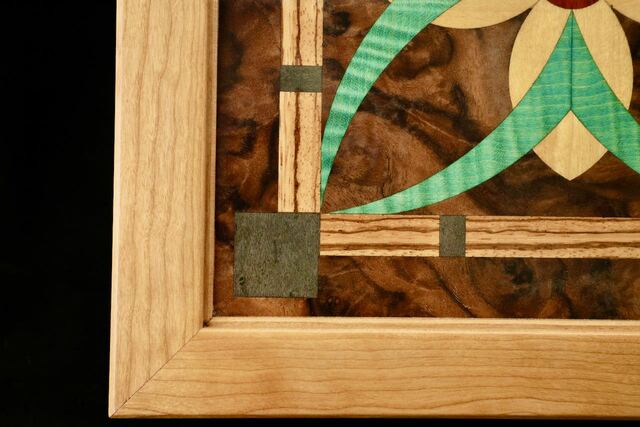
The seam where the green leafs join needs future attention. I should have just cut them as a single piece or at least cleaned up the burns from the laser a bit better.
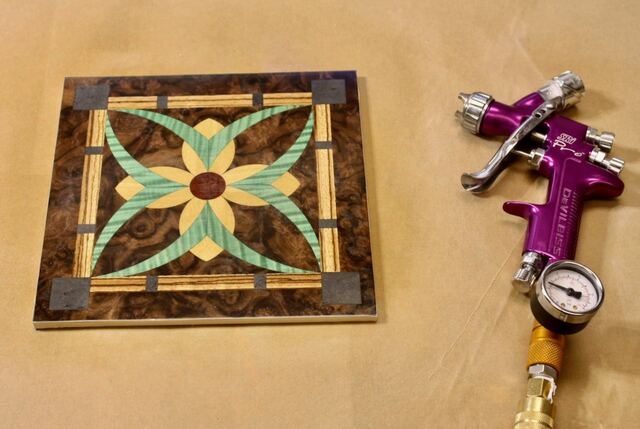
Nice and shiny after the lacuqer. Colors really shift with viewing angle in the light (chatoyancy)
Ok, enough on the panel, onto the box in part 2.
3 Comments

Awesome!
Ryan/// ~sigh~ I blew up another bowl. Moke told me "I made the inside bigger than the outside".

Nice Splinter, and you have the little purple gun. I like mine.
Main Street to the Mountains
Thanks guys.
I have the HF $9 special but haven't used it yet. That gun is my DevilBiss SRI, Great for the small stuff.
I have the HF $9 special but haven't used it yet. That gun is my DevilBiss SRI, Great for the small stuff.