Initially, I didn't plan to make any blog posts for this project because I didn't know if it would work out or crash and burn (still don't). But since this was something new for me, I figured I'd post anyway and maybe I'd get some helpful tips from the community along the way. (Even if it's in the form of, "what you should have done was....") 😁
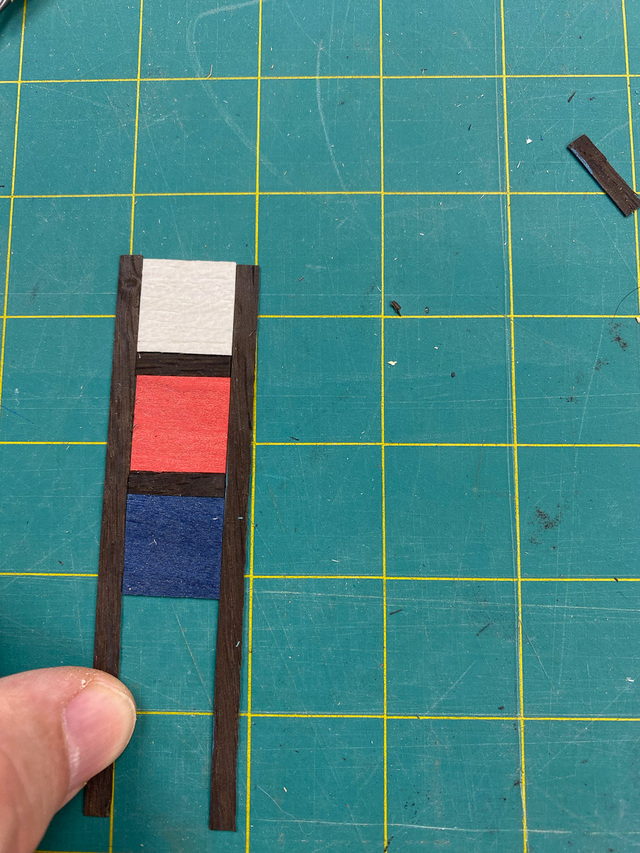
I used veneers that I had on hand: dyed poplar for the blue, red, yellow, orange (unfortunately, no green), fumed oak for the "lead" lines, and bleached obeche for the white field.
My strategy is to split the panel into a number of smaller modules that will be assembled into the whole after they're completed. I'll use blue tape on the underside to hold everything together temporarily. Once the full panel is complete, I'll apply veneer tape to all the seams on the top, remove the blue tape, and vacuum press the veneer to a substrate. I think it will work as long as I'm extremely careful when removing the blue tape.
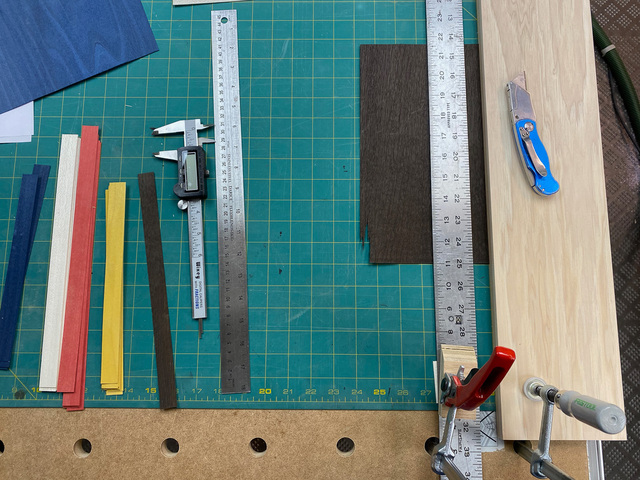
With a little research online for techniques on cutting uniform veneer strips, I found this technique show up in a couple different forms. Essentially, it's a cutting mat with a fixed fence at one edge and a straightedge clamped a uniform distance away from the fence. The straightedge is elevated off the mat by the thickness of the veneer (or slightly higher) so that the veneer section will slide underneath freely.
I grabbed a piece of hickory with a jointed edge for the fence and a square-edged aluminum yardstick for the straightedge. With a dedicated piece of scrap 3/4" plywood for a spacer, I clamped the straightedge in place and started cutting. Sometime after I took these pictures, I unclamped the fence and put a deep rabbet on the top of the fence edge. This was needed when cutting narrow strips to keep the fence from interfering with the cutting tool.
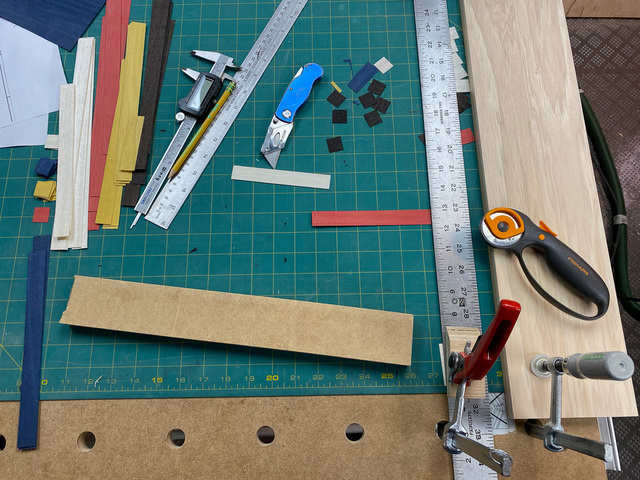
I experimented with a utility knife and rotary cutting tool. In most cases, the rotary cutting tool worked best. I went online and ordered a couple more cutting tools - a better quality utility knife and a circle cutter.
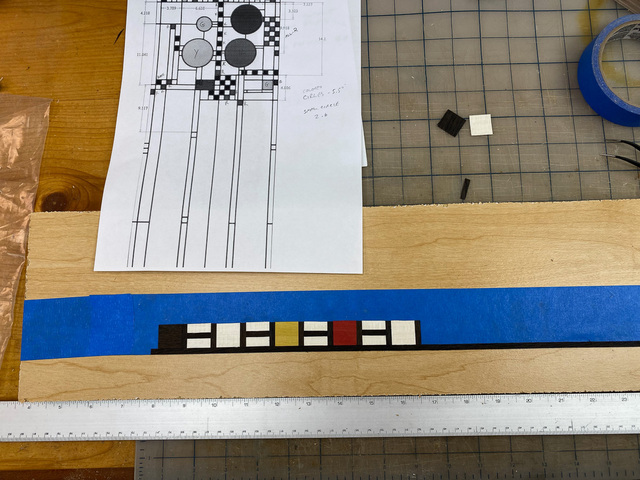
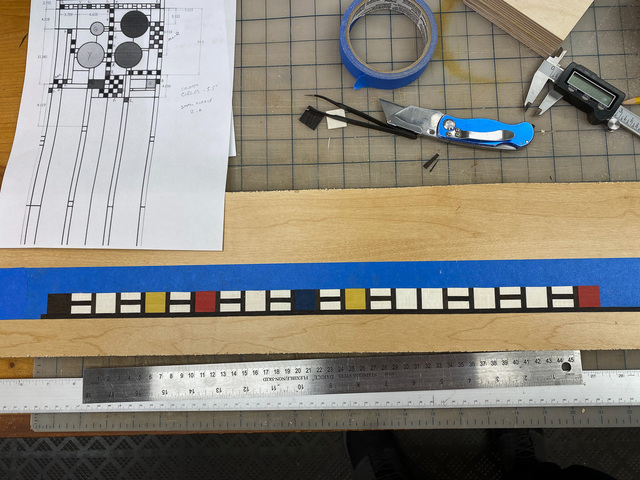
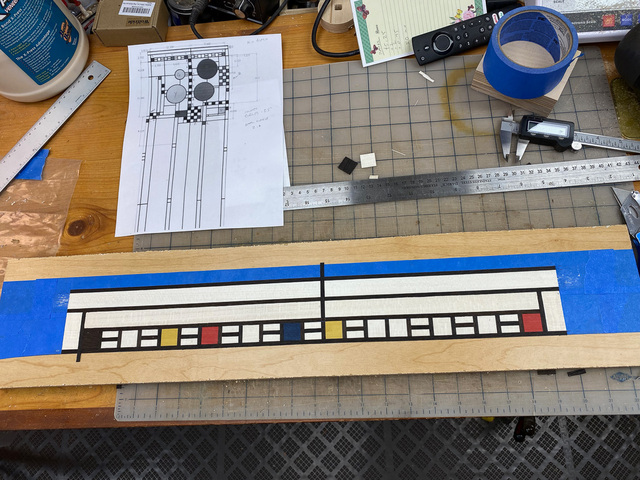
I cut a small supply of squares and strips and got started on first module - the first couple inches along the top of the panel. I inverted some blue tape and taped down the ends to hold it in place on a scrap of melamine. I understand contact paper would work too, but I didn't have any. I laid the first border strip along the edge of the tape and started building the pattern above it.
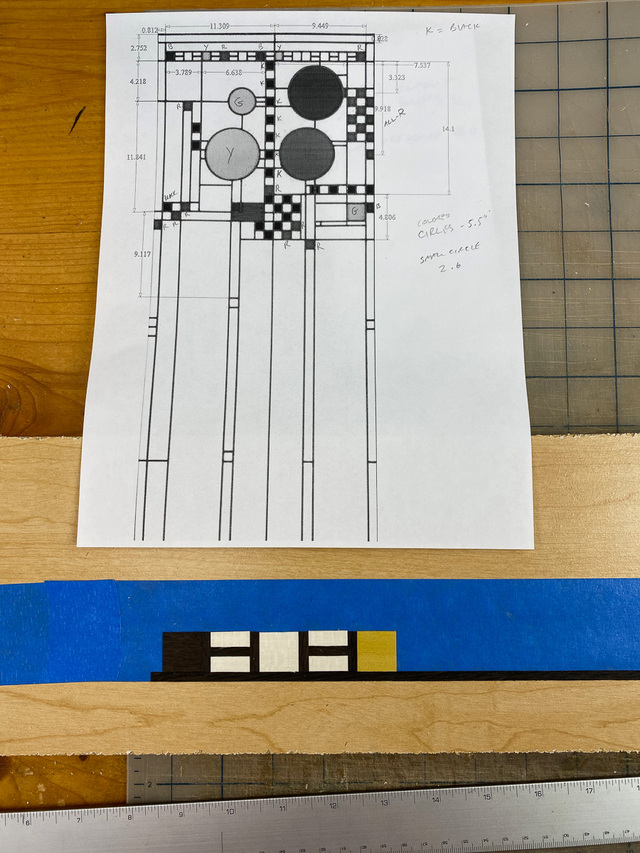
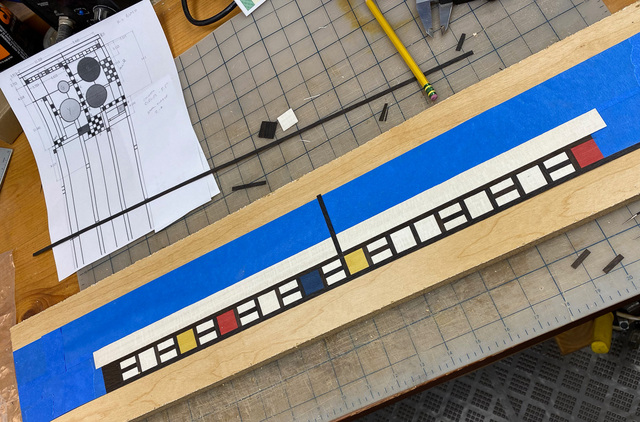
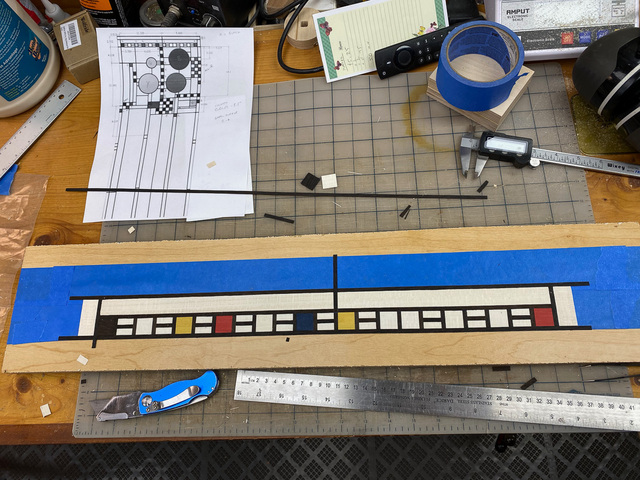
That's the first section of the top, minus the vertical side strips which will be added as one of the last steps. Next was the single stripe of black/white squares running down the center from the top, which I didn't photograph going together. Its final length defines the position of the flag and cluster of squares beneath the circles. I built that module next.
My wife does a lot of sewing projects. When we're at the fabric store, I'm always amazed at how well those rotary cutters work. The store employees cut through several layers of fabric with seemingly no effort. I guess veneer offers little resistance to them too.
Never seen the rotary cutter, is it like a pizza cutter? I hated using a box cutter as the blade would tend to follow the grain.
I first started doing this type of work with the blue tape just like you are. A real game changer was using just the contact paper (WalMart shelf liner) and securing it to a piece of melamine. easy enough to reposition stuff and you can "push" the pieces sideways to close up a seam. If there is some more profiling to do it is easy to take back out and reshape.
Once everything was in place, the melamine became the vacuum press lower caul. I just rolled on the veneer glue to my plywood panel then set this on top of the layout. Another caul and then into the bag.
Zero glue up anxiety and stress.
After pressing and some dry time, the shelf paper can easily be pulled back off. Only thing is knowing that the show side is down when placing the parts.
Splinter - Yes, the rotary cutter is like a pizza cutter. Mine is probably due for a new wheel, but it's still working pretty good. I like your approach to the process. I did consider doing the reverse pattern to avoid the extra steps, but thought I'd likely mess up trying to assemble the pieces as a mirror image. If I'd spent more time considering that option, I would have realized I could have printed-out a reversed pattern sheet. Oh well, there's always next time. But given your description of the shelf liner, I will consider switching over to that method for some of the assembly. It will definitely be easier to peel-off than the blue tape.
Dutchy - Yes, there are definitely similarities with Mondrian with the primary colors and geometric shapes.