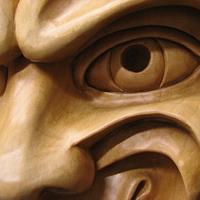
Here are a few pictures of the marquetry and routing in the inlays. By only using two veneers for the marquetry, Gaboon Ebony & Holly with the background veneer out of Bubinga burl really helps with the simplicity of the Art Deco style. My next steps I'll be jointing and making the upper cabinet and fitting the door with black Soss hinges. Then the interior of the cabinet will have a bunch of drawers and doors.
A pic post like this one makes us mere mortals think about trying projects like this. It is just a series of steps. If you can break it down to little steps like here, it's not as overwhelming. As incredible as the project is, the teaching element here is as strong as the work is.
Thank you everyone for the great complements. I forgot how much fun posting blogs were. I need to do more of them. Thank you for your very kind words they are very much appreciated.
I like the second photo showing all the cut pieces in trays waiting to be glued into place. Do you number or labels them somehow, or do you just know where each piece goes?
SplinterGroup: Thank you, Sir! I'm sanding off the paper that I glue onto the face of the veneer with hot animal hide glue. I do this so that the veneer won't chip or crack while I'm cutting on the scroll saw, the tiny little pieces. While cutting the marquetry packet the paper face of the veneer is laying flat to the table of the scroll saw, then when I glue marquetry to the sub-straight the paper side will be up. Ron Stewart: Thank you very much for the complement. I print a copy of the marquetry pattern that I double sided tape to a clamping caul to go by when putting all the pieces back together. When I'm cutting I just place the pieces in kind of an order. It's a lot easier that it looks. lol
That is a beautiful creation Dennis, and it had to be a time consuming venture. I know with my old eyes & cataracts, I'd never be able to do this. Congratulations on a superior job well done.
Dennis Zongker commented about 3 hours ago new Ross Leidy: Thank you! I used a scalpel to cut the holly veneer following a printed picture of the elliptical ring that I drew in AutoCad.
You have an unreasonably high level of patience, Dennis! Fantastic work.