


Share your craft projects
Make new craft buddies
Ask craft questions
Blog your craft journey
marquetry

Here are the last few that should bring the construction up to date with my project post. I highly recommend that you try this style of joinery. It...
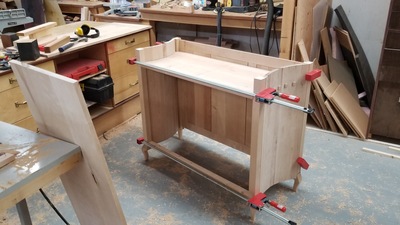
A little video of the first stage of gluing up the 18th C. cabinet. The top, bottom, and back are assembled dry to assure squareness and fit. The t...

It’s been a lot of fun and quite a learning experience but the construction part of this 18th C. kitchen cabinet is about wrapped up. I will be sta...
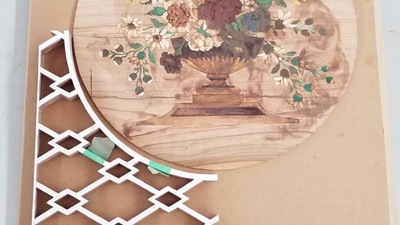
I’ve finished the Main parquetry / marquetry panels that will go on the sides of my cabinet …... finally.
This iconic Jean Henri Reisener parque...
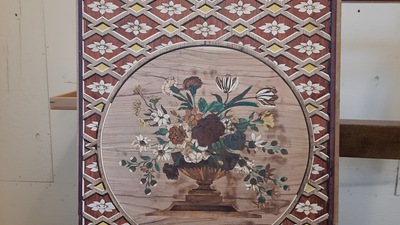
Since the last entry I’ve made a good bit of progress. The side panels are now completely finished and ready to be mounted on the cabinet and the f...
Here’s the video of the first stage of gluing up the curved side. In this stage the marquetry is not glued to the cabinet. It is laminated into a c...
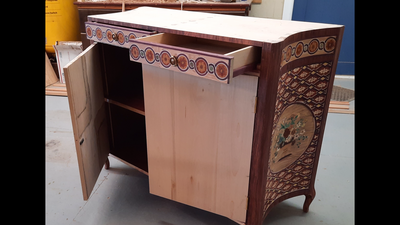
I’ve come to a place that is convenient to take a break. Sailing season is approaching and I have work to do on my boat to be ready. This cabinet ...

IMPORTANT NOTE: Almost everything on this page has been improved and updated in my second build , Chevy II
I am leaving this blog intact as a r...

The biggest and most dramatic new lesson I learned from the "Facets" project's dyeing was the huge dimensional movement that you can get when you...

I have done a few dye projects since the last post to this blog but they have been small and not very noteworthy. I did however learn from them a...