Share your craft projects
Make new craft buddies
Ask craft questions
Blog your craft journey
Karson
42 posts
and
5 followers
in almost 12 years
in almost 12 years
More from Karson
Ceiling Fan Frame
When we bought the home we now live in a year ago it had a florescent light in the middle of the kitchen. It was a 2’ X 2’ frame with double bulbs. Some times they would come on and some times they wouldn’t. My wife also wanted a ceiling fan.
Woodworker to the action. A year later after thinking about what I could do, I took down the existing light.
Wow they had installed the light before they painted the ceiling so If I wanted to paint the bare spot I would get to paint 3 rooms and a hall so that the paint would match. Choice #1
Choice #2 – make a box 2’ X 2’ and install the fan inside it.
I opted for #2.
I bought a 2’X4’ piece of maple 1/4” plywood and I looked around my veneer to see what I had.
Momentary Pause here—
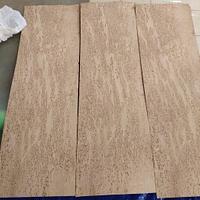
Since I moved to Virginia from Delaware and my veneer and wood was moved over 6 months and was stacked in different piles and spaces. It was put at the nearest spot that was empty. I then threw some 2X4 and plywood on the rafters to stash the veneers. They again were placed where they would fit. So to say “I looked around to see what I had!” really meant that the first place I looked was where the “Trojan Horse Platform Ladder” happened to be sitting (See My Workshop: Note this was the old one not the new one, But the Trojan Horse was moved and Rebuilt) and on the rafter above it was a few sheets of Russian Karelian Birch wood veneer. I needed sheets that would be at least 24” long and wide enough to cover 24”. I found 3 sheets that were 8 1/4” and 25” long so when I cleaned up the edges I was just able to get the 24” in width.
Unfortunately the sheets were not book matched. I had bought this veneer from someone who had selected his pieces and I got the left overs. They were close enough in matching that I slip matched them instead of book matching them. You also shouldn’t book match an odd number of sheets Unless it is really necessary. But in my case there were some missing sheets of veneer between what I had so so the match wouldn’t have even been close.
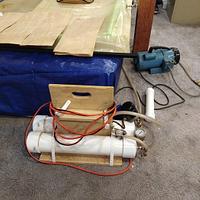
I found my veneer bag and pump buried in different places after the move. I hooked it together and the pump would not pull any vacuum. So I thought the bag might have gotten punctured in the move. So a few days to find my air compressor and blow up my bag with a soap spray. No leaks found. But it was still not pulling vacuum. It would pull vacuum if I put my finger over the end of the hose. I then found that the attachment to the bag had broken it seal and there was no seal. So I went to joewoodworker.com to get some new attachment pieces.
They were installed but still no vacuum being pulled. I took apart the piping to my apparatus and I found that the check valve was full of saw dust that it had sucked from the bag over the years.. I reassembled all the parts to put the filter in front of all other parts of the system. I had been filtering the air before it went to the pump but not before it went to any other parts of the system. That’s now been fixed and I have vacuum.
I glued the veneer on the plywood and then I took it to a woodworkers meeting to show and tell. Then I left it in my van overnight and over day. When I took it out the plywood was warped. ”””” YOU ARE NEVER SUPPOSED TO VENEER ONLY ONE SIDE OF PLYWOOD!””” So I put the sheet on a flat surface, put lots of weight on it and let it stabilize for a few days. Then I glued some backer veneer on the other side. It became pretty flat. I then took the other 2’’ X 2” piece and glued it on the back. So now my panel was 1/2” thick instead of 1/4” thick. And flat as could be.
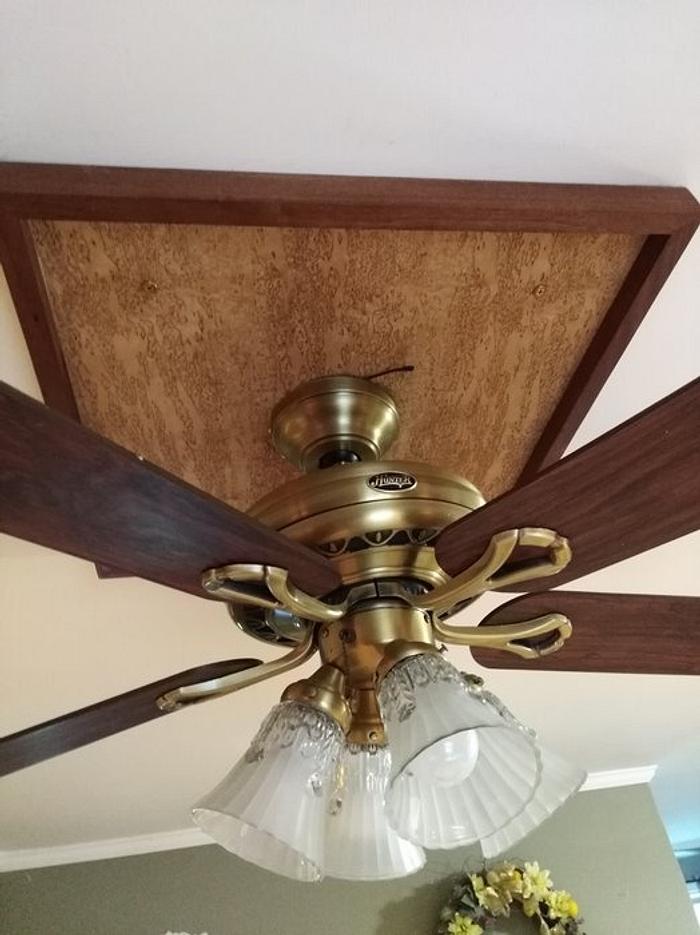
I took some 1” thick Sapele and made the frame cutting a 1/2 X 1/2” rabbit on the bottom inside edge so that I could glue the panel into the frame.
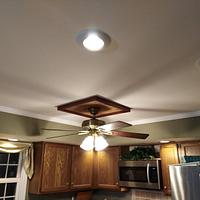
My concern now became how am I going to mount this frame unto the ceiling. There was only one joist and that was where the electric box had been attached to the light I removed. I finally decided to put some 1-1/2” Brass screws close to the 4 corners. You can almost see them in the closest 2 corners about 4” from the sides. I used brass screws and brass finish washers. They were screwed into plastic wall hangers rated for 50 lbs each. Then I screwed the fan hanger attachment with 2” screws into the joist. The other end of the fan attachment is screwed into my 1/2” thick panel. So nothing is attached to the electrical box holding up this assortment of parts.
So this frame is about 1/2” bigger than the unpainted ceiling. Blessing #1. The fan works and the light works with the remote control. Blessing #2. My wife is happy. Blessing #3. She even let me cook steaks for supper as a reward.
So now I’m thinking In order to match the fan to the ceiling box I might veneer the fan blades with some more of that unmatched veneer. I am going the veneer the space above the Microwave/exhaust to cover up the exhaust pipe. But that will be another posting.
Wood is good
1 Comment
You've got veneering down, nice work Karson!
woodworking classes, custom furniture maker


