I've pontificated for far too long about building tool racks for my workshop, so I finally bought some pine, MDF and oak to build a few. This chisel rack is the first of these and a plane rack (which will be located to the left of the chisel rack) will follow shortly. I like using words like 'shortly' because it is basically an undefined length of time). Just don't expect it in the next 30 minutes ok.
After looking at loads of chisel racks online, this one started with a few design principles:
The rack needs to hold all my general woodworking chisels in one place.
All of the tools must stand up straight and not lean over in any direction as is the case with some chisel rack designs.
They must not be spaced too far apart as space is a premium in my 9ft x 9ft workshop.
Each tool must be easily identifiable and accessible.
The rack needs to hang on the wall using the French cleats I put up a few years ago.
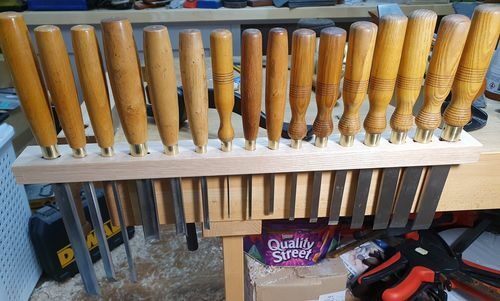
Where possible, I wanted the chisels to sit on their ferrules because I like a bit of bling.
The chisels on the top row must be removable from the front rather than having to lift the tools straight up and out as there will eventually be a deep shelf directly above the rack.
Armed with this information, I gathered all of the tools together (42 in total) and decided which of the tools would go on each row and in what order. The tools for the top and middle row seemed to take up the same amount of space in width, but the spacing for the front row was too great and therefore didn't comply with design principle number 3. There was nothing for it but to buy another Ashley Iles Mk II bevel-edged chisel to take up the slack. I hope you understand that I HAD to do this because there is no point establishing design principles if you don't stick to them. LOL.
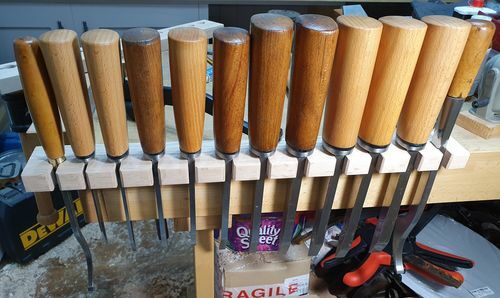
I started out by making the three oak racks and fitting each tool individually in the allotted space whilst allowing for a 10mm stub tenon on each end. This was the most time consuming part of the build, but I just kept chiseling away at it (pardon the pun) and pretty soon I could clamp each one to the bench and make sure everything fitted. In a lot of cases, each tool helped make it's own home.
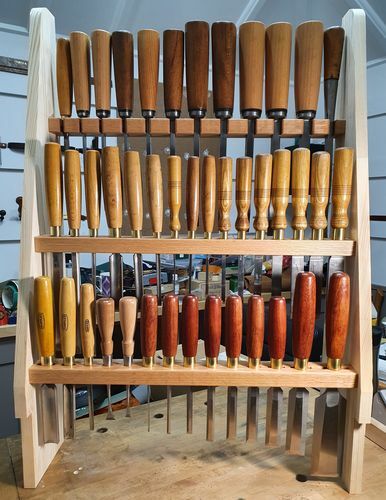
The back row houses my I. Sorby English mortise chisels (1/8" up to 3/4") along with two I. Sorby lock mortise chisels.
The middle row houses (right to left) a set of seven vintage Palm Tree firmer chisels (1/4" to 1"), three sash mortise chisels (1/16th", 1/8" and 3/16"), three vintage Thomas Wales & Sons in-cannel gouges (1/4", 1/2" and 3/4"), three vintage paring chisels 1/4", 1/2" and 3/4") by various makers.
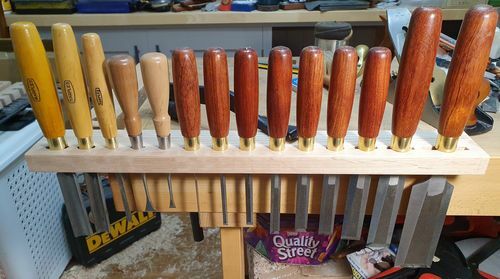
The front row houses (right to left) my set of Ashley Iles Mk II bevel-edged chisels (1/8" to 2"), two Lie Nielsen dovetail chisels and three vintage Marples out-cannel gouges (1/4", 1/2" and 3/4")
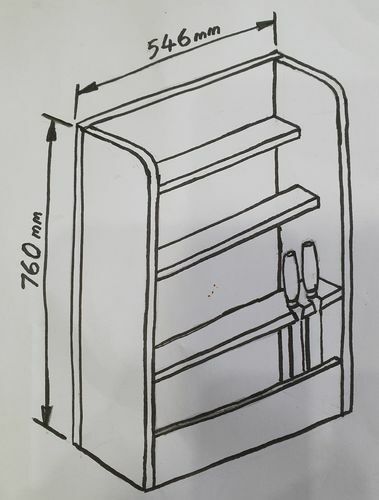
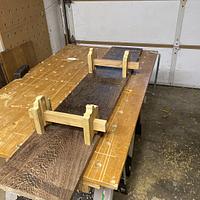
Then it was on to the two pine sides. I had to make sure that I had enough depth between the front of the back row and the back of the middle row to easily pull the English mortise chisels forward and rotate them 90 degrees about their horizontal access to be able to remove them once the shelf is installed above the rack. So whilst I was working out how to hold the three oak racks in the air with only two hands, I drew a little sketch. No idea why because I never looked at it again until I photographed it for this post. I suppose it shows how designs can change as you get into a build. Then again, it could also be 15 minutes of my life that I wasted and won't ever get back.
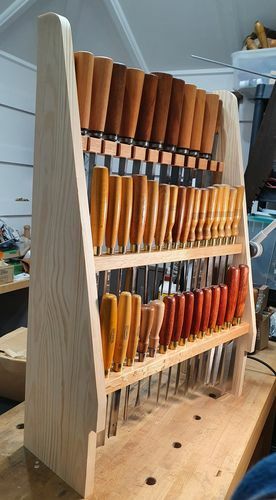
Once I decided on what depth the sides needed to be, I marked out where the racks would be placed height-wise. I positioned them so that I could see enough of the blade of each tool and thus comply with design principle No.4. After cutting the tenons on each end of the oak racks and chopping their respective mortises in the pine, I decided the sides would be more aesthetically pleasing if they sloped back towards the top and this should also match the slope of the plane rack that will sit alongside the chisel rack. The slope is long enough to encompass a No.8 bench plane, so we'll see how that goes. Time for another dry fit.
I also incorporated a pine front to stop me cutting myself when reaching for something on the bench below the chisel rack. This is just screwed to the sides. The back of the rack is made from MDF with pine French cleats. The back and sides are painted in Rich Praline Eggshell paint to match the rest of my workshop and the oak racks are finished with multiple coats of Peacock oil. All hand tool work apart from drilling the holes to mount the sides to the back.
Thanks for looking!
Andy -- Old Chinese proverb say: If you think something can't be done, don't interrupt man who is doing it.
Thanks. I. Sorby made mortising chisels ranging from 1/8" to 3/4". 10 in total. Mine are all Punch brand except the 3/4". I've been on the hunt for one of those for the last 10 years and I've never seen one. The one I have looks exactly like the rest of them, it just doesn't have the Mr Punch logo.
Andy -- Old Chinese proverb say: If you think something can't be done, don't interrupt man who is doing it.
I'm loving it Steve. Can't wait to build more racks for the rest of my tools. Racks and cabinets take more thought than you think they should really to fit everything in, but do it in a way that each tool is easy out and easy in.
Andy -- Old Chinese proverb say: If you think something can't be done, don't interrupt man who is doing it.