This crosscut sled was the second accessory I built for my table saw. I built this during the summer of 2009 from Formica covered MDF and oak trim. I spent several hours searching the web for ideas that I wanted to include in my version. For some reason I never stumbled across woodworking sites like Craftisian. If I had, the design would be a bit different. I saw a sled design on Woodsmith that is a starting point, but I made several improvements/changes. Since then I have seen several features that I would like to add. Let's see if I can cover the details.
This build happened before I was posting on the internet so I have very few build pictures.
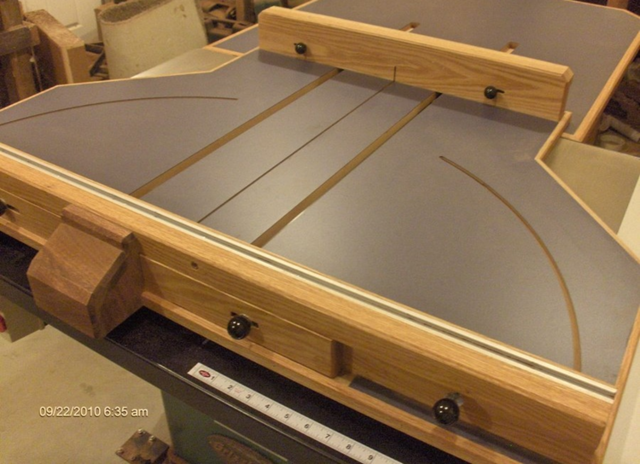
The first detail is the size - it is 27" deep and 45" wide. This is as big as I felt I could handle. Also, the depth is the largest that still allows me to store the sled along the back of my saw without interfering with the fence. The times I have made use of the full capacity are infrequent (maybe once a year). When it happens I am very appreciative of the size.
I squared the fence using a variation of the 5 cut method. Again this was before I spent much time online and devised the method on my own without knowing it was a standard practice. It took several clamped setups and test cuts before I was happy. The variation is that I used 4 cuts rather than 5.
The sled has two adjustable floor panels on each side of the blade. This way I can set the floor of the sled next to the blade even when I use a dado or tilted saw blade setup. This feature came from the Woodsmith design (linked above). For some reason they only used one sliding panel.
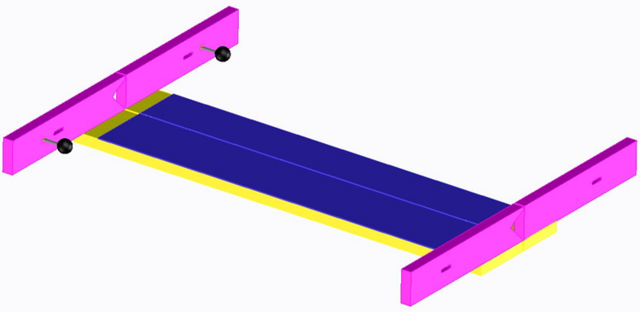
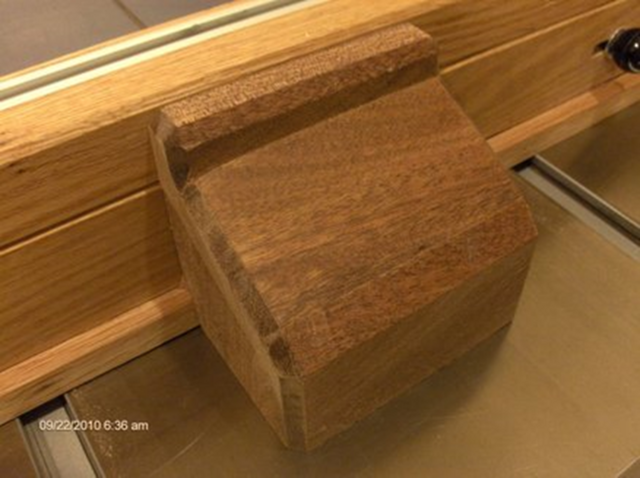
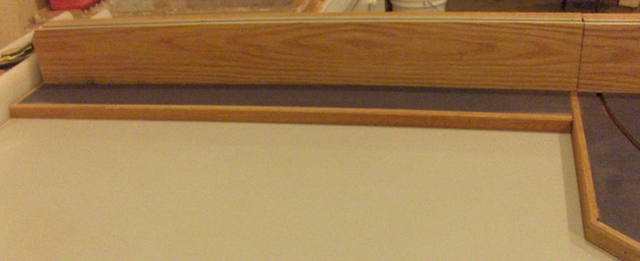
The adjustable floors deserve some extra description. Each panel consists of the floor panel and a piece on each end.
Each end is held in place with a bolt threaded into an insert. There is threaded insert in the adjustable panel back with the bolt running through a slot in the back wall. The front panel has a slot with the threaded insert in the fence. This view has the panels in the open position.
I put the knobs that are on the back wall on the inside of the sled for two reasons. First I can reach all the knobs from the front. Second I store the sled on the floor standing on the back wall. If the knobs were on the back side they make the sled too tall to fit under the fence.
When the knobs are on the inside of the back wall it does limit the max panel size. I added an extra set of insets and slots so I can move the bolts to the back side in the rare case I need to use the last inch of capacity. The slots can be seen in the first picture.
The runners are hard maple. I used two of them. They were cut slightly (0.004") large and fitted by sanding down.
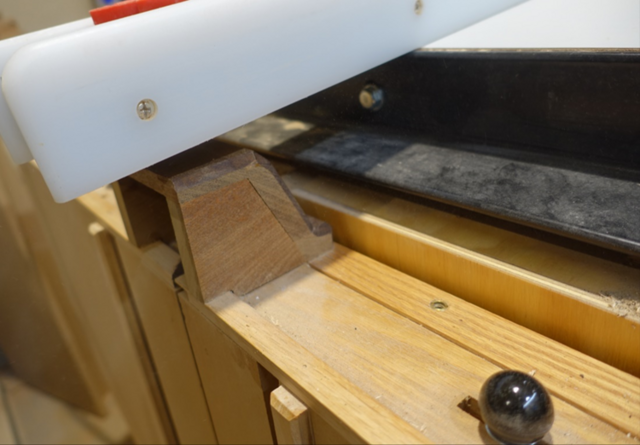
The box on the front of the sled completely covers the saw blade. This only works when used with my outfeed table . The stopped slots on the outfeed table stop the travel of the sled before it can pass through the blade cover (and then my hand). This is by far my favorite feature and one I highly recommend.
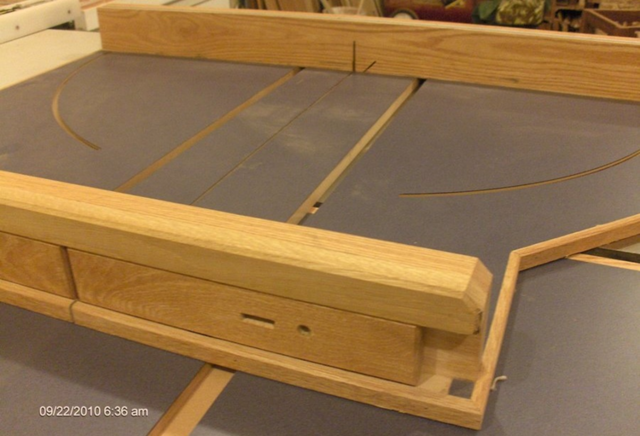
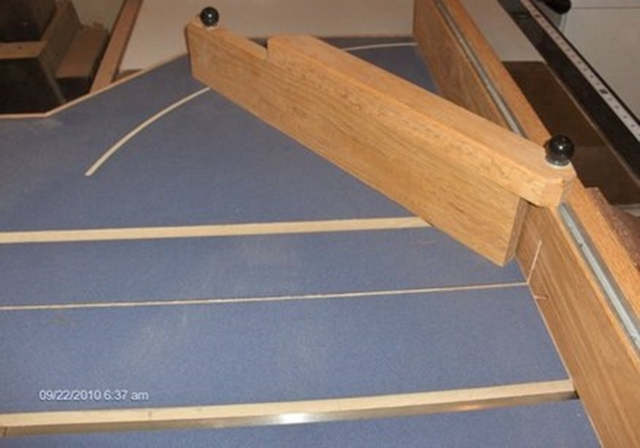
There are two adjustable angled fences - one right hand and one left hand.
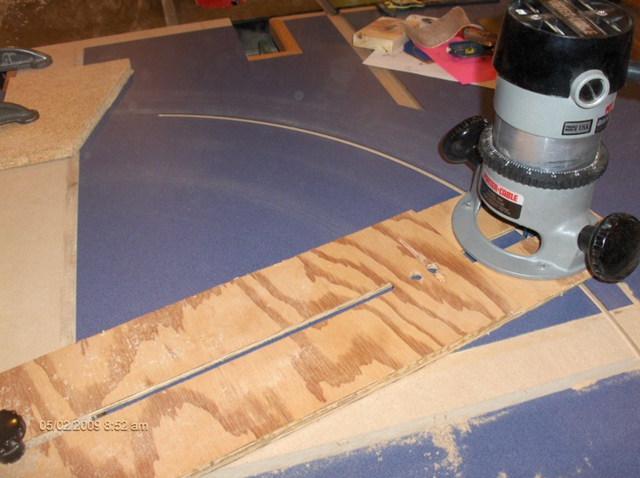
The pivot center is located through the T-slot rail on the top of the fence. The arc is routed with a t-slot bit and a trammel jig. Getting the pivot point and the arc concentric took some thinking but I figured it out!
There is a hole in the front wall so I can access the T-nuts.
There is an extension for cutting large panels. It locks into place with a single bolt.
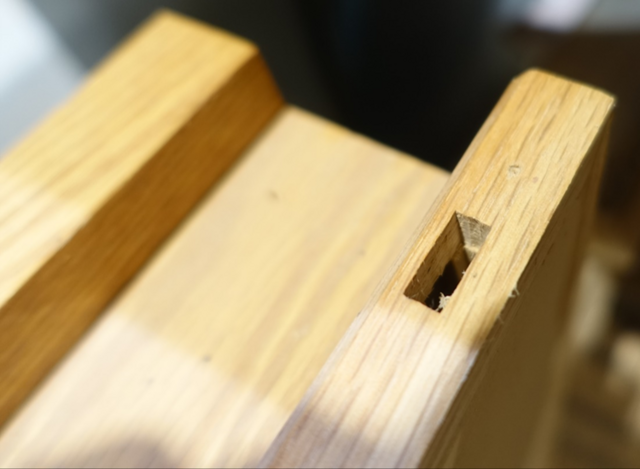
Finally, there is a t-slot rail that runs the full length of the sled and the extension to let me lock down a stop block (which I have not yet built).
After 14 years I have a pretty good idea of what has worked well and what I would change.
Plusses:
The size. The sled is a big help when cutting large panels. Much better than using the fence or a portable saw
The adjustable floor panels. The panels still have crisp edges and allow me to set up a zero clearance cut regardless of blade width or angle.
Sled extension. This is really helpful with longer pieces – especially thin panels that want to sag off the end of the sled.
The blade protection. This needs the stopped grooves in the outfeed table (or equivalent) but this feature removes any anxiety about getting my hand mixed up with the blade.
Minuses:
The size. I need to make a sled for small parts. Maybe even a medium sized one as well.
The pivoting fences. I found this idea really interesting when I first discovered it – and it looked cool as well. The fixed pivot point really limits options. It only works well for a specific set of cuts.
What I would do differently:
Narrower back wall. There are times when I want to make an angled cut on a wide board and the back wall gets in the way. I could take 2+ inches off each end and not lose any strength or stability.
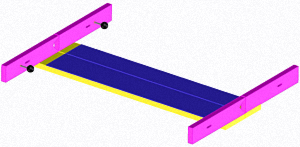
Use floating fences similar to this one. These would be far better than the swinging fences I have.
Keep the floor full width all the way to the back wall. This would enable the floating fences to have full travel.
I would have increased the travel of the adjustable floor that the blade tilts away from. I could then cut a bevel on the bottom side so the floor could move closer to the tilted blade. The way it is now, a piece on the top side of the angled blade can be unsupported for up to ¾ on an inch. If that doesn’t make sense I can add a drawing.
Reduce the fence height. There is a full inch of oak from the top of the blade to the bottom of the T-slot bar. I could take out 3/8” without compromising the stiffness of the fence. The fence is nearly 2 inches thick there. It would make reaching the floor easier during cuts.
Thanks for the comments. I really do need to get my smaller sled built. I think I want to upgrade this one first. Then I can make parts interchangeable between the large one and other sleds - mainly stop blocks and fences.
Steve, that came out great and it looks great too. I wish I saw yours before I built mine. Are you getting perfect 90 degrees?
How's the Grizzly table saw holding up? I have their 14" band saw with a riser block and I'm very happy with it, and I only paid $450. for it back in 2017.
Thanks for the comments! hairy - the day will come when I just won't lift it any more. so far so good though😉 James - When I dialed it in it was around .0001inches per inch. It still runs tight on the runners so it should not have changed. I like my Grizzly 1023L. I have had an issue with the left arbor bearing failing. They last about 3 years. I'm starting to think the arbor is ever so slightly over size and the bearing are getting damaged on reinstall.
Cool job eRasmus... Incredible how you guys tend to make simple workshop stuff look like classy furniture.
Can't say more than hasn't been said by others before me... other than... where'd you get that pink wood? Sordidly remind me of my old man's teal painted house, I wasn't planning to migrate my sled across from LJ, but this has prompted me, if only to present my alternative take to your interchangeable bases,
If your first cut is too short... Take the second cut from the longer end... LBD
Very nice. Something I do not have for my table saw. Should have but don't have. At my age I do not want one that would be as heavy as I imagine that one to be. Was looking at the one at the site you gave, very tempted. Awesome job!
Thanks for the comments. It is a very useful jig when it is needed. I forgot to add my agreement to Splintergroup's comment. This is definitely a sled for larger parts. I think I would want a sled that is about 6-10 inches deep and 8-14 inches wide for small parts.
Well Steve I see you have built yourself a Super nice Sled with so many great features that would be the envy of most any woodworker. You did great. I plan to look into doing some sort of a copy.
he stopped slots on the outfeed table stop the travel of the sled before it can pass through the blade cover (and then my hand). This is by far my favorite feature and one I highly recommend.
Really like the sled. The safety features are well planned and executed. Great work and design.
My outfeed table miter slots were to long to stop the sled before the blade came through the back Cut a small slat, dropped it into the miter slot. Now it the sled stops at the right point.


 - Project by Steve Rasmussen")


 - Project by Steve Rasmussen")