


Share your craft projects
Make new craft buddies
Ask craft questions
Blog your craft journey

lanwater
2132 posts
and
35 followers
in over 12 years
in over 12 years
More from lanwater


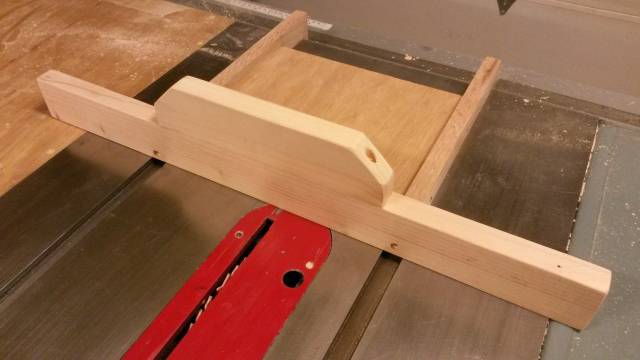
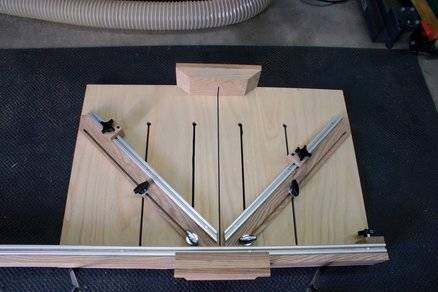
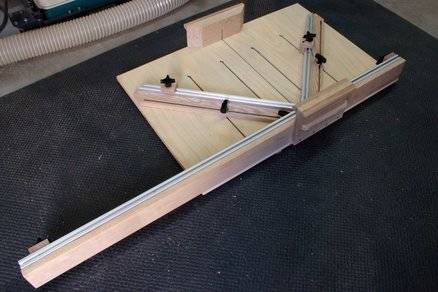
Super CrossCut sled


Moving a project over. Pardon the dust.
This sled is based on eagle lake woodworking cross cut sled. It has everything I wanted.
The following link has build details and how to videos
http://www.eaglelakewoodworking.com/post/Super-Sled-Crosscut-and-Miter-Sled.aspx
I made a couple of changes to the original design:
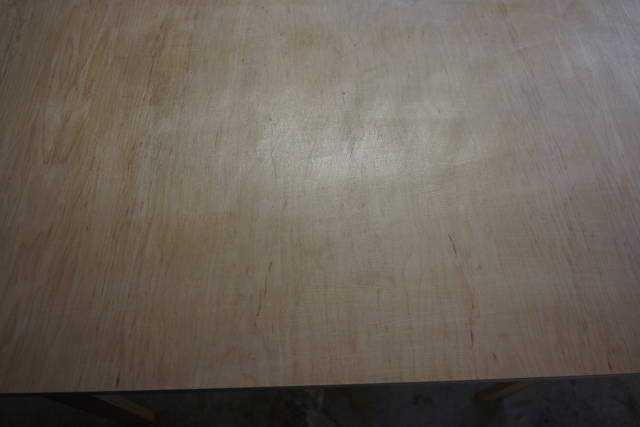
1-I used 3/4 project grade plywood from Lowes instead of 1/2 called for in the design. I wanted something more beefy. Of course it is heavier.
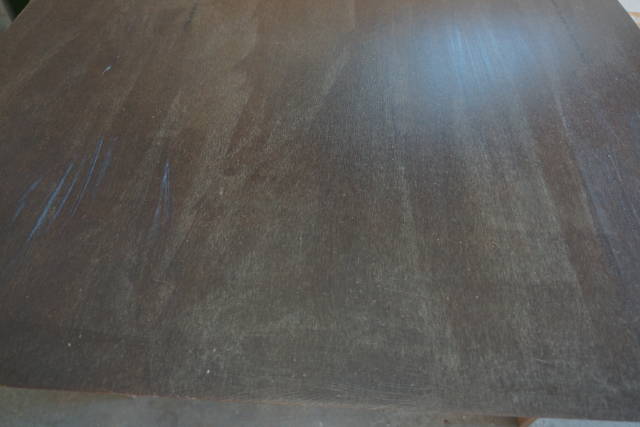
2- I used plastic laminate on both sides. I wanted to have a more resistant surface. The plastic laminate slides better in my opinion. I also think it looks better. I can also write on it and erase it. I bought one sheet 4’x8’ from Lowes for $52. I have plenty left.
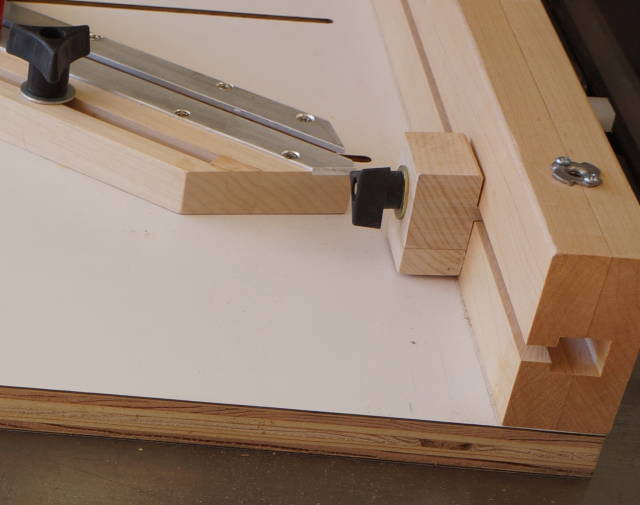
3- I changed the fence a bit especially in term of attachment. I did away with the track. The design I used allow me to have a stop much further from the fence without having a longer fence. I also don’t have to use flip stops.
4- I also shortened the moveable fences to my liking.
I have used this sled for a while and like it.
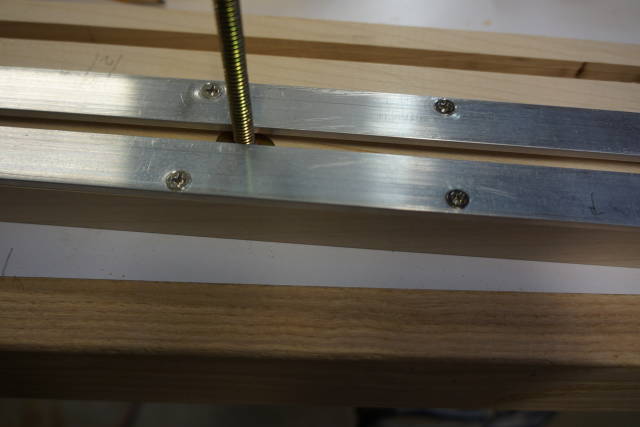
Fence build:
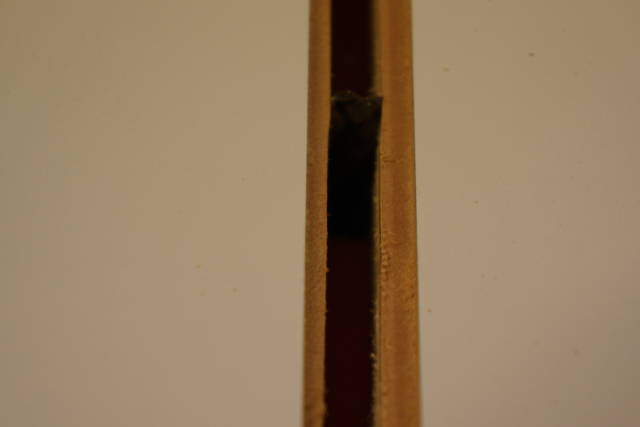
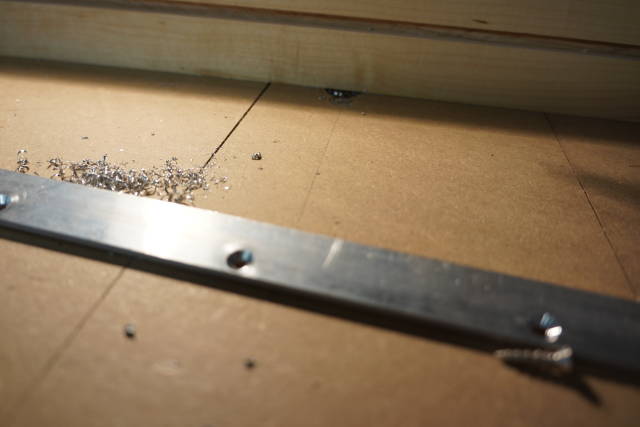
I cut a groove each half of the fence on the table saw using the regular blade in multiple passes. I did not feel like putting on a dado blade. I should have used a dado blade for a better groove.
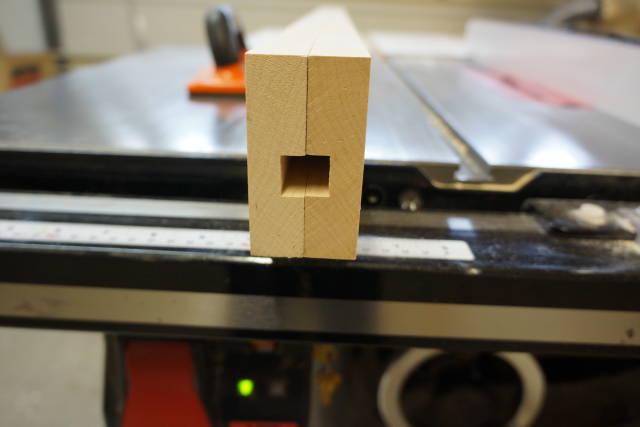
glued those 2 halves together with a small piece of wood that fits in the groove at each end so that the 2 halves don’t move during clamping
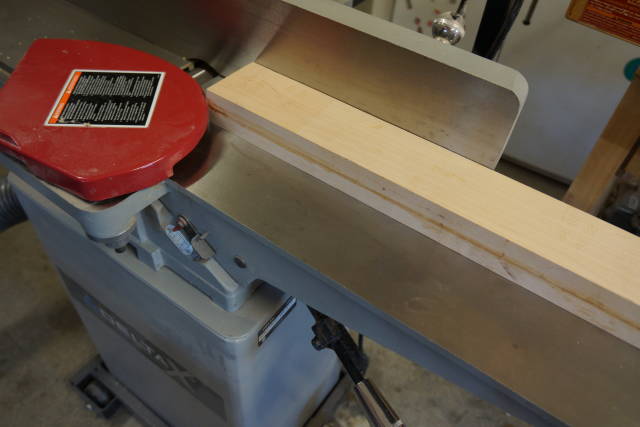
once the glue dried, I used the jointer to get a face flat and one edge square. I the moved to the planer for the other 2 faces.
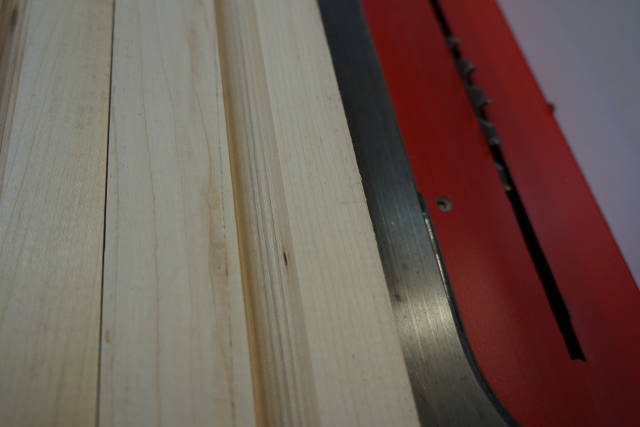
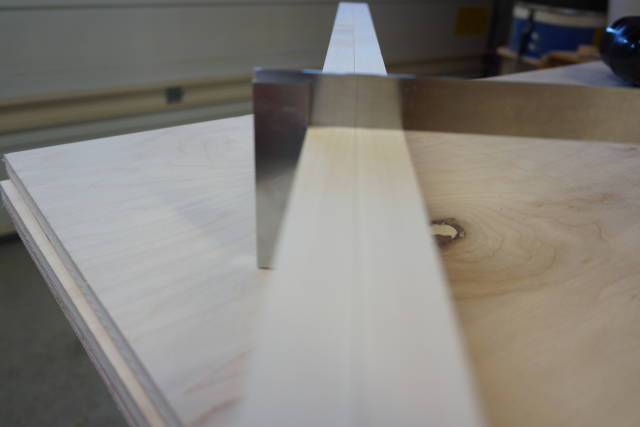
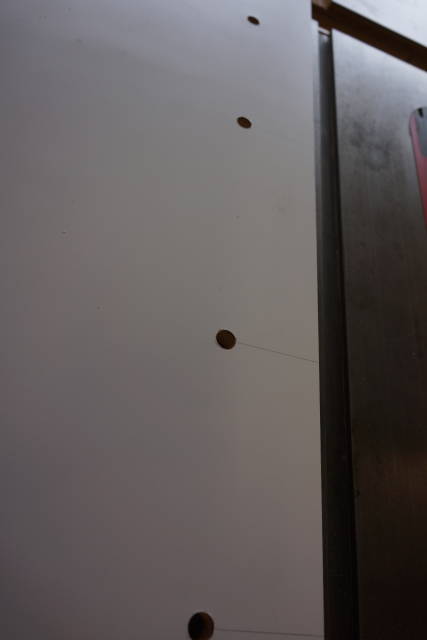
The final step was to cut a groove on the front face to act as a track for stops and accessories.
The base:
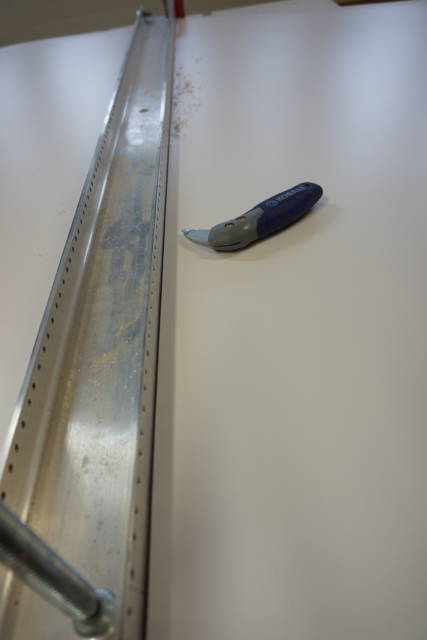
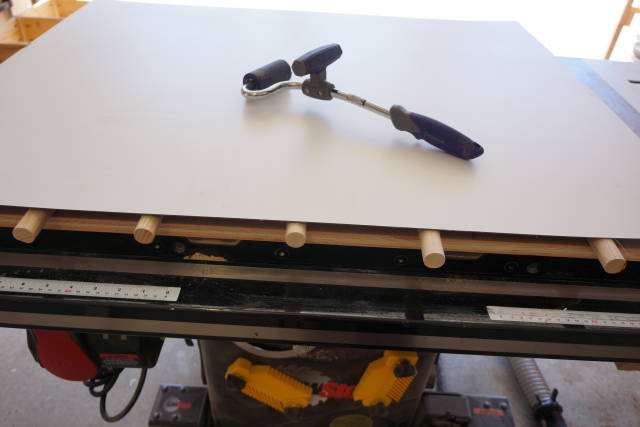
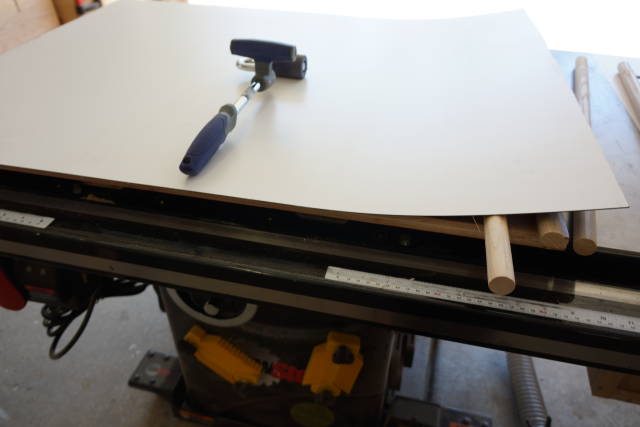
I scored the plastic laminate and bent it until it snapped.
I used a fence so I get it strait and to avoid tearing the sheet.
I applied contact cement to both the plywood an the plastic laminate. Waited until it became tacky then lay it into position with the help of dowels/rod.
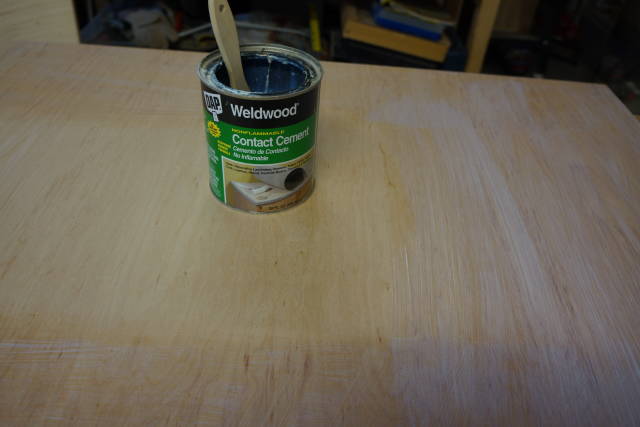
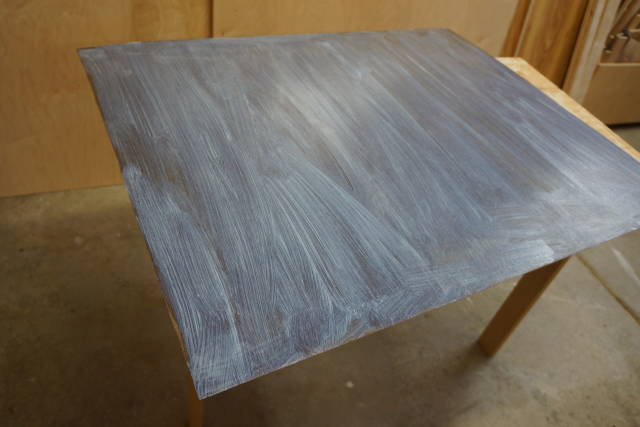
I used the roller from one end to the other applying pressure and removing the dowels one at the time.
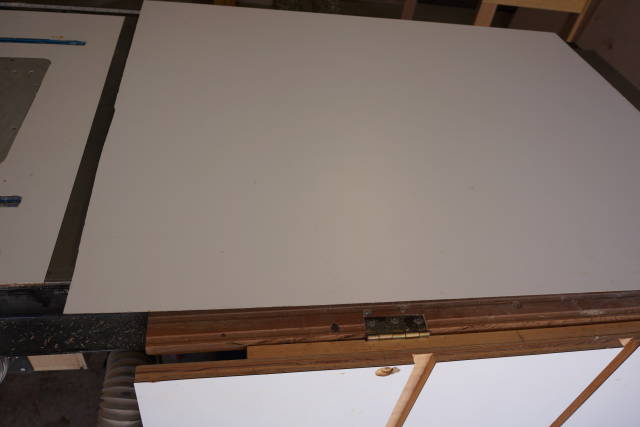
Once the dowels were all removed I rolled some more taking care not the crack the overhang edges with the roller.
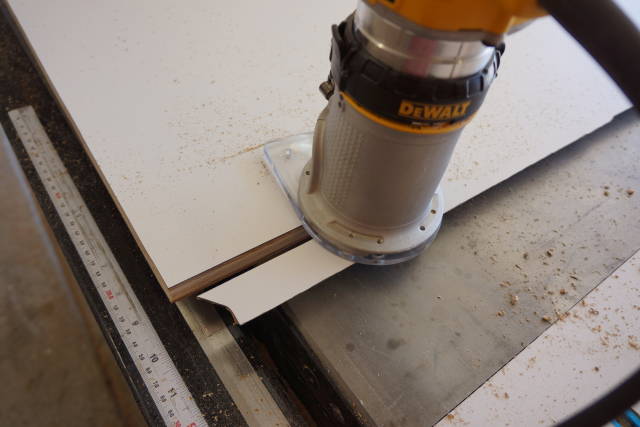
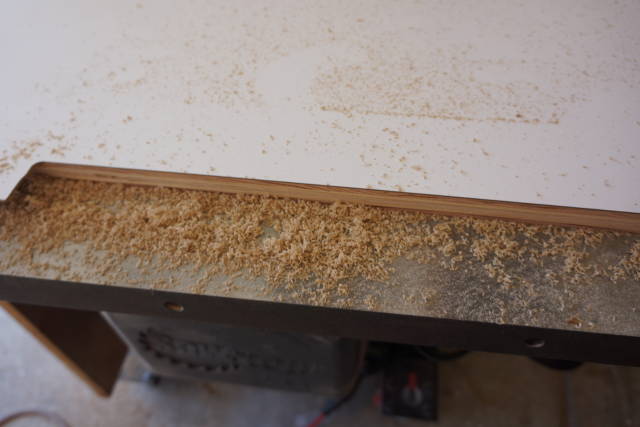
I used a flush trim router bit with the palm router to flush cut the plastic laminated. I debated using a chamfer bit to ease the sharp edge or jus a sanding block. I opted for the sanding block. I think I will probably chamfer soon.
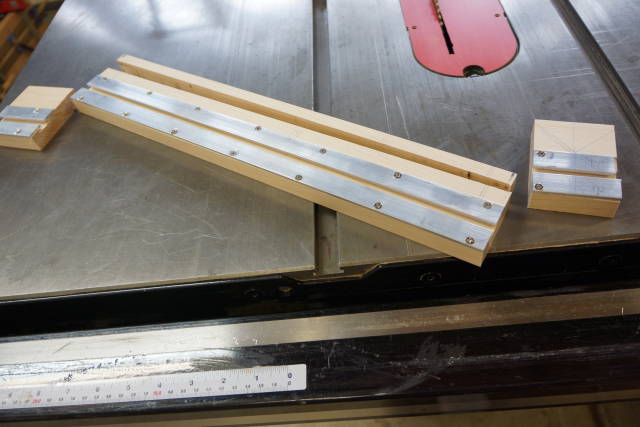
The moveable /miter fences:
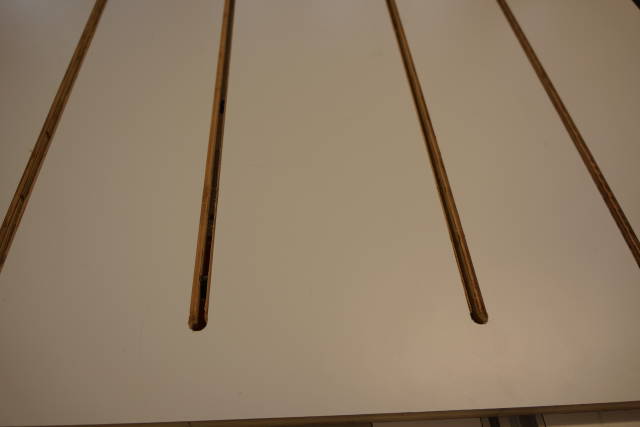
The slots for the moveable fence were cut on the router table.
I marked the locations for the slots. Drill an entry hole and an end hole for the router bit and took several passes for each slot.
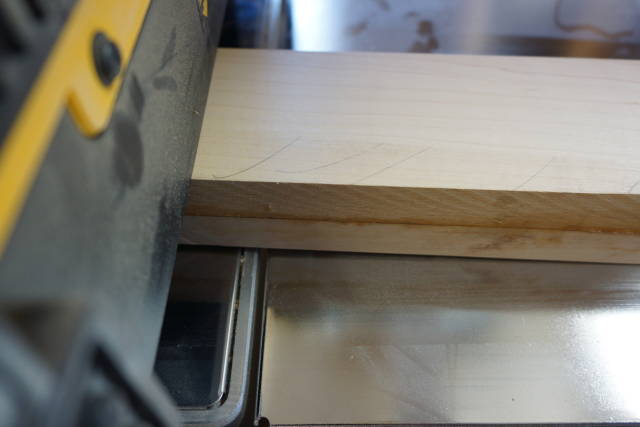
I bought a 3/4 wide 1/8 thick and 8 feet long aluminum bar from Lowes and cut 4 pieces from it for the moveable fences. I cut those on the miter saw.
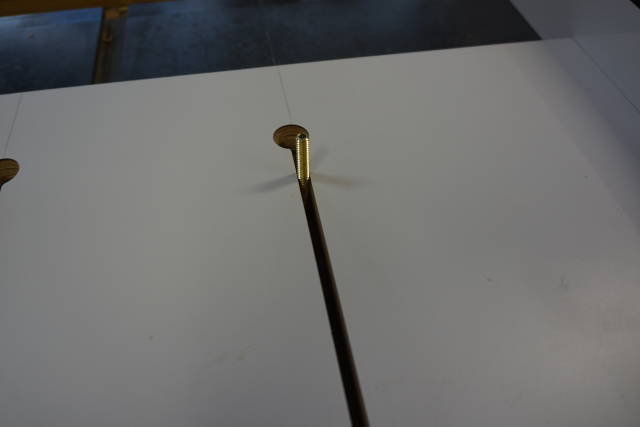
Drilled and countersink the screw holes on the drill press.
Cut the fences to length and the 45 degrees angles on the end on my Sawstop. I used the key to de-activate the brake system.
Any suggestion to improve the design will be appreciated. Thanks for looking.
Abbas, Castro Valley, CA
13 Comments

lanwater,
Your sled looks terrific! I really need to make one of these and have looked at numerous designs. I’ll add this one to my arsenal. You certainly did a fantastic tutorial. Thanks!
L/W
“Those who would give up essential Liberty, to purchase a little temporary Safety, deserve neither Liberty nor Safety.” Benjamin Franklin

This is an excellent sled. I have to make one of these someday. I made a very simple one that pushes the stock. Is very lightweight and easy to use but I’m very limited on the width of anything I can cut.
The picture is right after I made it before it got used I have a place for it on the wall next to my saw and it’s very handy to grab and put away when needed.
Losing fingers since 1969

I need to make one of these. I have a basic cross cut, which is wonderful, but then I have another for picture frame miters, and another for box miters, etc. I work in a very small one car garage, and simply don’t have space for every single sled. Creating one like this, and using the t slots for accessories would be very handy indeed. Nice one!
L/W: Thank you!
Brian: Thanks!
I have another simpler sled that was very effective but after I built this one I never looked back. That design has much more advantages despite being heavy.

David: It will be very handy. It has helped me improve my cuts:
-I know exactly where the blade will be cutting
-The work piece is supported on both side
-I can use hold down on the piece keeping my hands away (see below)
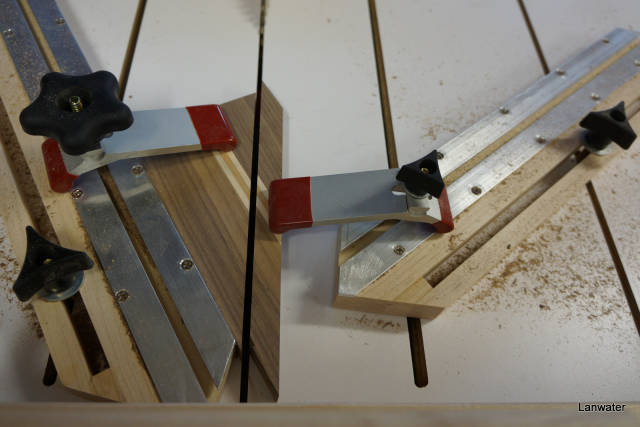
-In this particular design I can have a stop that’s outside the boundary of the sled itself. That was a life save when I built my bookcase.
I really like it.
Abbas, Castro Valley, CA
Great Design, Great Execution – your modifications make it both more functional and commercial-grade.
I’ll need to upgrade mine, once the test-rocker build is complete.
Nice Work.
MJCD

Good job! I built mine very similarly. I used Maple for the base and 3/4in ply as well.
HorizontalMike

So the white stuff was plastic laminate and not formica? Is it called “plastic laminate” at Lowes? I just bought a heavy fixed based Bosch router and I’m getting ready to build a nice router table. Most designs call for “plastic laminate”. I also have a rickety sled that has no fences and it’s made with particle board. It’s getting flimsy. I need to make a router table and a new sled.
I may ask you some questions when I get to the construction aspect. I didn’t see measurements. Did the website I saw have sketchup downloads so I could measurements? Oh, and do the big holes in the sled allow for quick removal of the fences?
David
David L. Whitehurst
MJCD: Thanks!
HMike: Thanks!
I must tell you that I saw your sled during browsing before I built this mine and was impressed. It was much better than the other bunch I saw.
Bently! From What I have seen so far I am not surprised you do not have one because you do not need one.
I am very sure you can stand across the room and say “hey, you are 1/64 off”
That’s what Jim my teacher does to me all the time. When I challenge him to prove it, he take his long caliper out, measure, smile and walk away; He was right on. He also have years of experience just like you. I hope we meet one day.
Abbas, Castro Valley, CA
David: to my knowledge Formica was the original brand /company. Every thing I read call it “plastic laminate”.
As for lowes good luck most of the employees don’t know what it is. However it is right where they put those cheap MDF kitchen counter top. They have about 6 different pattern. I like the white because It does not distract me and I get to draw lines on it that I can erase with an eraser:)
I put it on almost every surface in my shop. It’s durable. It allow material to slide easier too.
I must admit that I did some glue up on my saw outfeed table. When the left over glue dried I took a box cutter blade and scrape it off.
Caveat: They are very hard on the blade. When you score a sheet and try to snap it, make sure you do not let it bend all over the place, it will tear off; I have done that the first couple of times.
The site has measurement and a video. It is a good video.
Yes, the big hole allow the removal of the smaller fences.
And please don’t hesitate. Email any question you may have. I usually answer in the evening. I sneak some at work ( don’t tell).
Abbas, Castro Valley, CA
Well done !
Like all the design changes and laminating the base on both sides is the way to go to keep it flat a step often ignored .
I just saw yours kiefer.
I need to make another one (:
Abbas, Castro Valley, CA

Very nicely done. I’m going to make one this fall I think.
CHRIS, Charlottetown PEI Canada. Anytime you can repurpose, reuse, or recycle, everyone wins!

Excellent build Abbas,nice photo work up too.
woodworking classes, custom furniture maker
More from lanwater