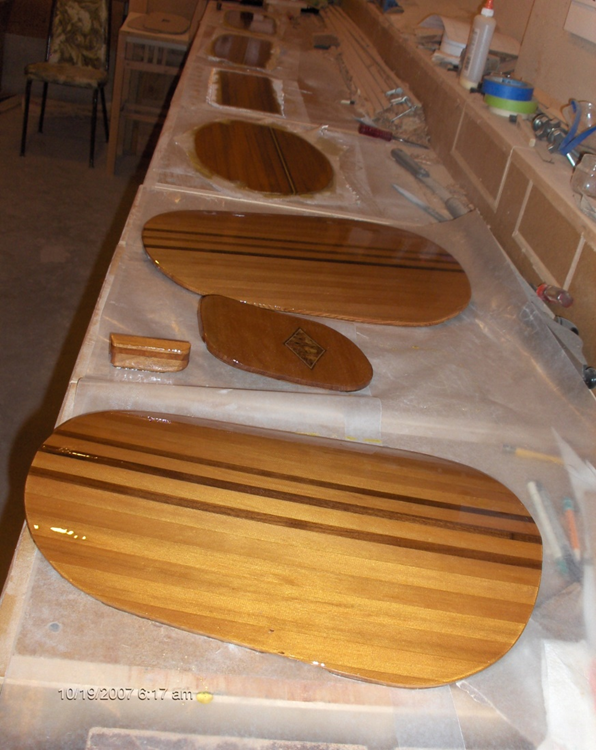
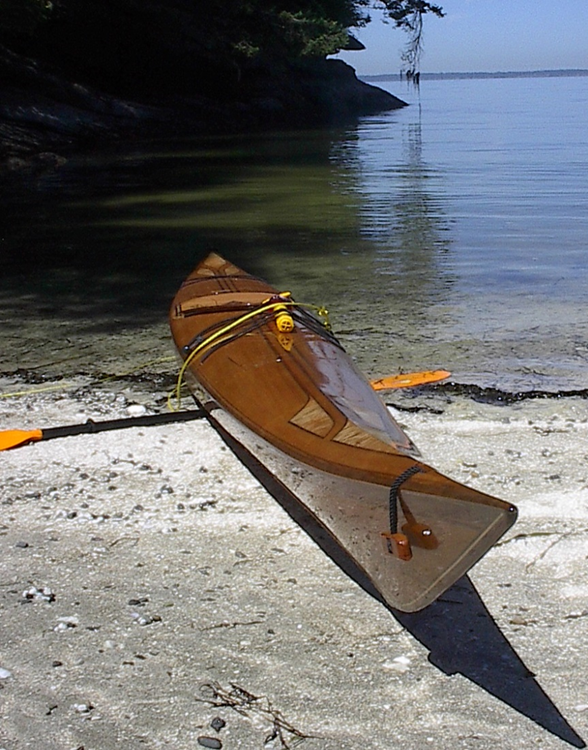
Years ago (between 2002 and 2008) I built a cedar strip kayak. This was my 2nd kayak build. I had completed a CLC LT17 stitch and glue style a couple years before and that fueled my interest in a strip built one.
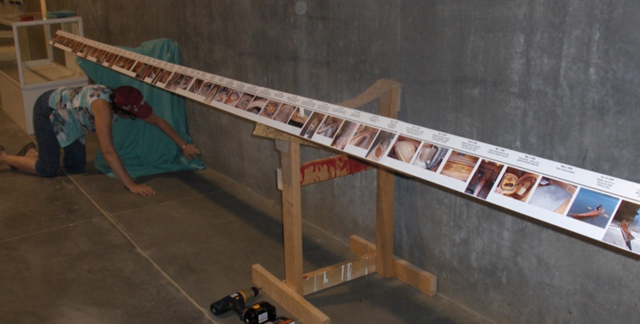
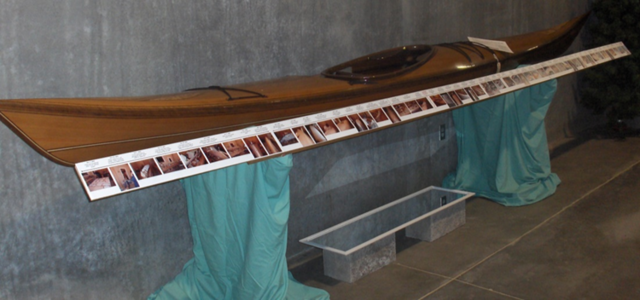
It is a Redfish King – about 18 ft long. After I finished it I displayed it at the Clark County Fair. A friend of mine was the fair manager and he suggested that I include a story about how it was built. I put together a timeline display that was as long as the kayak.
After the fair was over, the manager told me that they had attendees stay at the display for over a half hour reading the timeline.
The following pictures and text are from that timeline. It gives a good overview of the build but makes for a long project post.
Nov 2, 2002
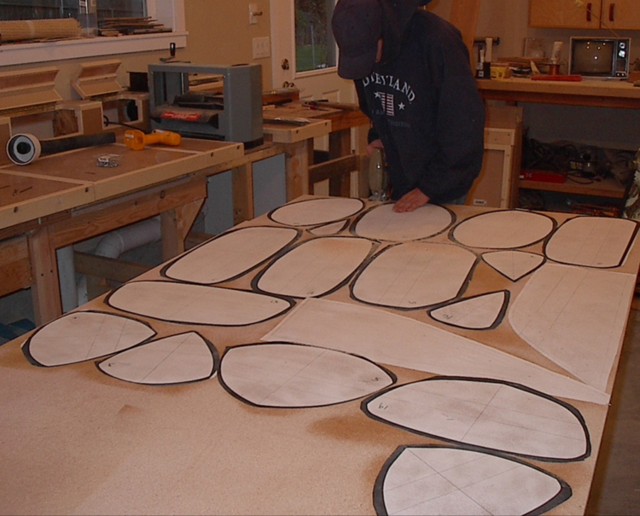
Plans are transferred onto ½ inch particle board
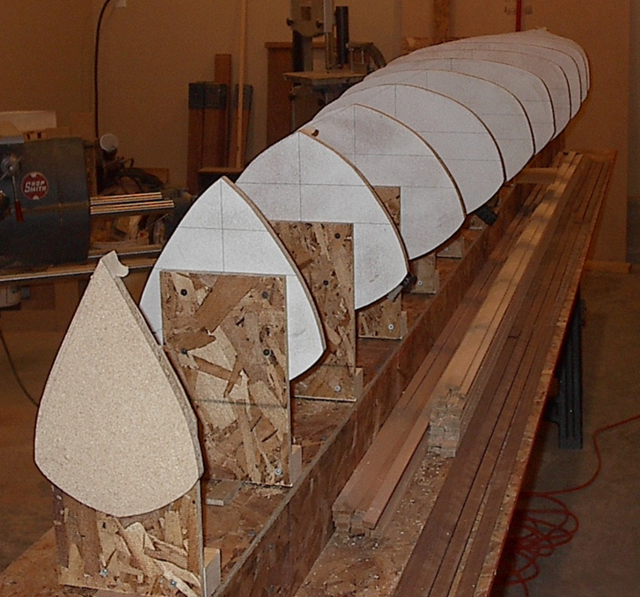
Nov 16, 2002
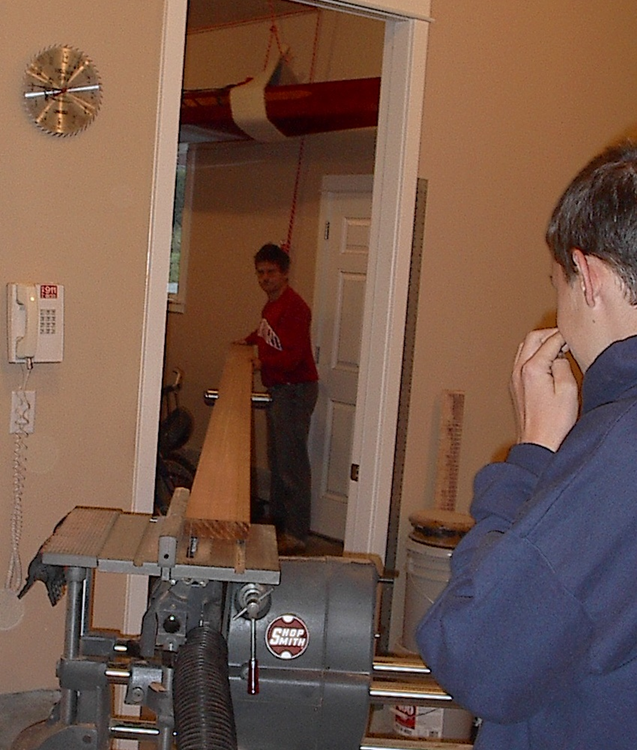
Strips milled from 2x6 lumber. Strips numbered to preserve relative order. (Note: you can see the stitch and glue kayak above my head here)
Dec 7, 2002
Forms assembled on strongback beam. Strips ready for assembly.
Dec 15, 2002
First strip test fitted along sheer line. Water line accent stripe test fitted as well.
Dec 28, 2002
First strips mounted to forms. Strips glued edged to edge and hot glued to form. (Note: I used a “stapleless” technique. Instead of stapling strips to the forms the strips are held to the forms with hot glue)
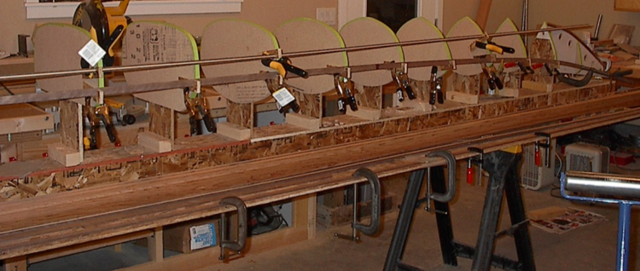
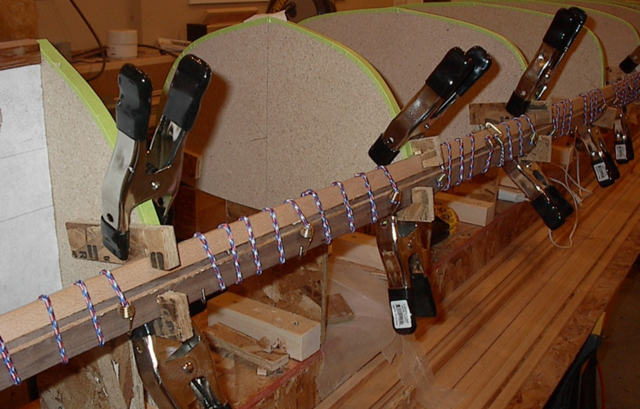
Jan 9, 2003
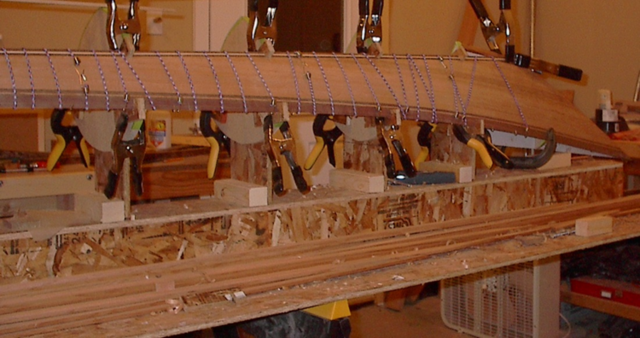
More strips added. They are trimmed at the water line. Bungees enable creative clamping.
Jan 17, 2003
Water line accent stripe glued in place.
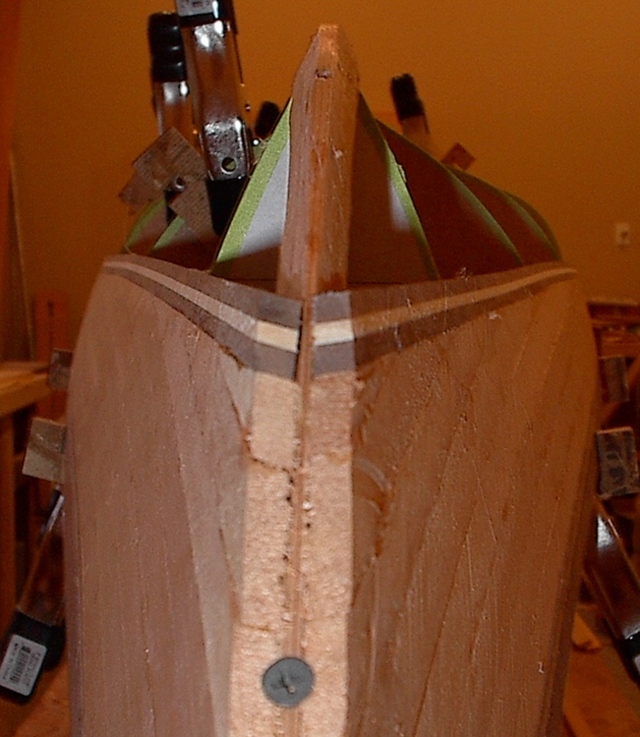
Feb 1, 2003
End view of water line stripe. (Note: The waterline stripe is a strip of maple with a strip of walnut on each side. The hull is western red cedar)
Mar 8, 2003
Hull filled in with basswood strips. Accent stripe provides transition from cedar sides.
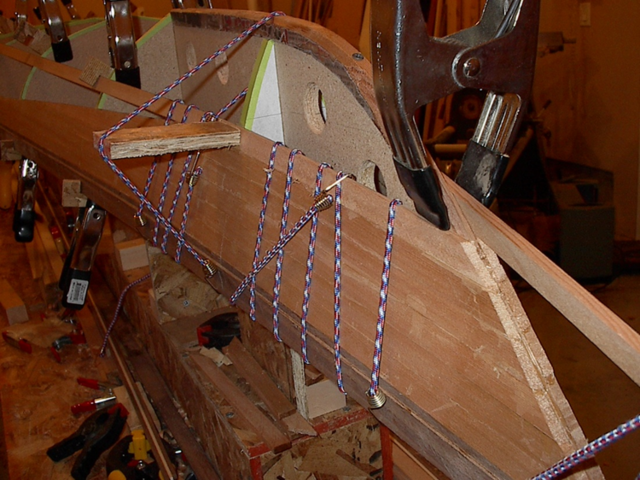
Mar 8, 2003
Keel strip glued in place with more creative bungee clamps.
Apr 5, 2003
Final hull strips are fitted into place.
Apr 12, 2003
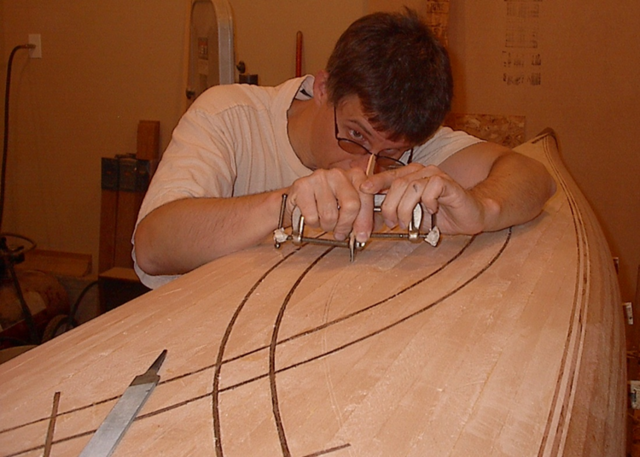
Hull inlay pattern is positioned for transfer to the hull. (Note: I worked out the shape and proportions in an Excel spreadsheet)
Apr 12, 2003
Slots for the accent pattern are cut into the hull. One walnut piece is set in at a time. (Note: the cut is done with 2 utility knife blades clamped across a spacer)
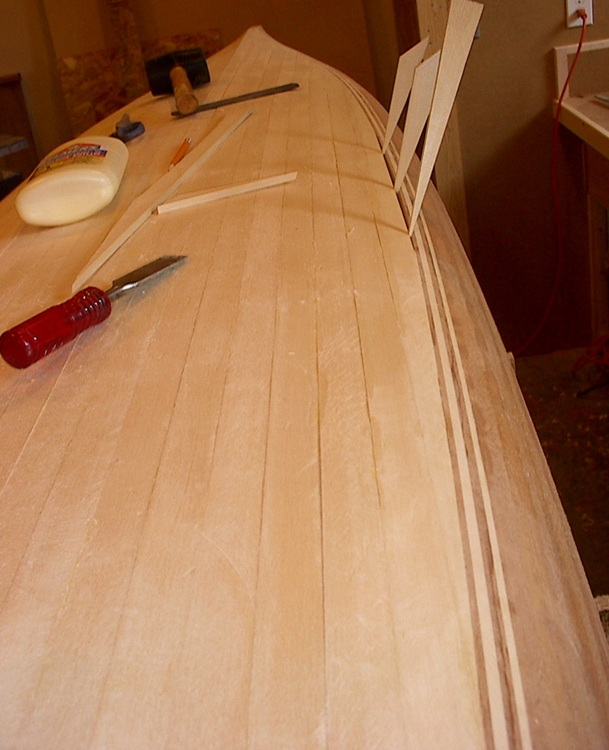
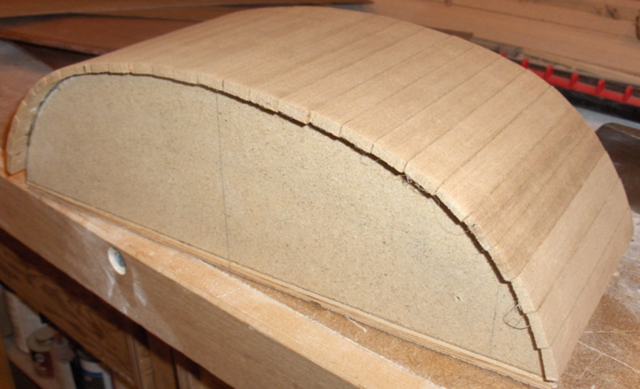
May 17, 2003
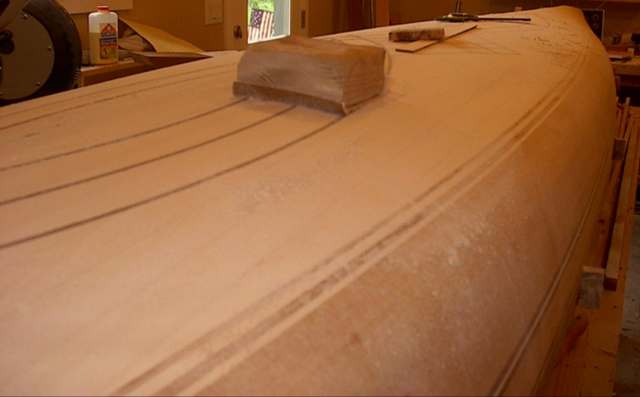
Once the hull is fully stripped, it is shaped and sanded.
July 5, 2003
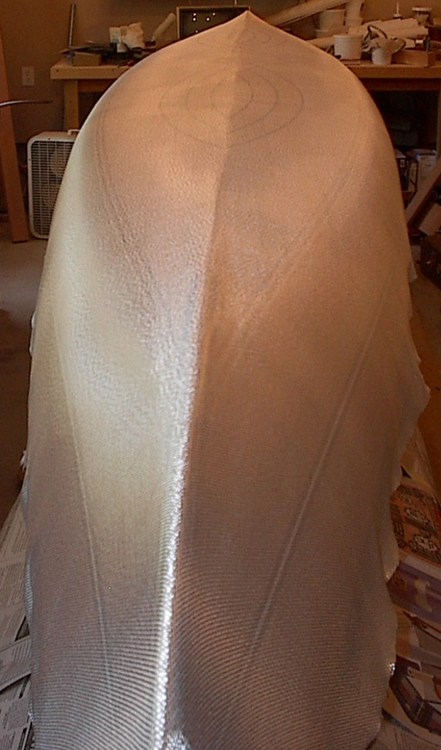
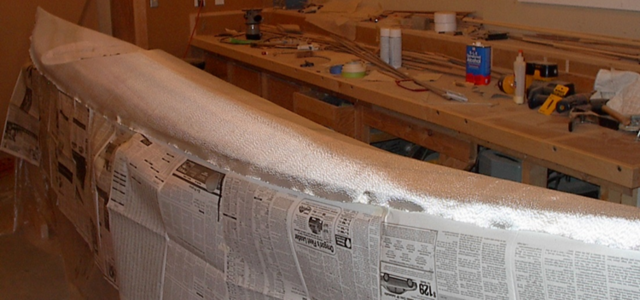
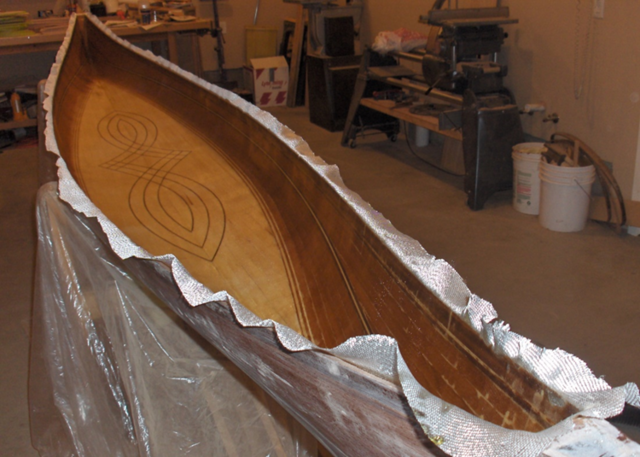
6oz fiberglass cloth is draped over the hull.
July 7, 2003
The fiberglass cloth is coated with epoxy. The cloth turns clear.
Sep 21, 2003
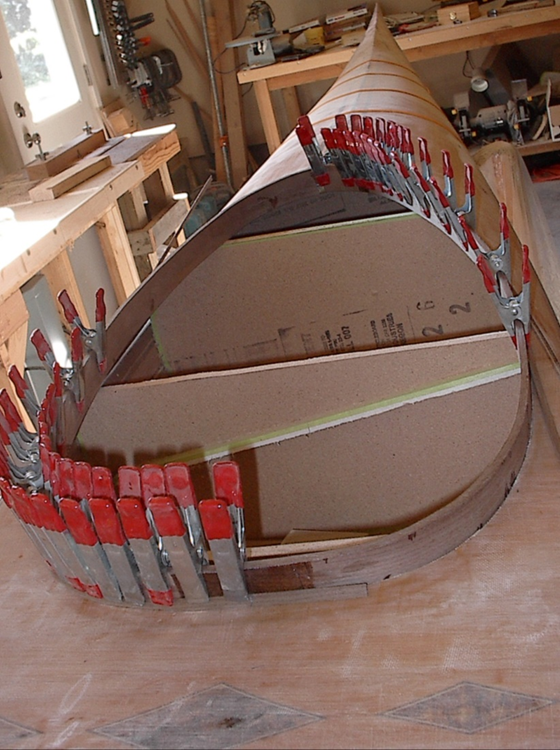
The hull is recoated & sanded. Strongback removed and hull rolled over. The 1st deck strips are in place.
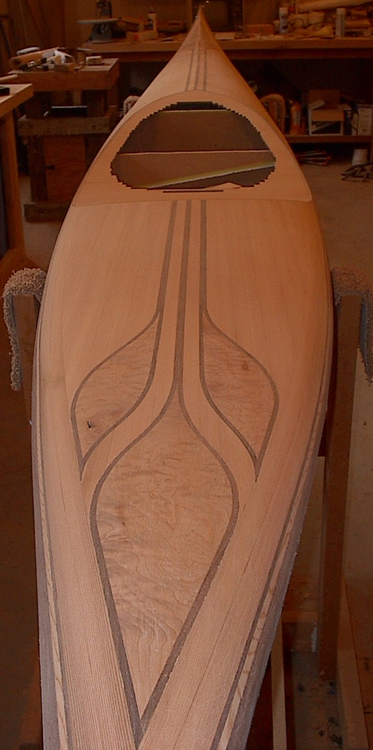
Nov 2, 2003
Deck front is partially complete. Here, inlays are built during stripping rather than cut in.
Nov 29, 2003
Detail pieces for aft deck are trimmed in ¼” thick walnut prior to assembly.
Dec 7, 2003
Aft deck being assembled. More bungee clamps.
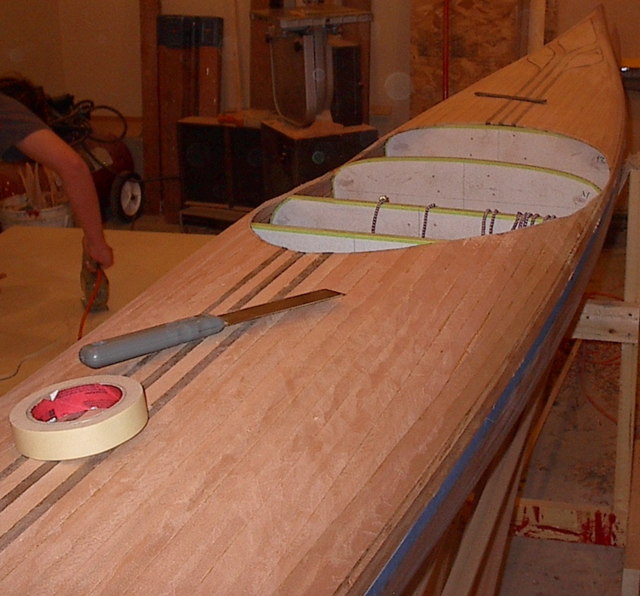
Dec 20, 2003
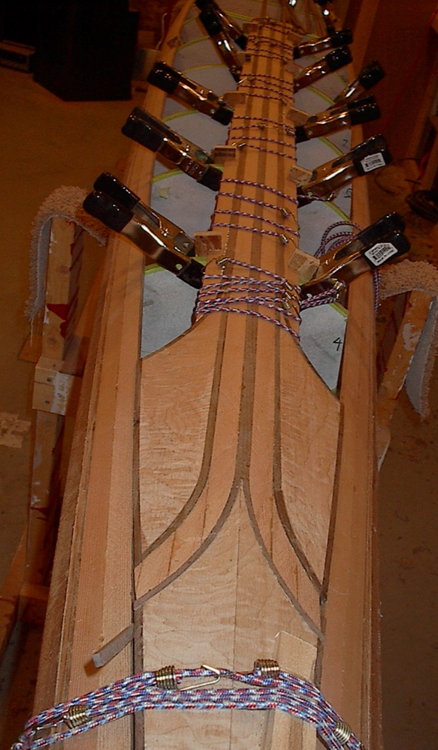
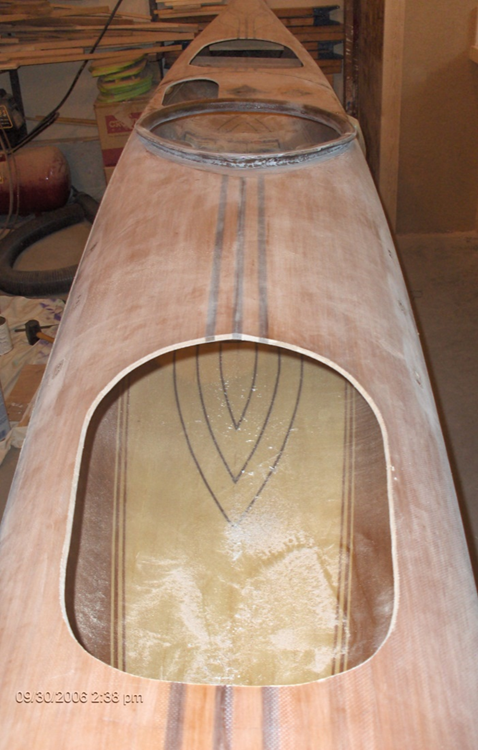
Deck strips finished. Cockpit recess is cut open with a pull saw.
One year break(some things are more important than boat building)
Nov 13, 2004
Accent strips added to cockpit recess opening.
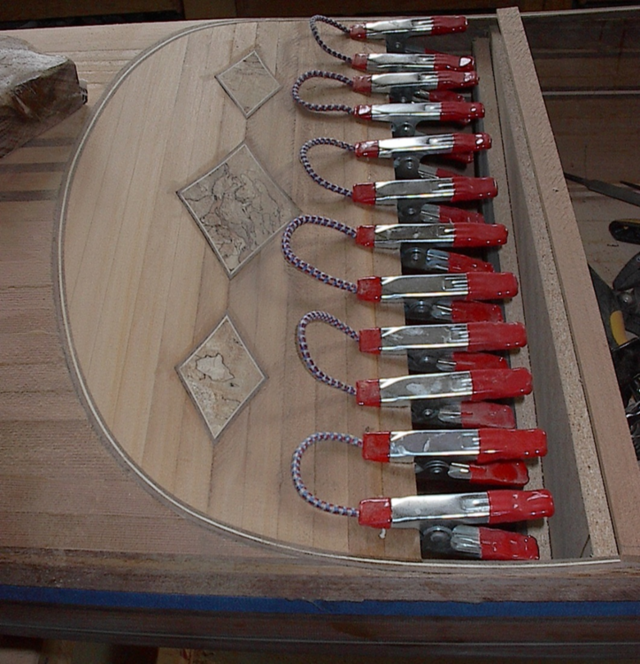
Nov 27, 2004
Cockpit recess strips in place. Diamond inlays added during stripping. (Note: This shot gives a good view of the accent trim that was installed in the previous picture.)
Dec 31, 2004
Deck and cockpit recess shaped and sanded.
Jan 2, 2005
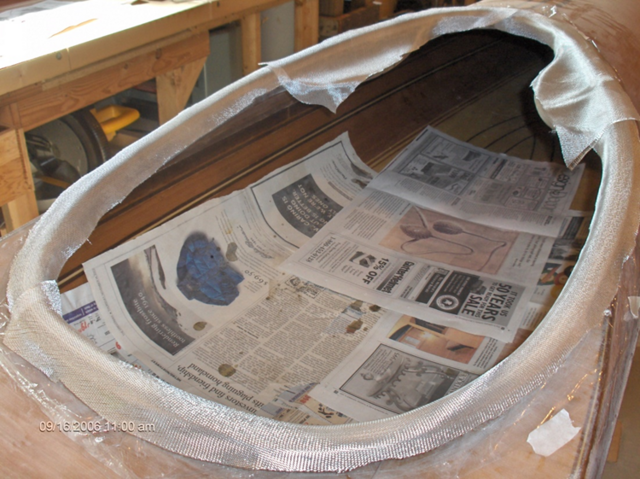
Fiberglass cloth draped over deck. Hull masked off to prevent bonding to deck
May 30, 2005
Deck removed from forms. Inside of deck smoothed and cloth in place.
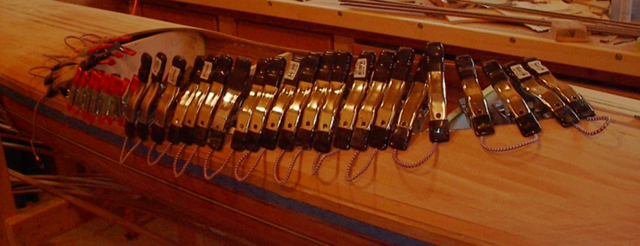
Jun 20, 2005
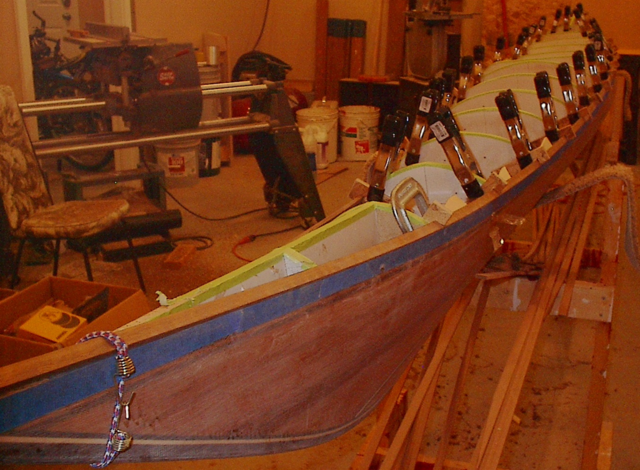
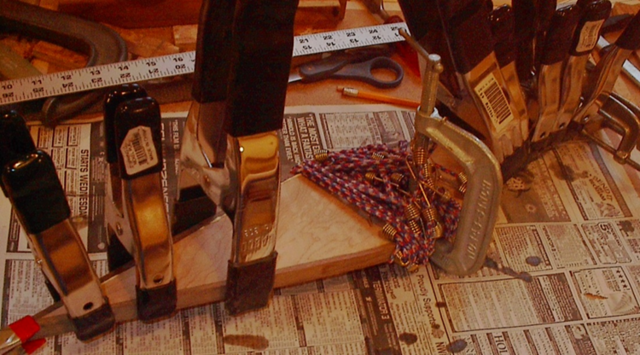
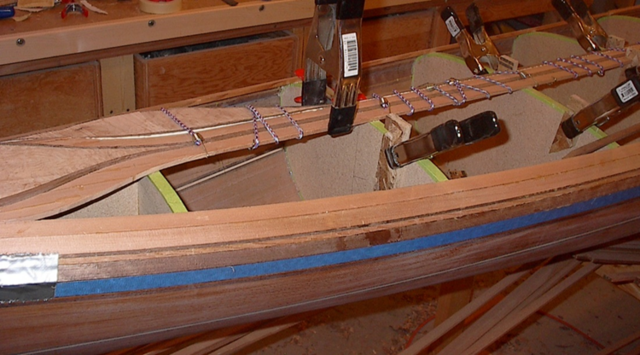
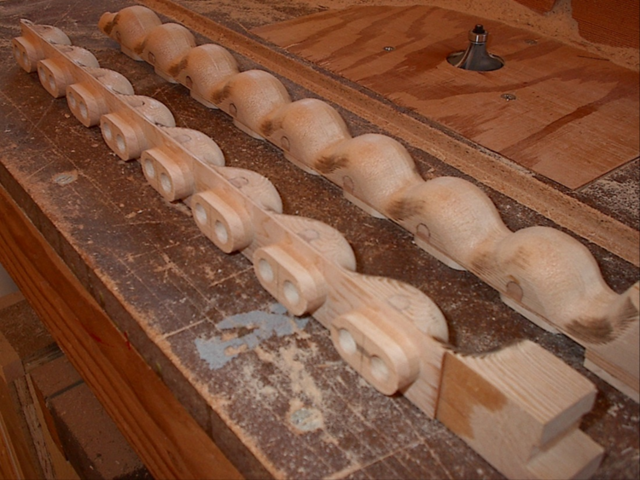
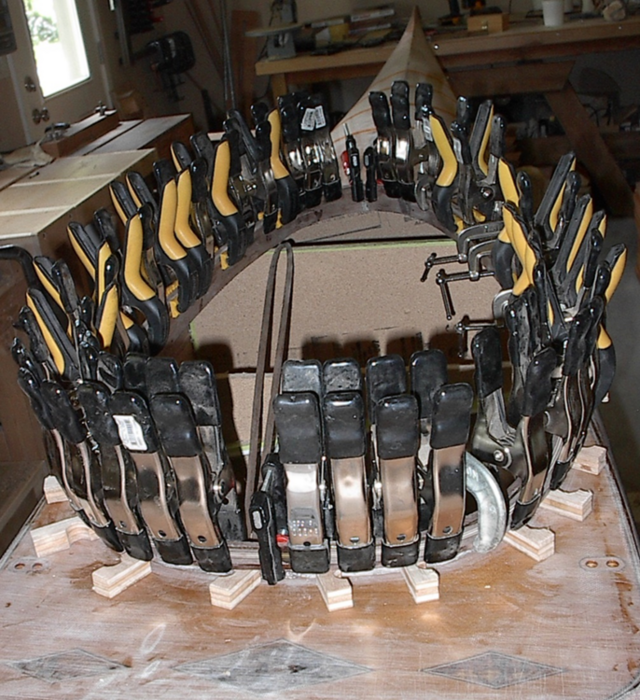
Bungee mount details being built up. Total of 16 (14 used with 2 spares)
Aug 20, 2005
Laminated coaming riser positioned
Sep 2, 2005
Coaming rim clamped in place. Spacer blocks hold it at an even height from deck
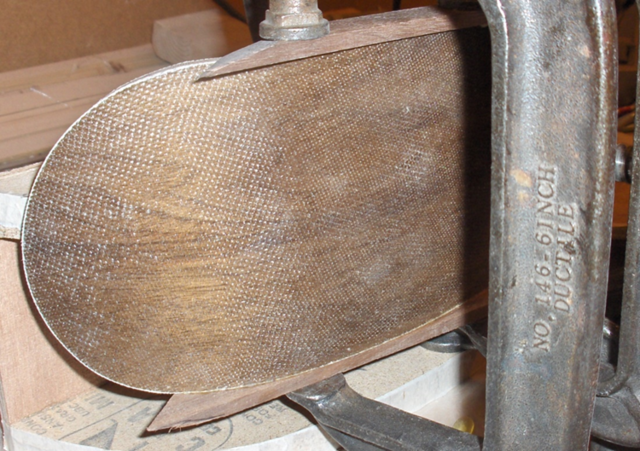
Nov 5, 2005
Magnet installed in carry handle receiver
6 month break
(Life happens)
May 31, 2006
Fiberglass epoxied in place on inside of hull
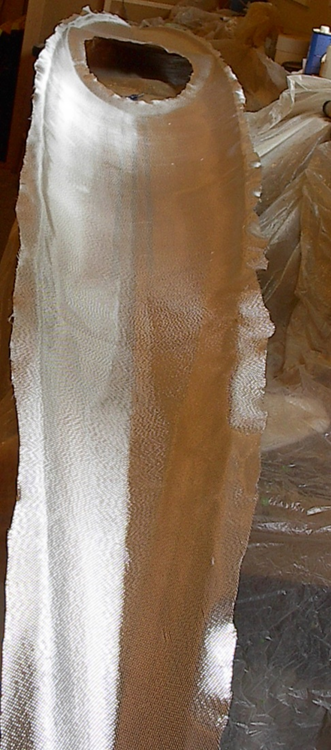
Sep 16, 2006
2 layers of 4 ounce fiberglass cover the coaming.
Sep 30, 2006
Hatch openings cut out of completed deck
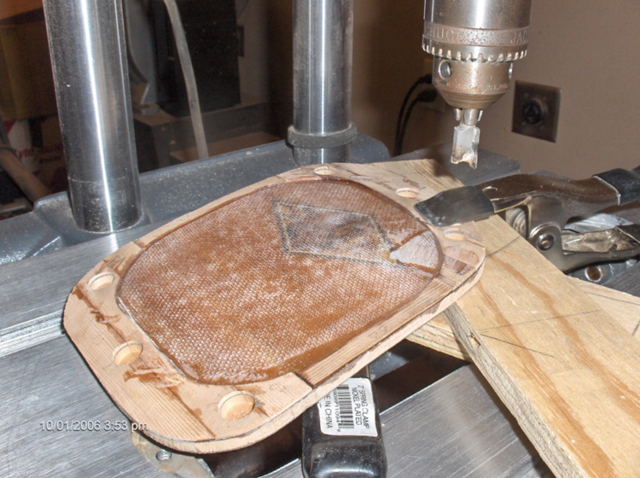
Oct 1, 2006
Spacer strips added to day hatch cover. Flat bottom holes drilled for retaining magnets
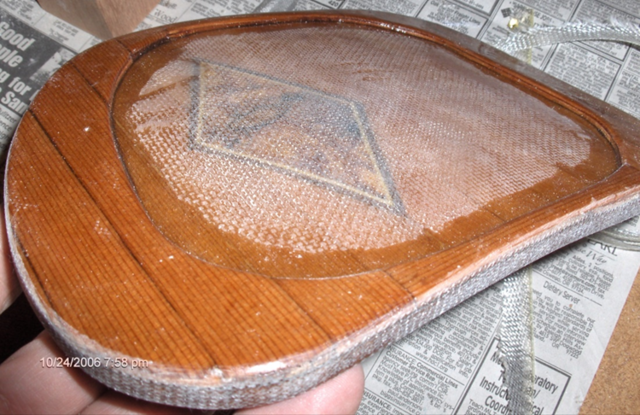
Oct 24, 2006
Magnets covered with another layer of thinner strips. Edges covered with a layer of fiberglass
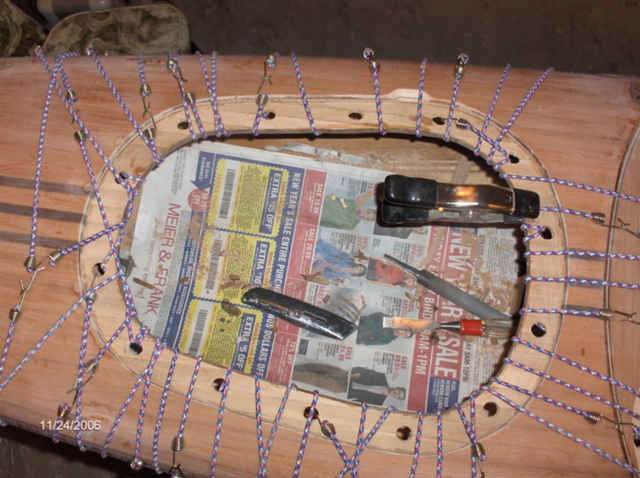
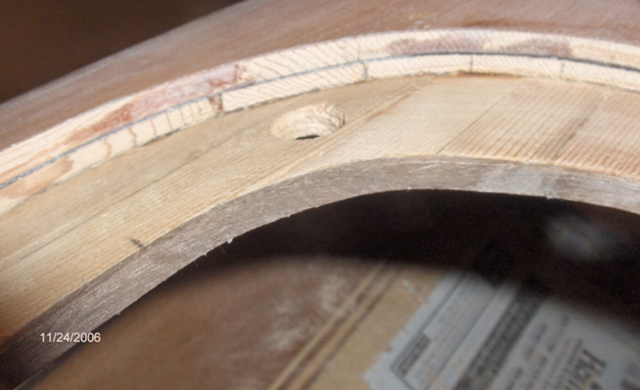
Nov 24, 2006
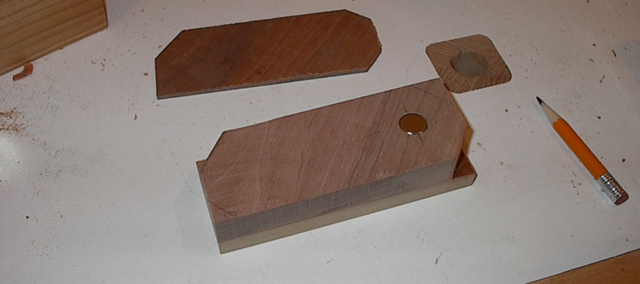
Hatch lips are built into each hatch opening. Holes drilled to receive magnets. Walnut trim strip glued to perimeter.
Nov 24, 2006
Close up of hatch lip with walnut perimeter. Note spacer strips to allow for increased thickness of hatch cover
Nov 24, 2006
Walnut burl veneer added to top surface of hatch lips
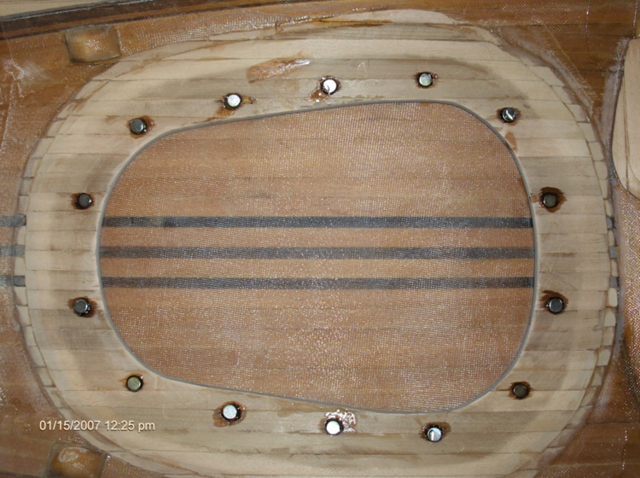
Jan 15, 2007
Magnets glued into hatch lips. Hatch is in place to make sure polarity is matched for each pair
Jun 18, 2007
Carry handle receivers fiberglassed into each end of the deck. Length of PVC pipe is for rope loop on handle
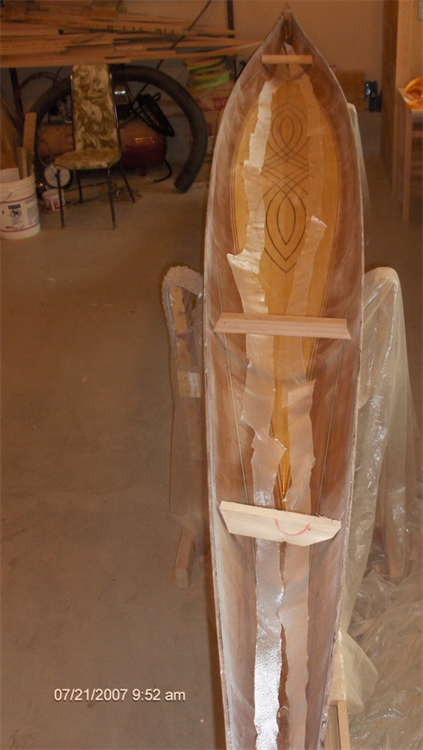
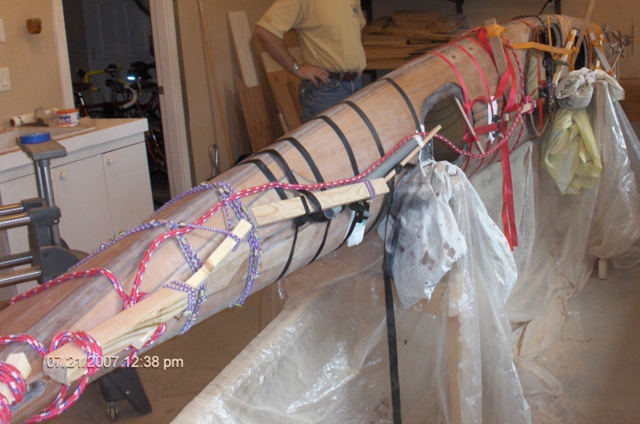
Jul 21, 2007
Fiberglass tacked along hull for gluing the deck to hull. Hull braced to match deck width
Jul 21, 2007
Deck clamped to hull and ready for the seam to be fiberglassed
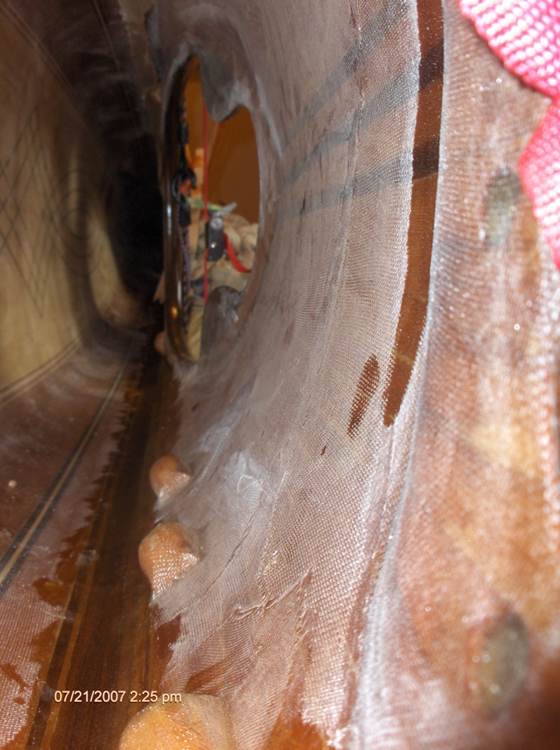
Jul 21, 2007
Inside view of seam fiberglassed in place
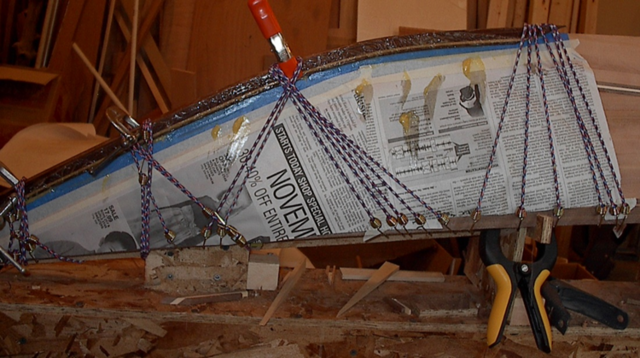
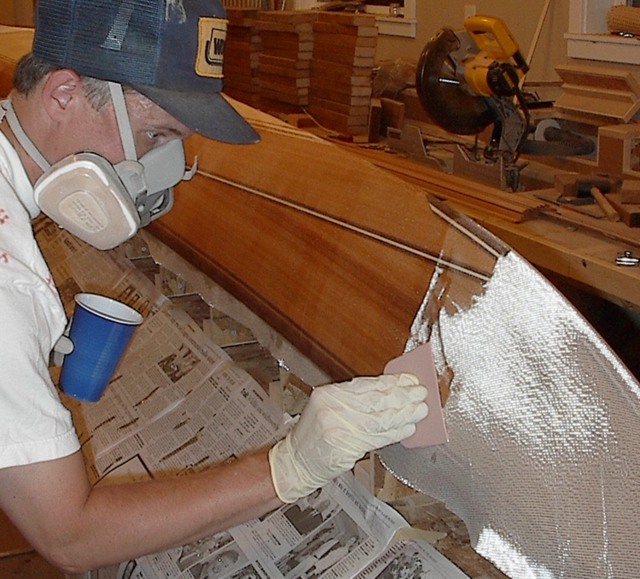
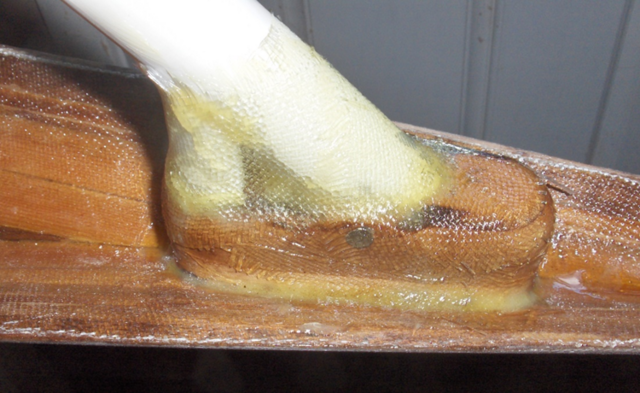
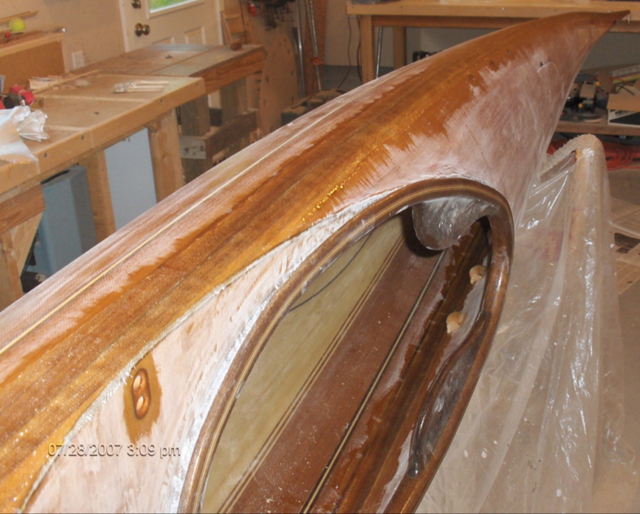
Jul 28, 2007
Outside of seam now fiberglassed
Sep 13, 2007
Bulkheads assembled and fiberglassed (Note: The waterline stripe was carried over to here)
Nov 11, 2007
Form built for seat back. Cedar strips glued on form in same way as deck and hull
Nov 18, 2007
Seat back covered in walnut veneer & fiberglass. Edges trimmed with ¼” walnut
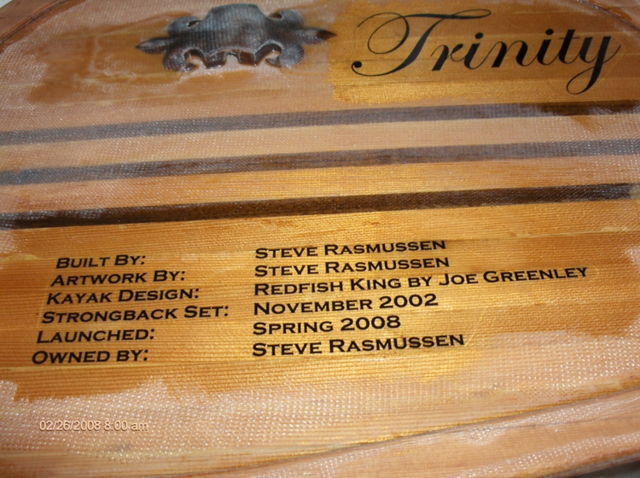
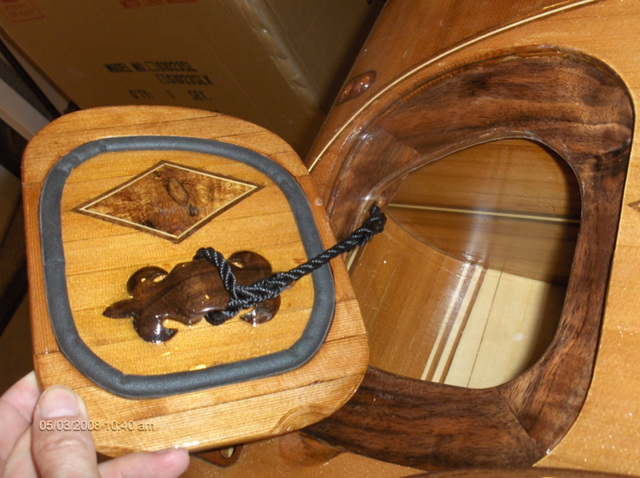
Feb 26, 2008
Kayak’s name and build info laminated to the inside of the main hatch cover. (Note: You can also see the hatch tether detail next to the name)
Mar 1, 2008
Kayak suspended from the ceiling and ready for varnish
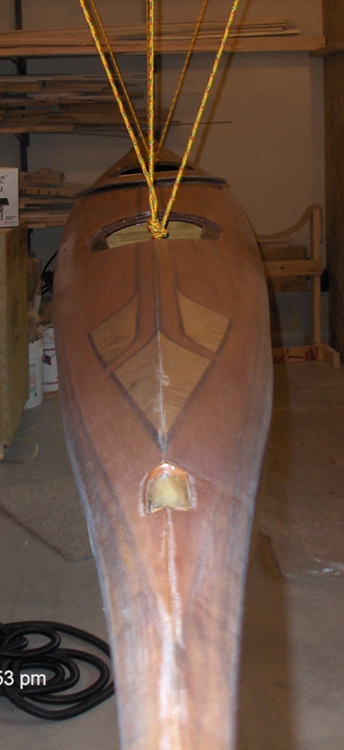
May 3, 2008
Final details – hatch cover gasket and tether attached
May 3, 2008
Seat is being shaped
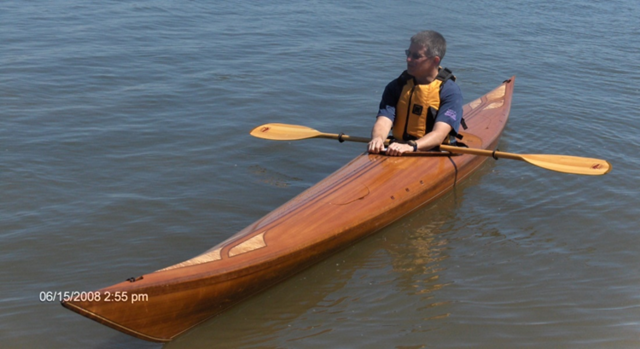
Jun 15, 2008
Maiden launch on Vancouver Lake (Father’s day)
Jul 12, 2008
Fully rigged and on Dot Island in Chuckanut Bay (near Bellingham, WA)
That is everything from the timeline display. If anyone has questions or wants more detail, let me know. I have lots more pictures.
Absolutely gorgeous, Steve! That looks like it was a ton of work. I suppose I can see putting something that beautiful in the water, but not dragging it up onto the bank afterward. :-)
Thank you everyone. It has plenty of scratches now. When it was on display at the fair a friend of mine said he couldn't believe that I was okay with people touching it and getting fingerprints on it.
I told him that the kayak had spent 5 years as an art project and after the fair it will be a boat. And boats get scratched.
Beautifully done Steve. A work of art for sure that is over the top. If you used 6 oz cloth I would have to guess about 45# when it was all said and done. I bet you get many looks at the lake when you launch, and have a hard time getting out on the lake to paddle. I hope my build is half as good as this. Thanks for sharing, and I know who's ear I can bend if needed.
Eric - good guess! I think it is a little heavier that that, but only a few pounds. I opted for several features where I choose "cool" over "lightweight". But I can still carry it by myself. I'm looking forward to seeing your build.
Egads Steve - this is beyond amazing! So far I just took a quick look at the photos. I'm looking forward to reading the details tomorrow when I'll have more time.
Thanks for putting this post together.
“If there are no stupid questions, what do you call this?” — Horace the Horse
WOWerasmus... wOW, woW, wow... incredible build and a brilliant write up. I for one appreciate the added effort you made in presenting this creation for others to drool over.
As others have said, the craftsmanship is totally overboard... much like my family/friends rendering me during our nautical adventures. As I have said in other posts, I'll never take on such a task, however, your detailed explanation have given me many clues/ideas/ for other projects.
While reading through the details, I was continually perplexed on how you were going to remove the forms... then the penny dropped and realised that there were two halves... which then had me "rivetted" fiberglassed to the conjoining.
While I have dabbled with the use of magnets, your application has given me a greater appreciation of their inclusion in diversified future projects.
PS. To think... it took me 17 years to build my pissant 1.017m boat... and it was only a model.
If your first cut is too short... Take the second cut from the longer end... LBD
Eric - I used a rolling bevel. I got pretty good at it with my block plane. I'd put a strip or two on each side before I went to work and a couple more after.
I think I will purchase a cove and bead set for the router attachment on my shopsmith. Debating on cutting the strips on the table saw or the bandsaw. Bandsaw has a thinner kerf but not sure if it's worth the effort.


 - Project by Steve Rasmussen")


 - Project by Steve Rasmussen")