Share your craft projects
Make new craft buddies
Ask craft questions
Blog your craft journey

Carey Mitchell
170 posts
and
11 followers
in almost 3 years
in almost 3 years
More from Carey Mitchell
Federal cellarette
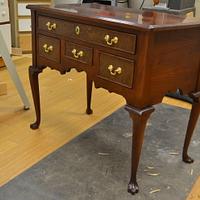
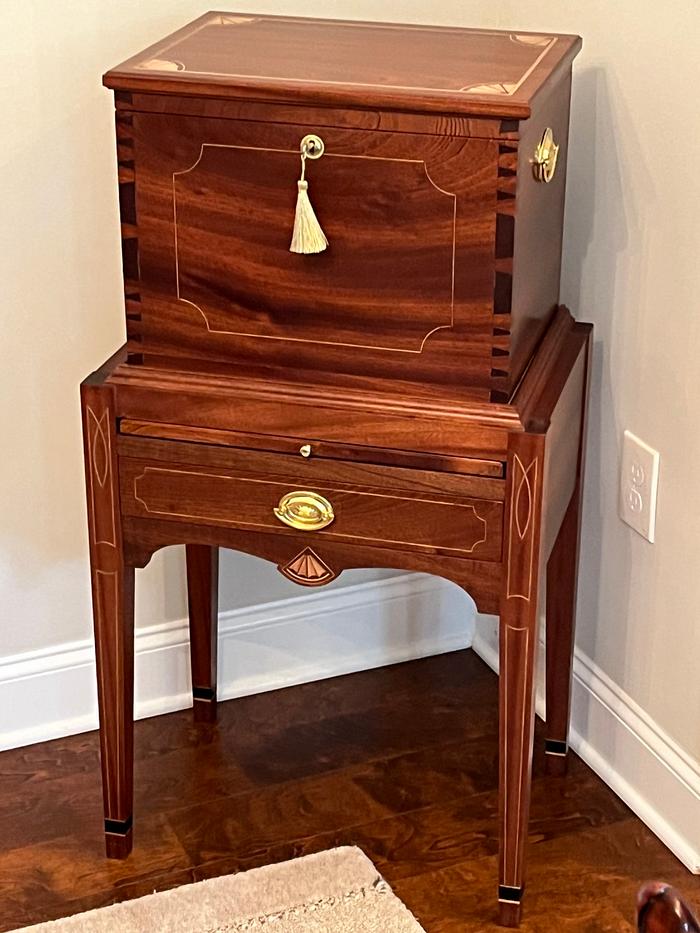
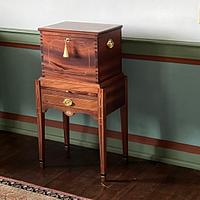
The cellarette is now in its new home in the Vann House, a Georgia Historic site, built in 1804 by the Cherokee chief James Vann. It joins the Queen Anne lowboy in the house, see previous post.
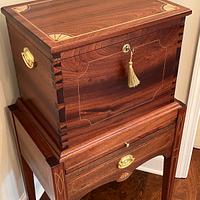
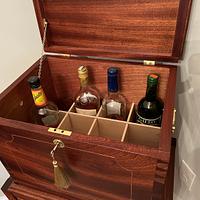
This is my rendition of a cellarette in the Federal style, for storage of bottles of fine beverages. Around 1760, the American colonists began importing gin from the Netherlands and brandy from France; and other high quality spirits came from elsewhere. This style cellarette evolved to store the bottles containing the Dutch gin; however, the bottles were prized and were reused for locally made brandy and other spirits. These cellarettes were very similar to sugar boxes in the colonial period, except for the partitions. Most cellarettes were crafted in North Carolina, Virginia and a few in Bucks County, PA. Similar pieces were being used in England during that period, and I have seen photos of some French pieces.
This is my rendition of a cellarette in the Federal style, for storage of bottles of fine beverages. Around 1760, the American colonists began importing gin from the Netherlands and brandy from France; and other high quality spirits came from elsewhere. This style cellarette evolved to store the bottles containing the Dutch gin; however, the bottles were prized and were reused for locally made brandy and other spirits. These cellarettes were very similar to sugar boxes in the colonial period, except for the partitions. Most cellarettes were crafted in North Carolina, Virginia and a few in Bucks County, PA. Similar pieces were being used in England during that period, and I have seen photos of some French pieces.
The original antique which inspired my first two cellarettes was made around 1780 by Micajah Wilkes in North Carolina, and is on display in the Museum of Early Southern Decorative Arts in Charleston. Wilkes is known for several exceptional pieces; the original cellarette sold at auction for $165,000. Another of his cellarettes was recently appraised on the Antiques Road Show at $125,000. A third is on display in the McLaren Gallery at Colonial Williamsburg.
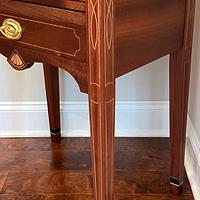
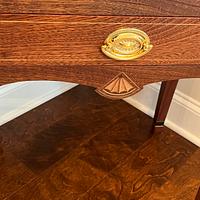
I adapted the front design from a photo of a ca. 1790 Federal bowfront table, including the stringing on the legs and the upside down fan on the lower rail. In designing this piece, I increased the width of the base in order to permit a more gentle sweep of the curves on the lower rail. Compared to the first piece, in the Southern style, I added the fans on the top, the pull-out tray, lengthened and tapered the legs, and added the sandalwood stringing on the legs and case. The hardware are reproductions in the Federal style. The base measures 40 X 21 X 14” and accommodates 12 bottles. Inside compartments separate the bottles. I came up with a pattern I liked for the dovetails that broke up the tedium of a uniform layout.
The wood is sapele, with mahogany inlays, sandalwood stringing and ebony ankle band inlays. The sandalwood was chosen to lend an aged appearance, as I thought holly would be too white. For the stringing in the front of the case and drawer, I used 1/32" stringing, as I didn't want this to appear as prominent as that on the legs. I used 1mm carbide bits, which were a little oversize for the stringing but worked fine. The 1mm bits break easily; luckily, I had purchased a package of 10.
In order to cut the curved grooves for the stringing, I purchased Lee Valley's router base kit* for the Dremel, after learning the hard way that Dremel's base is a piece of junk. The Veritas base kit includes a number of pieces, including 2 edge guides, a set of 6" and 12" trammel rods, and a really ingenious setup for centering. It enables cutting curves with radii from about 1/2' to 18." It was well worth the money, a pleasure to use.
In order to cut the curved grooves for the stringing, I purchased Lee Valley's router base kit* for the Dremel, after learning the hard way that Dremel's base is a piece of junk. The Veritas base kit includes a number of pieces, including 2 edge guides, a set of 6" and 12" trammel rods, and a really ingenious setup for centering. It enables cutting curves with radii from about 1/2' to 18." It was well worth the money, a pleasure to use.
I wanted a way to avoid having the stringing stained by the Transtint dyes I normally use. The result was to oxidize the sapele surface with potassium dichromate. It reacts with the tannins to produce a rich reddish brown color that shows really nice depth. Since maple, holly and sandalwood have little or no tannin, their color is hardly affected, while the tannin-containing woods are colored nicely. Note that the sandalwood was largely unaffected by the process. Thinking about a short article about the use of the potassium dichromate; it can be used on any wood with significant amounts of tannins.
Note: Potassium dichromate can be nasty stuff, so follow all the safety precautions. There were a number of test pieces. One supplier’s information suggested a concentration of 100 grams per liter – a small sample came out nearly black. I finally zeroed in on 4 grams per liter and that nailed it.
Note: Potassium dichromate can be nasty stuff, so follow all the safety precautions. There were a number of test pieces. One supplier’s information suggested a concentration of 100 grams per liter – a small sample came out nearly black. I finally zeroed in on 4 grams per liter and that nailed it.
Then 6 coats of satin varnish, with wet sanding between coats with 600 grit paper. Then rubbing with 0000 steel wool to remove all remaining sheen. The final step is application of finishing wax with superfine steel wool, drying and buffing again.
So, my own rendition of a classic piece. I didn’t track the time but estimate it at about 80-90 hours.
Next up ---- another cellarette in the Queen Anne style, then maybe I'll move on to something else. have my eye two. One is in the Museum of Early Southern Decorative Arts in Charleston, along with the Wilkes piece that first got me interested in cellarettes. https://mesda.org/item/object/bottle-case/6079/
The other is in the Winterhur Museum in Delaware: http://uncorked.winterthur.org/consumption-equipage/cellarettes-bottle-cases/
* - See my product review for this tool.
Carey Mitchell
18 Comments
Nicely done! Beautiful work.
Ryan/// ~sigh~ I blew up another bowl. Moke told me "I made the inside bigger than the outside".
once again carey phenomenal craftsmanship. love the dovetails and string inlay. beautiful work.
working with my hands is a joy,it gives me a sense of fulfillment,somthing so many seek and so few find.-SAM MALOOF.
Excellently done. Stringwork and elays are superb. Beautiful chest.
Ron
Yowza!
The detailing is incredible!
The detailing is incredible!
Amazing work. It looks great
Carey, stunning work!
The dove tails look 3D.
Great project!
The dove tails look 3D.
Great project!
Petey
Beautiful!
-- Soli Deo gloria! ( To God alone be the Glory)
That piece is a work of art!!
Cheers, Jim ........................ Variety is the spice of life...............Learn something new every day
Beautiful work, a cellarette has been on my bucket list for some time. You sure did a fine job on this, and the colors look great.
-- Paul--- Creativity is allowing yourself to make mistakes. Art is knowing which ones to keep. — Scott Adams
Incredible piece Carey. The case looks like it was made from a single slab. That was the first thing I noticed, that sure makes the front look amazing, and your attention to detail really shows.
.................. John D....................
John, it was made from a single long board. The plan was wrap the grain around the side-front-side; however, the rough cut for the front twisted over the month that it acclimate din the shop. I had planed to the final thickness and could not flatten it. That's happened a couple of times with sapele and I don't know how to deal with it.
Need to get some better photos.
Need to get some better photos.
Carey Mitchell
Beautiful work Carey! And a nice write up as well. Thanks for sharing!
Was the Sapele ribbon stripe?
Beautiful workmanship.
Exceptional piece. Love the stringing. Don't like the dovetails, but then I never do unless they are secret mitred, in which case why bother. Great informative write up. Thanks for posting
I had to come back to look at this piece again and noticed your floor. WOW is that beautiful.
.................. John D....................
Nicely done, that looks incredible.
John; the flooring is engineered hardwood (walnut) from Shaw Floors (Shaw Industries, Inc.), where I spent 37 years.
Carey Mitchell


