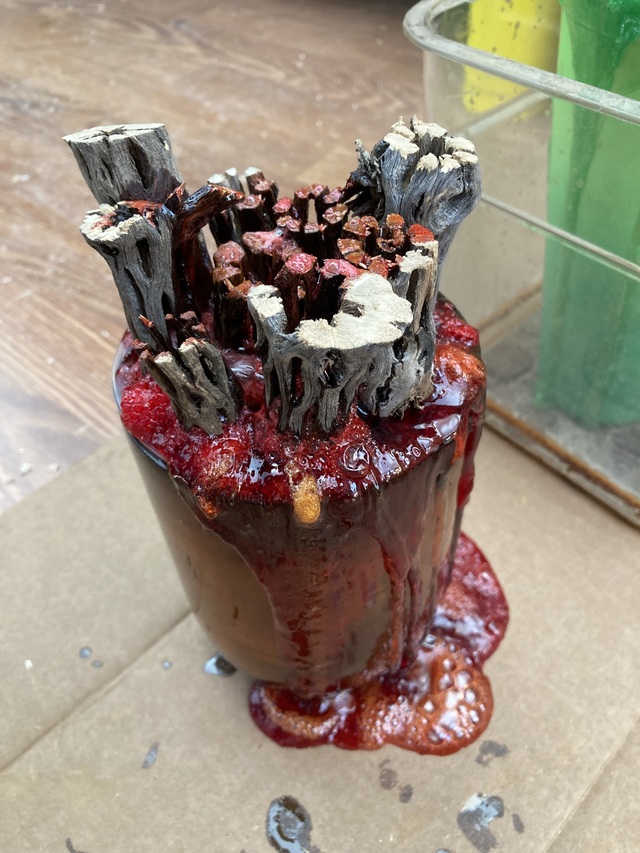
After the first bedside lamp with its wooden base, I wanted to try making one with a cholla and epoxy base. I started by pouring tinted epoxy into a 16 ounce cup from the dollar store, with some cholla pieces jammed into it. For smaller molds like this, I may need to start using partial pieces of cholla, as there ends up being a lot of empty space that needs to be filled with the epoxy. And pouring large amounts of epoxy can lead to a runaway exothermic reaction which causes the epoxy to foam and bubble and set very quickly, which generally isn’t usable.
With a successful pour, I pulled the blank from the mold and rough-turned it to a shape I thought would work. The only dimension I was really worried about was the top, which would have the top of the lamp meeting it.
Looking at the rough blank, there wasn’t enough room for a battery, so I glued on a round piece of cherry, which I thought would look good, then I poured a small pour of epoxy to make sure the base and the lamp body were stuck together real good.
Next I turned the base, aiming to leave it as wide as possible, giving me the most flexibility with the battery.
With the base turned, I bored a hole into the base of the lamp body. The largest diameter at the bottom was 2½ inches, but I stepped that down to an inch to make sure I didn’t make the inside of the lamp bigger than the outside.
With the hole bored and the top of the lamp assembled, I carved out an opening for the battery and glued on some feet to give a little clearance for the battery, so the lamp wouldn’t rest on the battery.
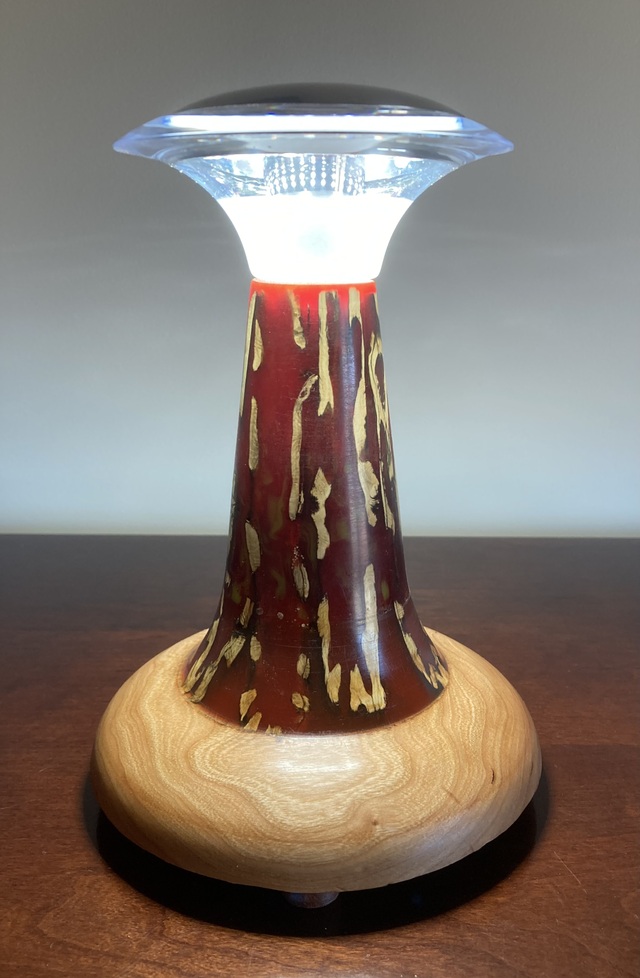
After signing the lamp, I finished it. The epoxy portion is polished with a plastic polish. The wooden base was finished with multiple coats of Tried and True Danish Oil. After the finishes have had a chance to cure, I’ll probably add a coat of furniture wax to make it easier to dust.
Interesting way to make a lamp to display or show the wood, Came out nice.
I was wondering: in order to help reduce the epoxy foaming as you show, and to also reduce the amount of epoxy required while making this process a little easier, have you considered inserting a hollow tube in the middle of the mold? This eliminates the drilling requirement & reduces both the amount of epoxy & wood needed. I'm also thinking that this would help with aligning the wood sticks around the lamp base in a vertical manner so a greater volume of wood is exposed on the surface of the base. The tube could be made by rolling some cardboard, like the thick back of a paper tablet, and could be adjusted for any size diameter desired. That's all, just rambling while thinking. Nice lamp.
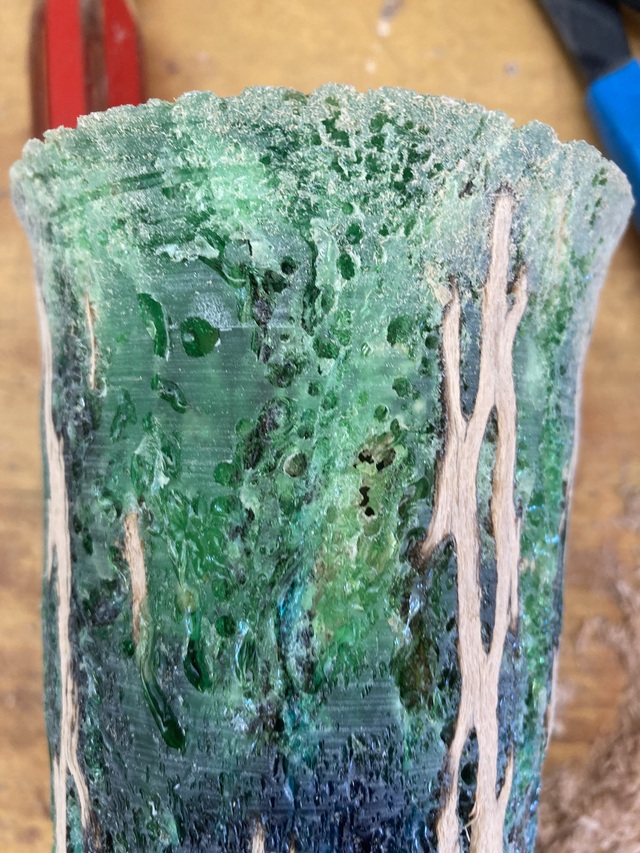
The construction of the pour is so random you really don't know what will show up until it is finished, makes for some great patters and colors!
I would liked to see more of the cholla pattern exposed since it produces such a unique pattern. Maybe you could boldly go where no one has gone before and try flattening and laminating the stuff like they do with bamboo plywood?
I know, crazy talk 🤠
Lower "failure" photo looks like a great item for Halloween next year 👍
I've noticed there are some folks on the This Old House Builders channel that are working with epoxy. none of them are doing anything like you are though, mostly river tables. They did have an episode with tricks and suggestions for working with epoxy.
Not using a deep pour epoxy, Nathan, because most of them suggest a quarter inch is deep. I’m fine with coloring outside the lines, but I’m not going to pay extra for something that may or may not work. I’m fine with the epoxies I’m using (System 3 or Stone Mold), and just needed a reminder as to how much at once was too much.
I haven’t put in a tube, Tom. I generally have a piece of cholla in the center, and then others flanking it. But I’m also going to rip some in order to have thinner pieces for filling gaps. More experimentation will be needed.
Splint, I have thought about doing a pour, then slicing it into veneer. But I’m so dang far behind on things my sweetie wants me to finish that more experimentation will need to wait.
Earl, there are two bowl-turners that I talked to during the Eldorado Studio Tour in 2022 who had cholla bowls very similar to mine in the 2023 tour, so I’m not the only one doing this sort of thing. But I may be the most mad-scientist-ish. Well, except for Keebs, who does a lot more playing with pours than I do.
The third (and final for this batch) cholla and epoxy lamp got rough-turned and hollowed this morning. It also will have a cherry base, but I’m trying a few different things with it. I think I’ll need to make a hardware store trip for some 18 or 20 gauge wire and more solder first though.
I used a no-name brand (Shabebe) to do a fill on a table for a friend. It was not their deep pour variety but I went about 1/2 inch deep with no issues. Not the same as what you did but deeper than 1/4". The stuff was much cheaper than the name brands and I was very happy with the results. If you are up for some experimentation, their deep fill version claims it can be 2-4" deep. Unfortunately, it only seems to be available on Amazon.
--Nathan, TX. Hire the lazy man. He may not do as much work but that's because he will find a better way.
Yeah, the Stone Coat (not Stone Mold) I use let me do a 16 ounce Red Solo Cup in two pours, which is just fine, but I’ll take a look at the Shabebe next time I need to buy some.


 - Project by Dave Polaschek")