Share your craft projects
Make new craft buddies
Ask craft questions
Blog your craft journey

LesB
168 posts
and
7 followers
in about 3 years
in about 3 years
More from LesB
Microwave wet wood for turning
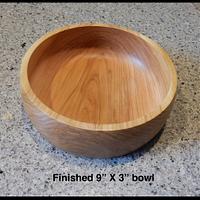
In past responses to threads on turning green wood I have suggest using the microwave to dry wood. Now I had a project that was needed to be done soon so I took my own advice.
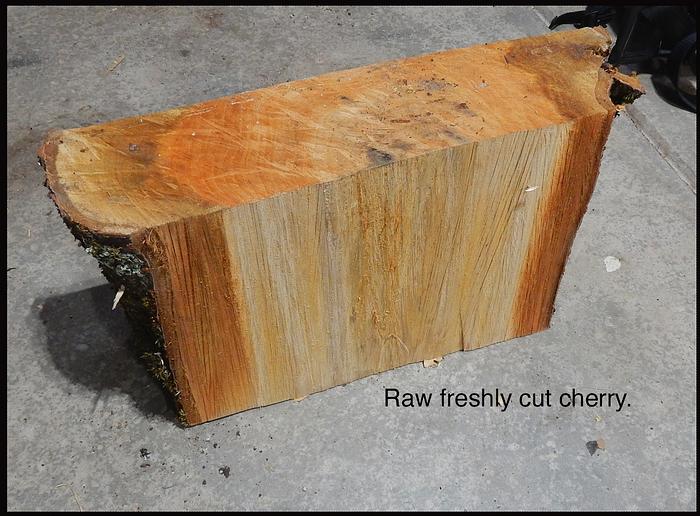
I have done it several times over the years, usually with small items, but this time I had a time critical need to do it. A friend had a cherished cherry fruit tree go down in an ice storm this winter. She had planted the tree in honor of her daughter’s birth. I’m guessing by the growth rings of the tree 30+years old. She asked if I could make something like a bowl from it. At my age you never know how much longer I will be able to continue wood working so I used the microwave to speed things up.
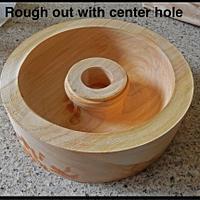
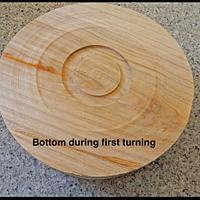
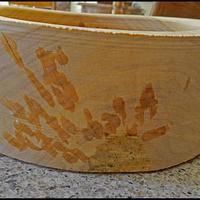
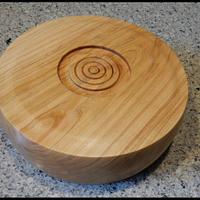
The blank slab I started with was about 10” X 12”X 3-1/2” and so full of water it almost dripped. I let it dry for a week in my (cool) shop then proceeded to cut the bowl blank on the band saw. Then with a router, a circle template, and a dovetail bit, I cut a mortise on top side the size of the large jaws on my lathe chuck. Mounted on the lathe I trued up the bottom and sides adding another mortise to the bottom. I then remounted the blank from the bottom mortise and proceeded to cut donut out of the inside of bowl leaving the outside walls about 7/8” thick and in the center column about 3” in diameter and on the top of the column a 1/4” tenon that would be used to remount the blank when I was ready to do the final lathe work. I then used the Forstner bit to hollow out the center of the column.
From there I began the microwave drying process. Over a period of 5 days I microwaved the bowl in the brown paper bag for about 2 minutes on each of the top & bottom making the wood almost too hot to hold….not quite. I left it in a paper bag slightly open and let it cool. I did this twice in the AM letting it stabilize during the day (in the bag) and repeated this in the evening. On the 3rd round I noticed small cracking or checking occurring on the end grain of the wood and immediately treated the small checks with medium thick CA glue. Letting it soak in a little before spraying with an accelerator. That stopped them from getting bigger. I did get one small crack on the inside and stopped it the same way. During the final turning I was able to remove these cracks.
On the 3rd day an obvious warping could be seen across the bottom and top of about 1/4” measured from center to outside edges longitudinally with the grain.. After the 5 days I let it stabilize for a two days and then proceeded to finish turning it. The mortise and tenon I had made for mounting on the chuck had become very slightly oval in shape from the warping so I first trued them up to keep the piece concentric. I then turned the bottom and sanded it. Then reversed the mount and turned the inside of the bowl. As I got into the thicker area on the inside bottom curve I noticed there was still some moisture but a couple of 2 minute microwave treatments fixed that.
I then put two coats of processed walnut oil on and let it cure for two days. Finally I will apply 3 coats of salad bowl finish (Generals) and deliver it to my friend.
I then put two coats of processed walnut oil on and let it cure for two days. Finally I will apply 3 coats of salad bowl finish (Generals) and deliver it to my friend.
Over all this took somewhere around 3 to 4 hours of my time over the week long process instead of waiting months or years for the blank to dry naturally. I think the friend will be pleased. She wanted it to be a memory piece of the tree she planted for her daughter.
10 Comments
great tips les ! thanks for posting this.
working with my hands is a joy,it gives me a sense of fulfillment,somthing so many seek and so few find.-SAM MALOOF.
Thanks for posting this!
Ryan/// ~sigh~ I blew up another bowl. Moke told me "I made the inside bigger than the outside".
I don't use the lathe, but this was really interesting. Lovely bowl!
.png)
No one will convince me to turn a bowl... however, I think many readers may get some good ideas from you informative post...
If your first cut is too short... Take the second cut from the longer end... LBD
Interesting process - thanks for sharing!
And the bowl looks great too!
And the bowl looks great too!
Les that is beautiful bowl. Gotta love Cherry.
A friend turns and has access to a lot of freshly cut wood, his kid is a tree cutter. He does same, and has a whole science for using his "shop ovens" he has both a microwave, and an oven he has re-worked with new burners, that can hold a pretty low, but constant heat. Mad scientist kinda guy, but he gets good results, and his turned stuff sells quick, he has mad skills at the lathe.
A friend turns and has access to a lot of freshly cut wood, his kid is a tree cutter. He does same, and has a whole science for using his "shop ovens" he has both a microwave, and an oven he has re-worked with new burners, that can hold a pretty low, but constant heat. Mad scientist kinda guy, but he gets good results, and his turned stuff sells quick, he has mad skills at the lathe.
Thanks everyone for the compliments.
GeorgeWest, The microwaving in a paper bag acts like a steam kiln driving the internal moisture to the surface. The bag retains enough water vapor to keep the surface of the wood from drying too fast and creating tension that brings on the cracks. I can see that after using the microwave to remove most of the moisture a low heat oven could help stabalize the remaining moisture. Some people use a scale to weigh the piece from start to finish to determine how dry it is getting.
GeorgeWest, The microwaving in a paper bag acts like a steam kiln driving the internal moisture to the surface. The bag retains enough water vapor to keep the surface of the wood from drying too fast and creating tension that brings on the cracks. I can see that after using the microwave to remove most of the moisture a low heat oven could help stabalize the remaining moisture. Some people use a scale to weigh the piece from start to finish to determine how dry it is getting.
Yeah he is constantly weighing, and using a high end moisture meter. He has some formula in his head of starting weight and moisture content, versus how much cooking, and at what temp, and he keeps calculating as he goes. Like I said, he's a mad scientist kinda guy. But he has some initial cracking, and it's like he gets it under control pretty quickly.
I don't even ask him questions anymore, his answers just go ZOOM right over my head, and I'd like to think I have a pretty good concept of wood, moisture, and drying. :-))
I don't even ask him questions anymore, his answers just go ZOOM right over my head, and I'd like to think I have a pretty good concept of wood, moisture, and drying. :-))
Very nice piece, Les. Did you microwave it before the first turning?
I did that all day once with a big piece of madrone that was freshly cut. As it dried, it has some cracks develop, but I filled them with black epoxy and it never cracked any more after that.
I did that all day once with a big piece of madrone that was freshly cut. As it dried, it has some cracks develop, but I filled them with black epoxy and it never cracked any more after that.
Cheers, Jim ........................ Variety is the spice of life...............Learn something new every day
Thanks Jim,
I only let the piece air dry in my shop for a week or so then cut the blank on the band saw, routed the mortise for the chuck and turned most of the wood out of the inside. Then I started my microwaving. I find that medium thick CA glue works quite well at stopping cracks. I use it all the time on the lathe work as i run in to cracks or voids. Sometimes on bigger openings I press fine sawdust that matches in the hole then add the glue. On the sawdust plugs I usually hit it with thin CA first because it absorbs faster then add the medium CA immediately. The thin CA seems to wick the thinker stuff in.
I only let the piece air dry in my shop for a week or so then cut the blank on the band saw, routed the mortise for the chuck and turned most of the wood out of the inside. Then I started my microwaving. I find that medium thick CA glue works quite well at stopping cracks. I use it all the time on the lathe work as i run in to cracks or voids. Sometimes on bigger openings I press fine sawdust that matches in the hole then add the glue. On the sawdust plugs I usually hit it with thin CA first because it absorbs faster then add the medium CA immediately. The thin CA seems to wick the thinker stuff in.


