


Share your craft projects
Make new craft buddies
Ask craft questions
Blog your craft journey
EZInlays
11 posts
and
3 followers
in almost 12 years
in almost 12 years
More from EZInlays


FishFry Wall Art

I ran across this awesome slab of burled maple and wanted to make something cool with it. Because I’m in the process of starting up a small business I needed to make some marketing materials. What better way to do that than to use one of my designs in the wall art? For this project I chose to use FishFry, the design I created to honor the Rainbow Trout of Yellowstone Lake!
The most important aspect of building a decorative inlay is material selection. For this build I wanted a dramatic dark color with good grain patterns for the back of the fish. I found asection of Wenge with a grain pattern around a knot that had the perfect look for the back of a fish. For the underside of the fish I wanted a bright color without much discernible markings. For the fins and face Lacewood was the perfect choice. Last, but not least, the Rainbow Trout gets its name from the cool striping on its side. Only one wood choice for that and it was Purpleheart!
Using the inlay templates in the FishFry kit I cut out all of the inlay pieces with my plunge router.

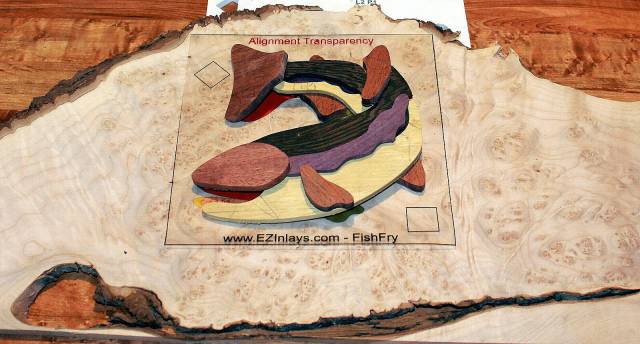
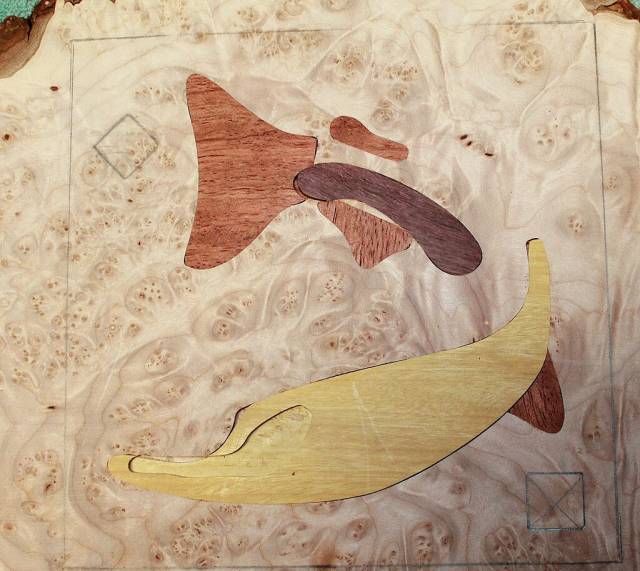
Because I wanted to see what the final inlay was going to look like I stacked up all of the pieces on the base material. If I was going to make a change of material the time to do it was before I started to assemble the inlay itself.
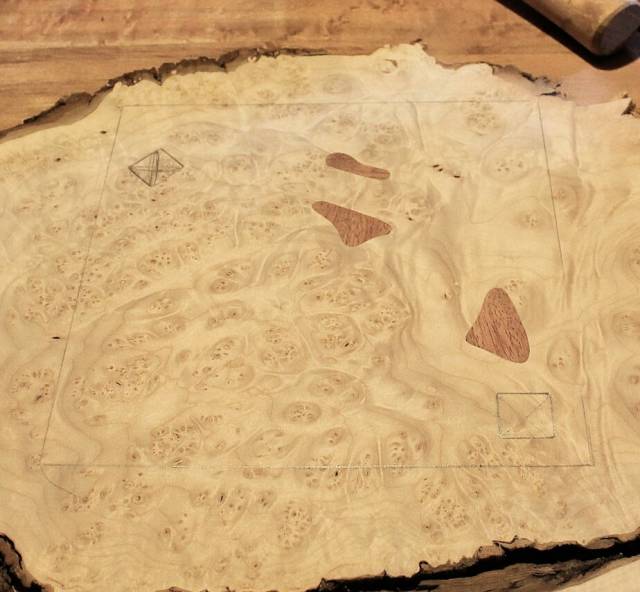
Building an Inlay is a simple process of cutting a hole, filling the hole with the inlay, and then repeating the process on a layer by layer basis. Each layer has one or more pieces that gets added to the design. This is what the project looked like after the first layer was completed. The first thing you’ll notice is the alignment marks drawn on the base material. These are used to line up each subsequent layer of the design. The other things you’ll probably see is that it doesn’t look like much after the first layer is complete!
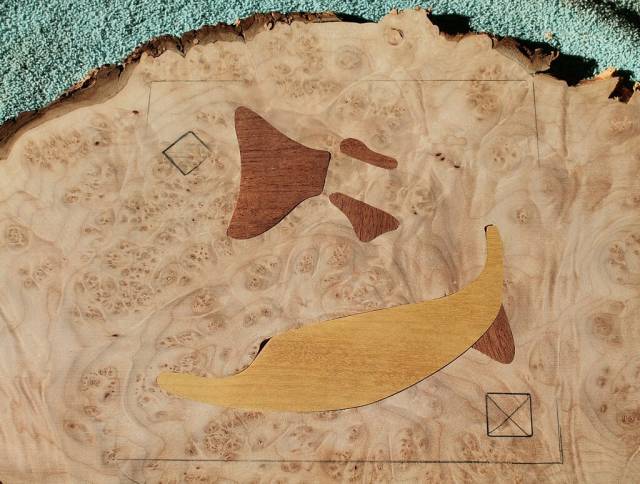
This is what it looked like after Layer 2 was finished. You may notice there are some pretty big gaps in places in this picture. Those gaps are fine because most of them get covered up in subsequent layers. Most of the big gaps were created when I was sanding the inlay for a proper fit. I knew what areas would be routed out on future layers so I could sand those areas away making it easier to fit into the void.
Then Layer 3. On this layer I didn’t fill the mouth in with a piece of wood. Instead I chose to leave that area empty so I could fill it with a glitter filled epoxy later on in the process.
In this picture you can see the pieces to be added while working on Layer 4. I use double sided tape to hold the template in place during the routing process. I try not to put any tape on areas that already have an inlay so I don’t pull that section out when removing the template. I also like to put the pieces on the base material so I can see how they will look once they are installed and to assist with the placement of the template.

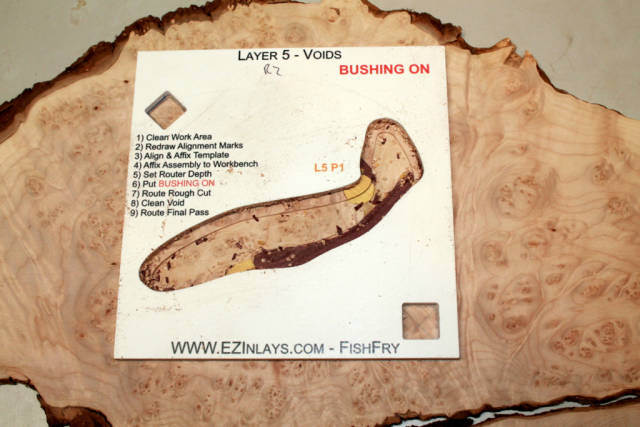
This is what the project looked like after making the first rough cut of the Layer 5 void. I always make two passes when cutting out the voids. After making the first pass, which removes the majority of the material, I clean the debris from the template and then cut the second pass. The second pass makes good sharp edges so the inlay fits into the void better.
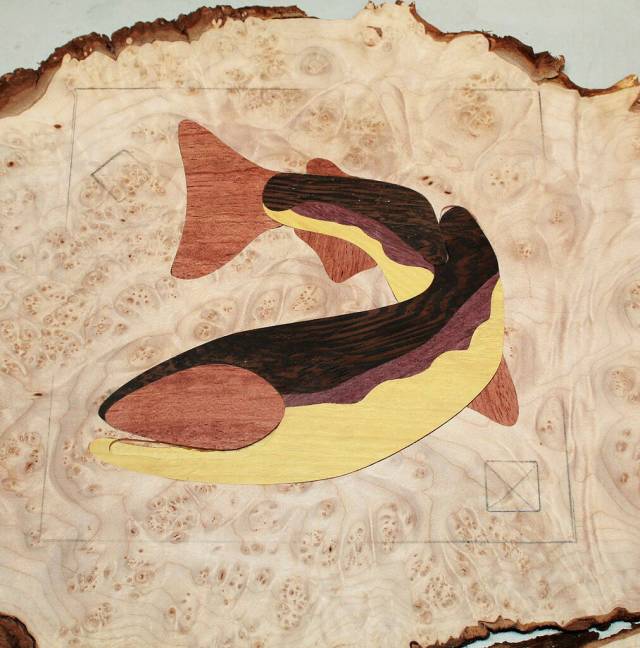
This picture shows the design after Layer 6 was completed. By now you’re getting excited to see the final layer go in because it is starting to look AWESOME!!!
Finally we get down to cutting the voids out for Layer 7. I filled the fins with Lacewood but left the eye empty so I could fill it with glitter filled epoxy along with the mouth.
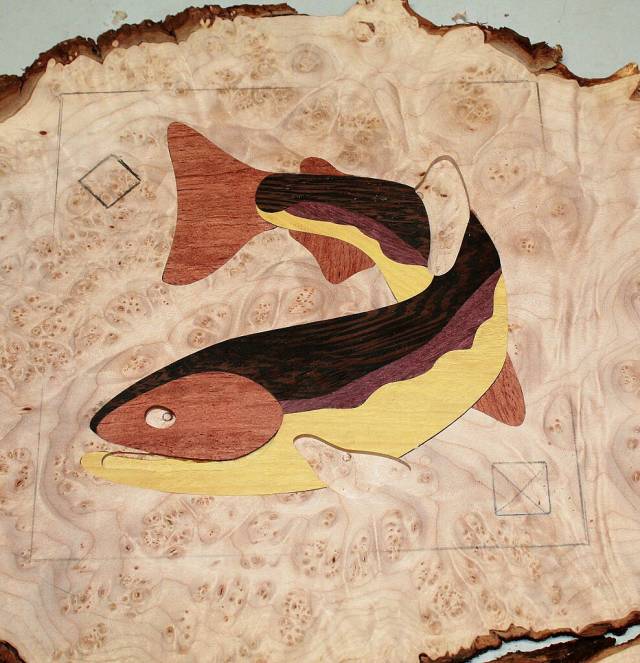
I filled whatever gaps I had with glue and sanding. I then filled the eyes and mouth with an epoxy and glitter mixture. Then I did some final sanding and applied a few coats of Tung Oil and a polyurethane finish to protect the colors from fading. All in all it took me about 5 hours to make this inlay.

Have an Ordinary Day...
4 Comments

Wow thats awesome. So 3D
Jeff Vandenberg aka "Woodsconsin"

Very nice inlay.
Abbas, Castro Valley, CA

nice job. I have done small inlay , that is a talent in its self
Wheaties

Super inlay work and very nice photo work up.
woodworking classes, custom furniture maker
More from EZInlays