


Share your craft projects
Make new craft buddies
Ask craft questions
Blog your craft journey

Toothpick
17 posts
and
2 followers
in about 12 years
in about 12 years
More from Toothpick


walnut table


11 Comments

Beautiful and exactly what I have planned to build.
Losing fingers since 1969

Very intricate design. Well built!
Abbas, Castro Valley, CA

Perfect!
-- Michal, http://WoodworkingWeb.com
It appears that each leg is free standing, tied only to the table top. How is the stretcher connected?
By the way, the way you did the legs is far simpler than what I had in mind. It’s brilliant, really I imagined a free standing base. That would have required complicated leg joinery that I haven’t even figured out yet.
Losing fingers since 1969
Ian and Michael thank you.
Brian, the stretcher is connected with flush mount clips like you would use to hang a mirror or flat mount frame. They are recessed into the stretcher but not the leg so it looks as if it is free floating. The clips are only recessed as wide and tall as the clip other wise you would be able to see the mortise from either side of the leg or it would be a giant slot. Since the clips are only about 1″×1″ the are hidden neatly behind the leg and concealled by the mortise in the stretcher. The one thing I would suggest is using a longer screw for these clips as I believe they come with a #4 3/4" and I wanted a bit more bite. If you have the capability you could even bore out the holes and perhaps use a #6 but that would require also grinding down the head of the screw and I am just simply lazy sometimes. I suppose that you could make the legs free standing as a base unit by only attaching the top with screws through the underside of the leg top, but the mortise seemed to really lock it it in and then with the clips, the downward force of the table top is minimized. My original fear was that because the legs are splayed at an angle and that they don’t go straight to the ground the force of the top would want to push the legs out and thereby make a dining table into a Japanese tea table. If I can get my wife to help I will try and lift the stretcher out and take a picture.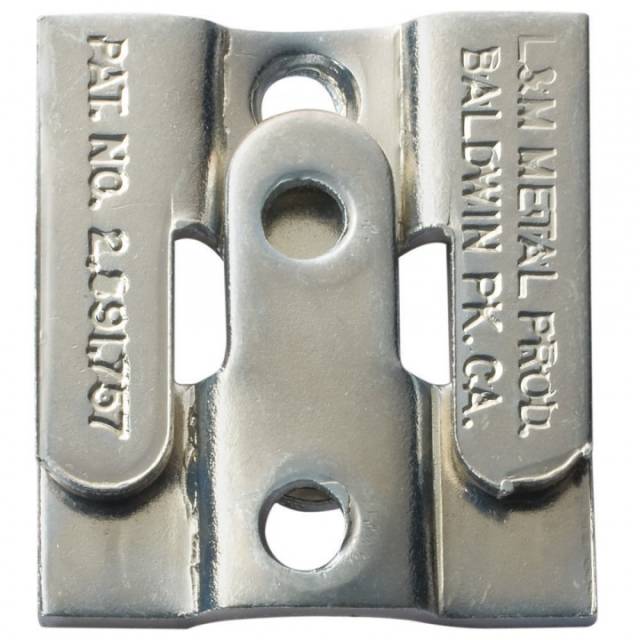
I was able to take a picture from the underside of the stretcher and you should be able to see the recess, also I forgot to mention that I mounted them flush to the bottom of the rail so they could slide in.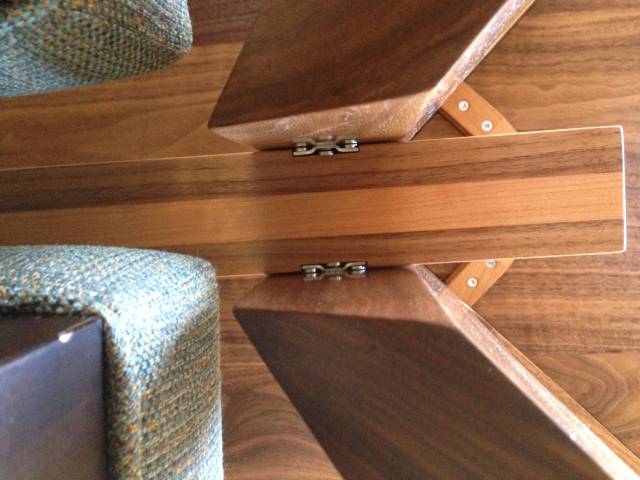
That’s simply brilliant. If I understand correctly, the weight basically bears completely on the legs themselves. You could probably get away without the stretcher altogether. That is, if your cherry leg clips hold. I guess there must be a lot more pressure on the inner clips but the stretcher tying the legs together balances that out. The more I think about it the more I understand it and the more I’m excited about building a prototype. Thanks so much for the tips.
Losing fingers since 1969
It just dawned on me that the way you assembled it, the table is completely portable. Is thinking that if I build the table I have in mind, it would have to stay with the house whenever I sell it and move. This keeps getting better. Thanks once more!
Losing fingers since 1969
Yes the table is completely portable. I suspect you could get away without the stretcher but the legs would need to be tied together in some fashion or another because of the weight of the table top the legs will always want to push out and separate. I think there is nominal pressure on the clips but pressure all the same. I hope you have had some time to get into the shop. If you would like I can message you a drawing I did for the legs and it would give you a template. Let me know.
That would be great. Thank you.
Losing fingers since 1969

Wonderful build
woodworking classes, custom furniture maker
More from Toothpick