Wolf (& Rabbit!)
in almost 12 years
9 Replies
Go to the Drug store and buy some reading glasses. :)
Figuring out how to do something you have never done is what makes a good challenge.
Measure twice; cut one, two, three, four times or more. ;-) Then, of course, it will probably still be too short!
Practice . . . practice . . . practice . . .
I have the same problem and I’m too old to ever “get it.” I like to blame it on my cheap tools, but vision is also a good excuse!
L/W
“Those who would give up essential Liberty, to purchase a little temporary Safety, deserve neither Liberty nor Safety.” Benjamin Franklin
Try using the metric system.
—Madts.
Tor and Odin are the greatest of gods.
I love metric. I can’t sort out the 15/64ths plus 9/16ths thing.
I’ve started using a very nice marking gauge and a knife for layout. It certainly seems to help as I can use the layout line to sort of catch the chisel, if you see what I mean..
-- Alec (Friends call me Wolf, no idea why)
Take lots of time laying out with accurate tools also take lots of time milling and fitting. sneak up on the joinery with lots of dry assemblies .
woodworking classes, custom furniture maker
Wolf, Something you may wish to consider, if not already doing it.
I always strive to achieve the most accurate and neat results possible, so when I decide to build some thing as a first up project I use some similar timber or short pieces of the same actual timber to make a small prototype.
This effectively allows you to taylor the final result to obtain the finish you are wanting.
For example when setting up tooling I take the time to make a test piece or prototype do whatever the process is and then gauge my results, if its not what I wanted it gets re done! Now this takes some time but in the process ensures the final production run is as wanted.
A practical example was the Curved Fronted Box I made back in 2013.
Have a look at this:
To assist me I made a small section and used it in the steps I needed to do.
begining at the joints then application of veneer and finally to and the the edging.
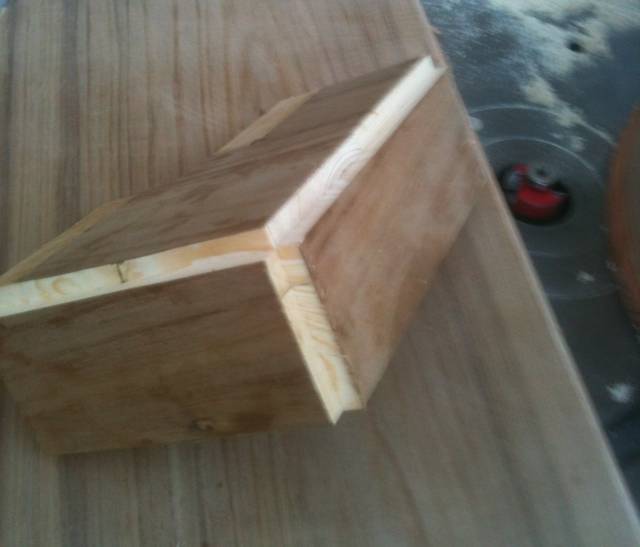
Some developments on adding the trim
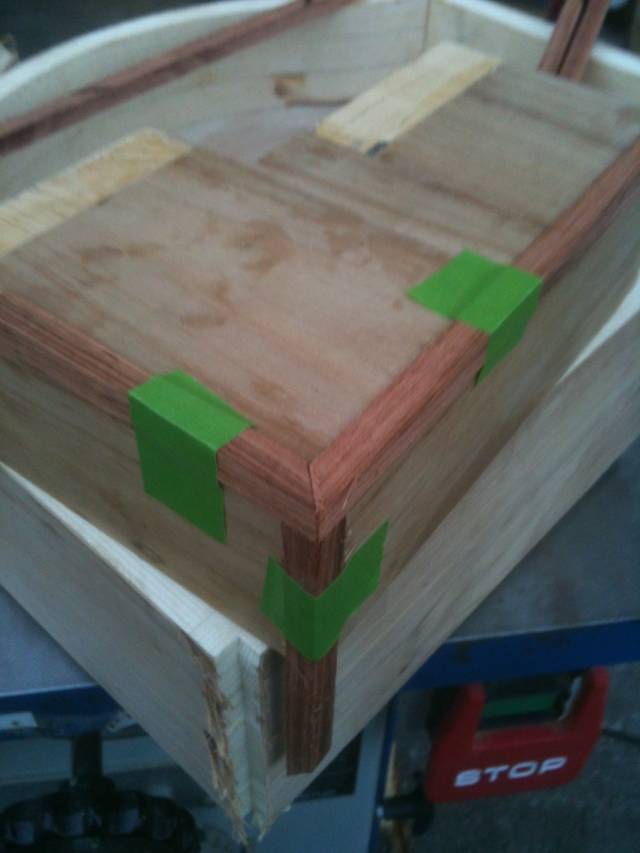
This is not the be all to end all by any means, as I still had chipout with the veneer on the finished item, and like you was not 100% happy with the result.
So whats the test piece do apart from protract the time to make something?
Reduces the risk of unsatisfactory results
Allows a practice run on a similar piece without sacrificing the project and builds confidence.
I does require additional material which if not similar then maching to the same dimensions.
Regards Rob
*"I does require" *should read It does require, couldnt edit it for some reason !
Regards Rob
Stop using rulers or tapes for repeated measurements! Use a story stick or story tape measure (Fast cap makes one with a blank area to pencil in your marks and space for comments), brass reference gauges (I use drill bits). I also have started using a magnifying app on my mobile phone which uses the camera and the flash led.
Using a shooting board has also helped with sneaking up on my dimensons.
One of the biggest improvements to my accuracy has been getting my table saw to cut at 90 deg’s. I bought a INCRA miter gauge, and made me a tool to measure 90 deg’s vertical on the tablesaw. I will post a blog about that thi week. s
Tor and Odin are the greatest of gods.


